msi Bios - CLICK BIOS X


Unique Themes:
Distinct Design for Each Product Segment
One Click OC:
The Easiest Way for Performance Optimization
ESA Architecture:
Optimized BIOS Expandability and Efficiency
Optimized UI / UX:
Seamless Navigation for an Intuitive Experience
Auto Resolution Adjust:
Seamlessly adapts resolution settings
CLUB386
"the company was keen to emphasise the efforts put towards crafting Click BIOS X... I’m happy to say the result is a marked improvement over what came before."
FUNKY KIT
"MSI’s newly designed CLICK BIOS X offers an aesthetically pleasing and user-friendly experience."
GCC GAMERS
"MSI’s newly designed Click BIOS X redefines the user experience with its aesthetically pleasing interface and intuitive layout."
GURU3D
"This update incorporates a new ESA (Enhanced System Architecture) design, offering substantial improvements in both user interface and user experience."
KITGURU
"MSI’s new BIOS layout is very good."
OC3D
"The MSI BIOS is a real step forwards we feel... There is nothing like clarity of BIOS settings to give you confidence."
PC GUIDE
"BIOS is simple and easy to use, with great overclocking capabilities."
POKDE.NET
"The new CLICK BIOS X interface significantly improves the user-friendliness of the motherboard..."
TWEAKTOWN
"It's easily MSI's best BIOS interface to date and quite possibly the most intuitive of all the major motherboard players."
One Click for Ultimate Performance
BIOS, or Basic Input/Output System, is a firmware built into a motherboard for seamless OS-hardware communication. MSI’s CLICK BIOS X offers a sleek, intuitive interface, allowing effortless system tuning and performance optimization. With enhanced functionality and MSI exclusive features, users can easily achieve peak performance for a superior computing experience.
ACCESSING CLICK BIOS X
01


STEP 1. Boot! :
Boot up your PC
02


STEP 2. Press “Delete” :
Press “Delete” to run the BIOS setup after you press the power button
03

STEP 3. Enter MSI Click BIOS X :
Enter MSI Click BIOS X successfully
01
STEP 1. Boot! :
Boot up your PC
02
STEP 2. Press “Delete” :
Press “Delete” to run the BIOS setup after you press the power button
03
STEP 3. Enter MSI Click BIOS X :
Enter MSI Click BIOS X successfully
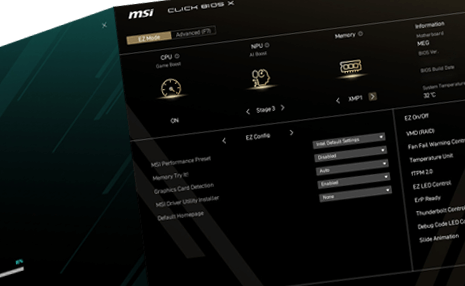
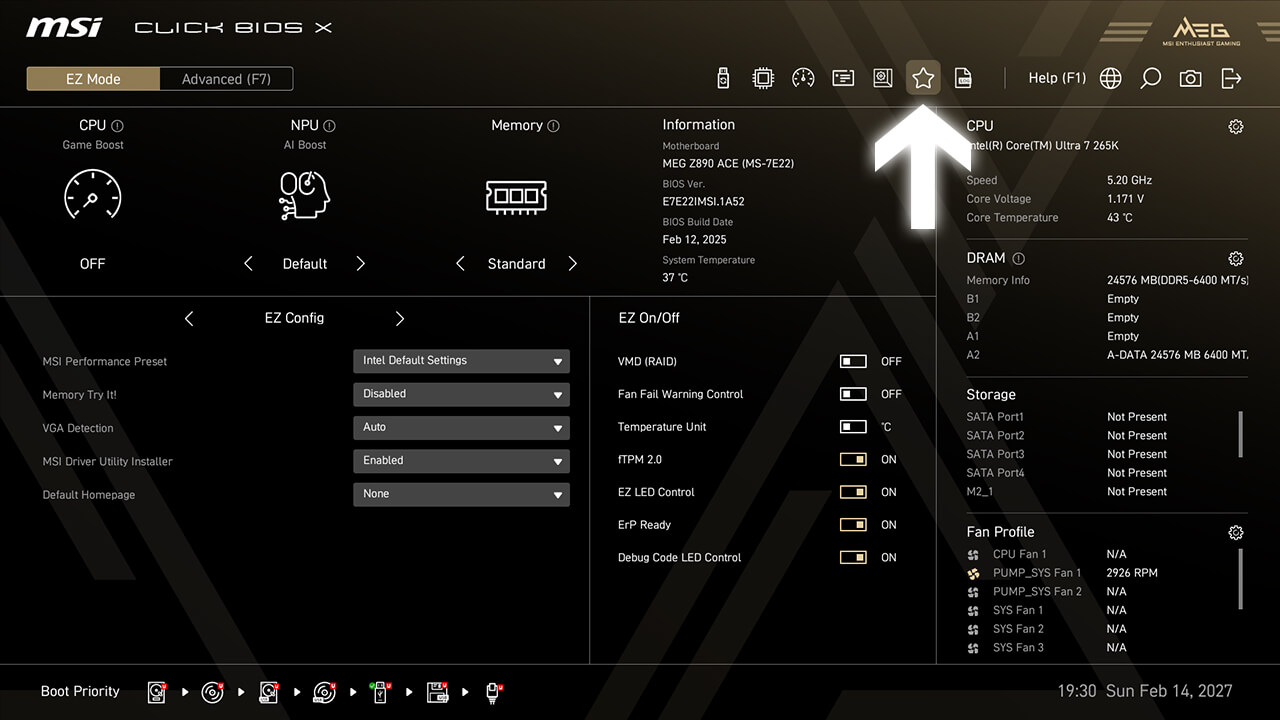
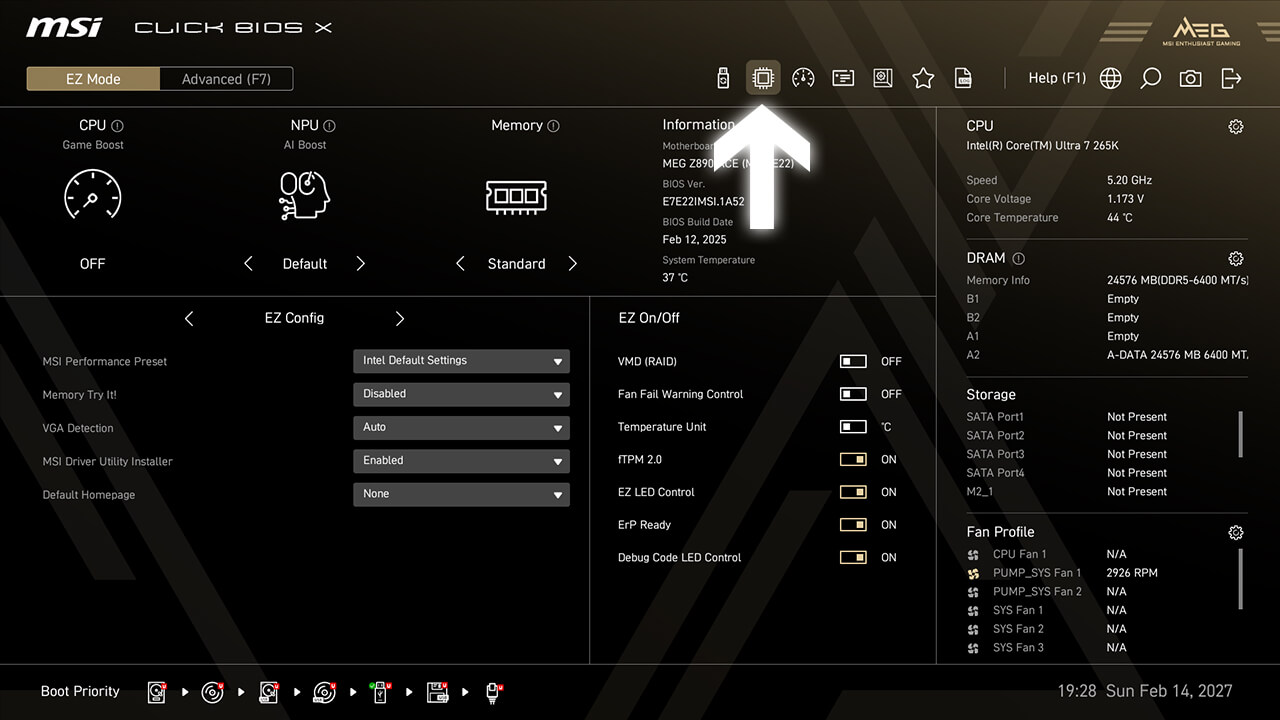
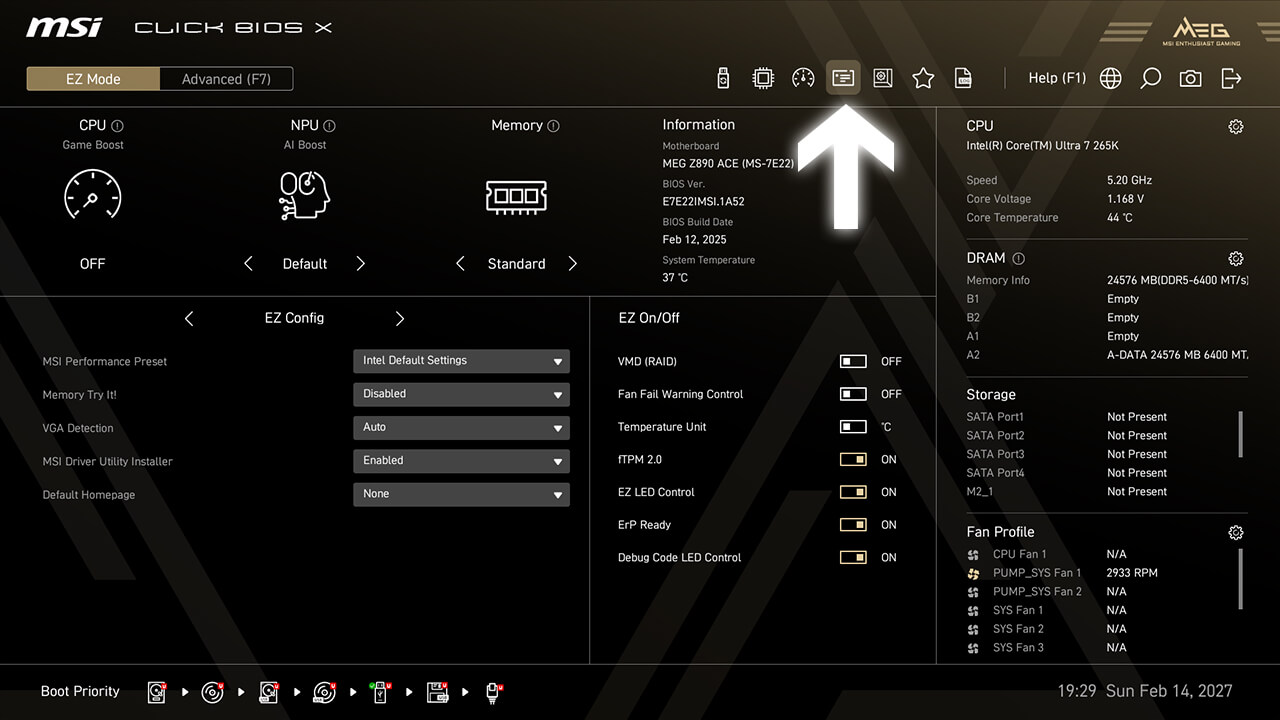
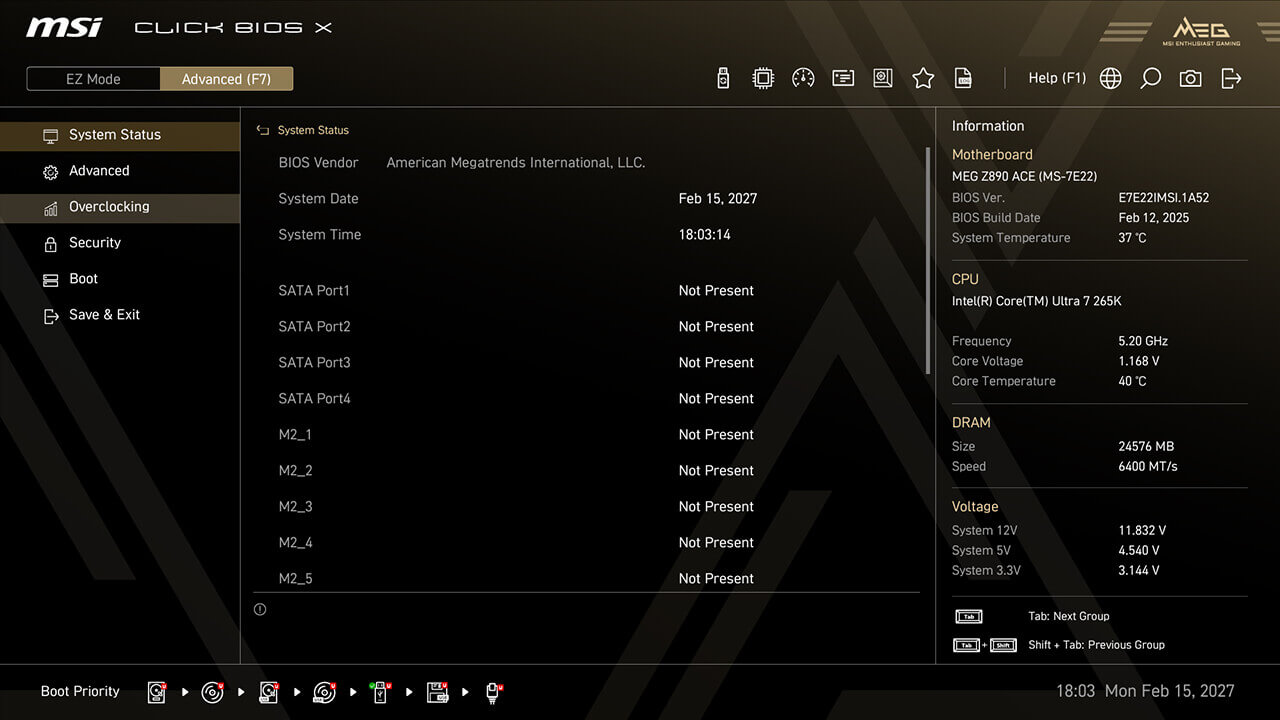
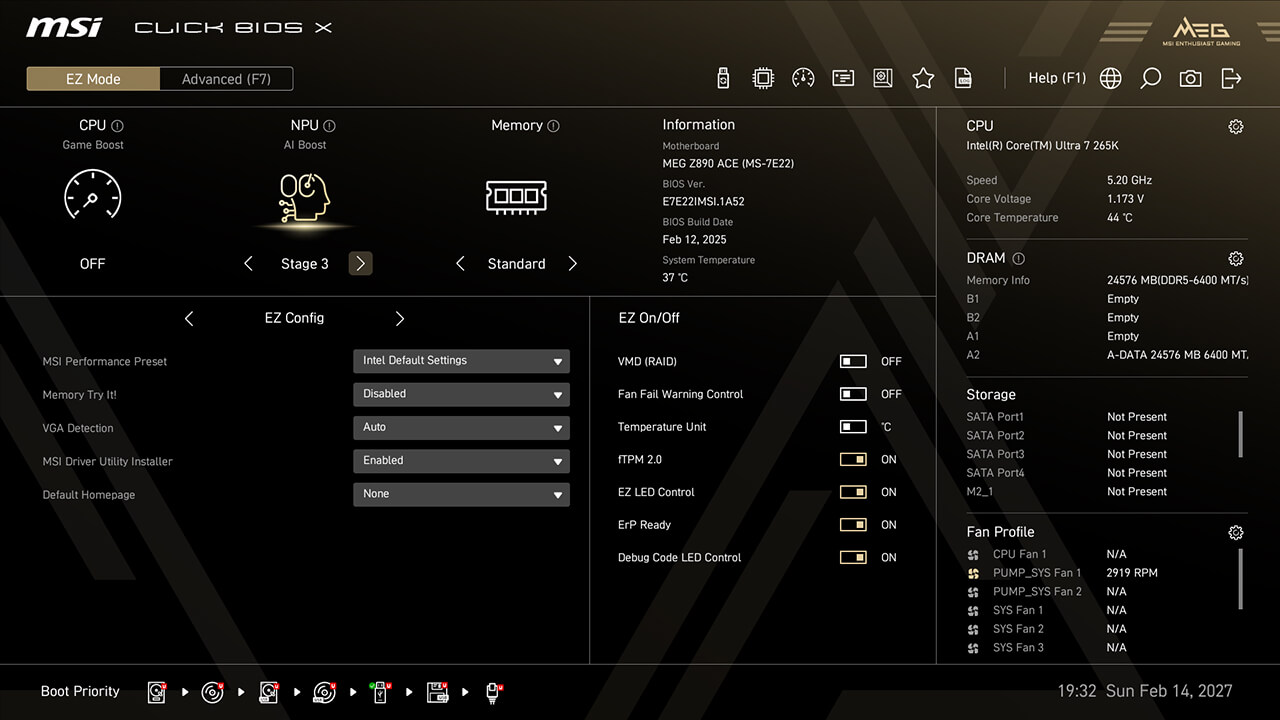
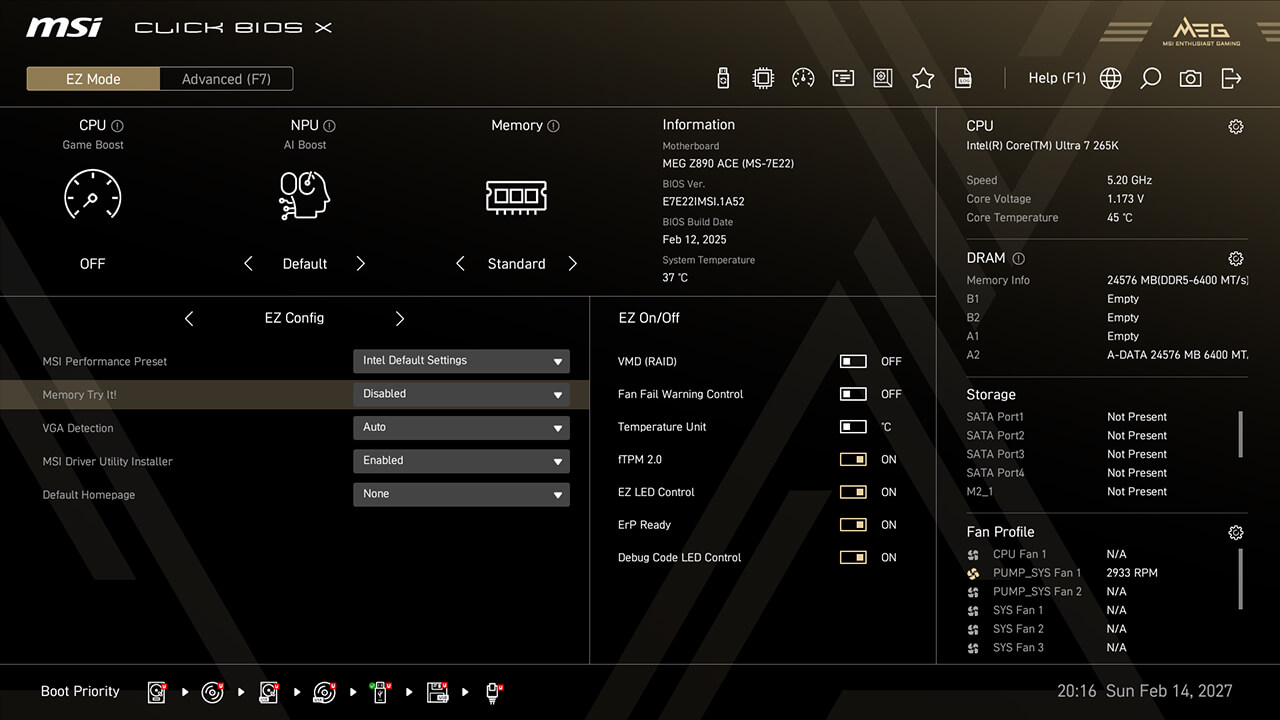
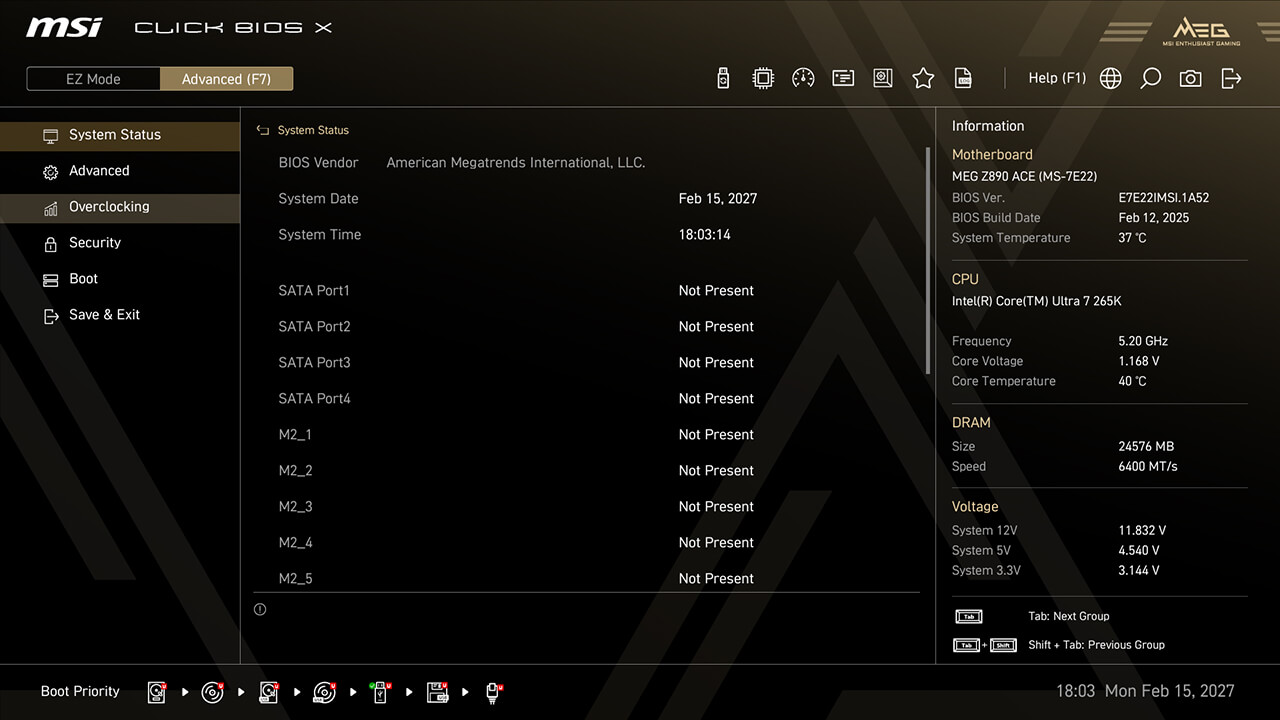
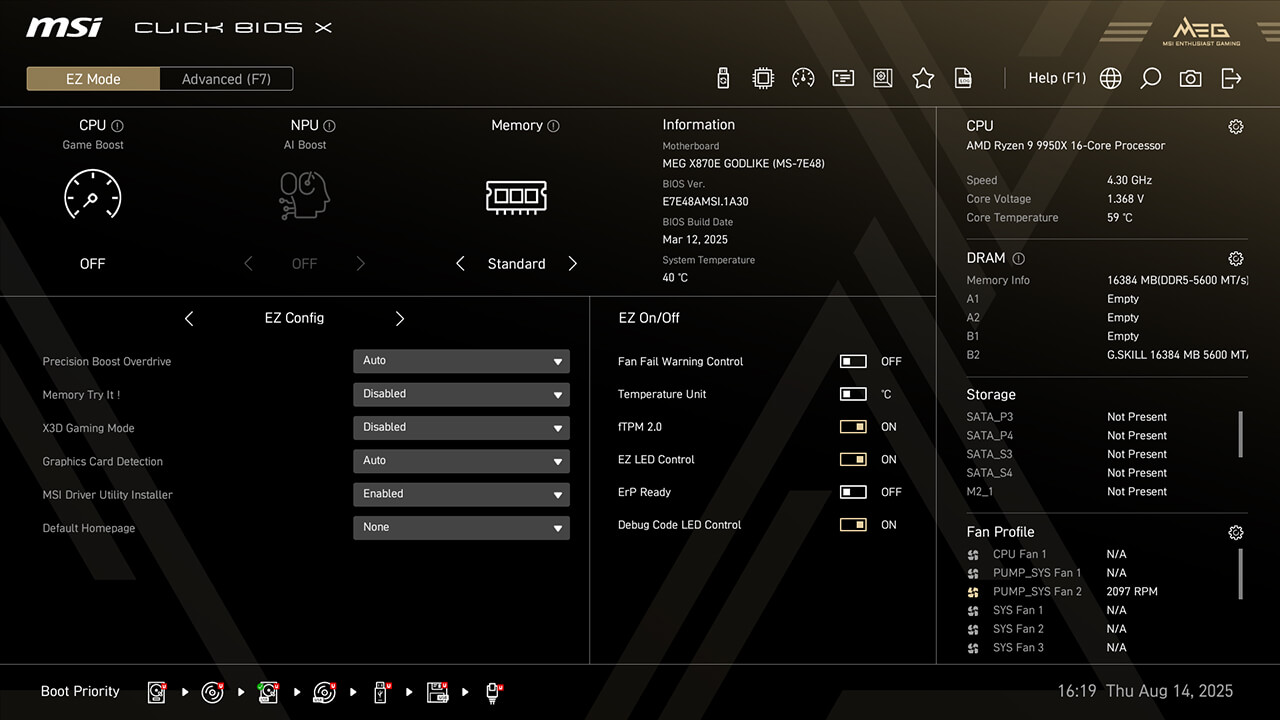
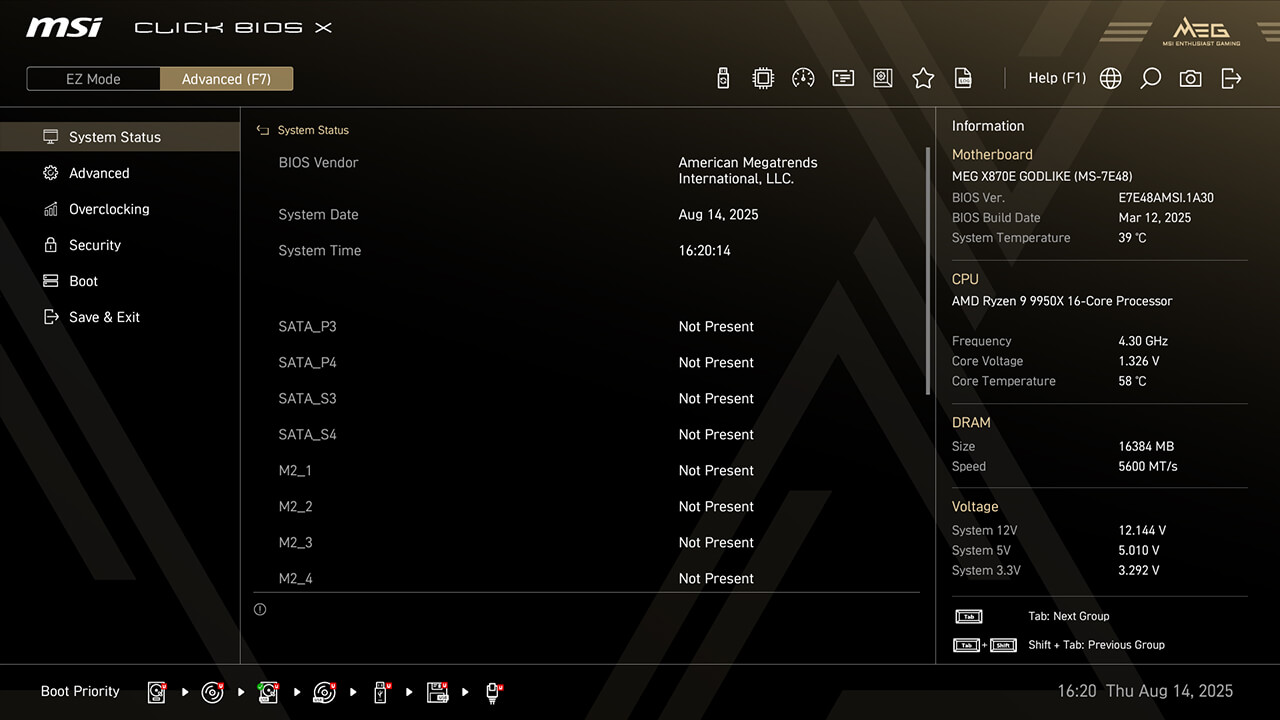
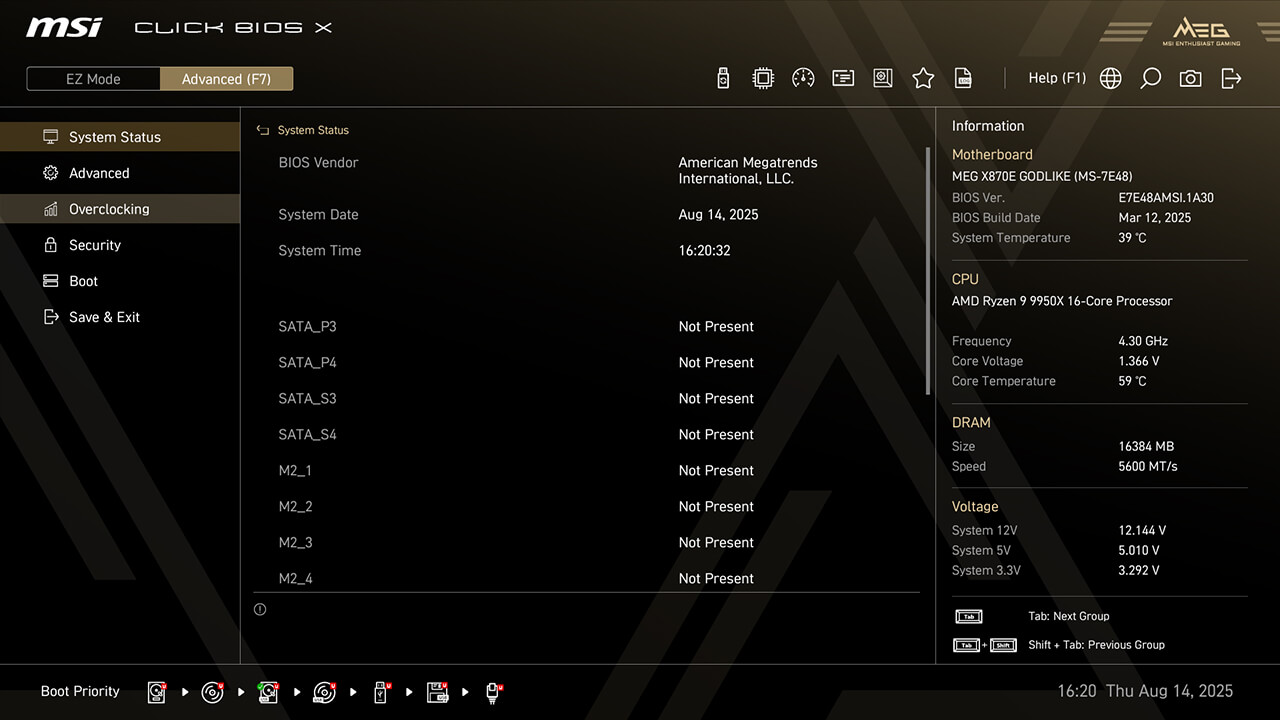
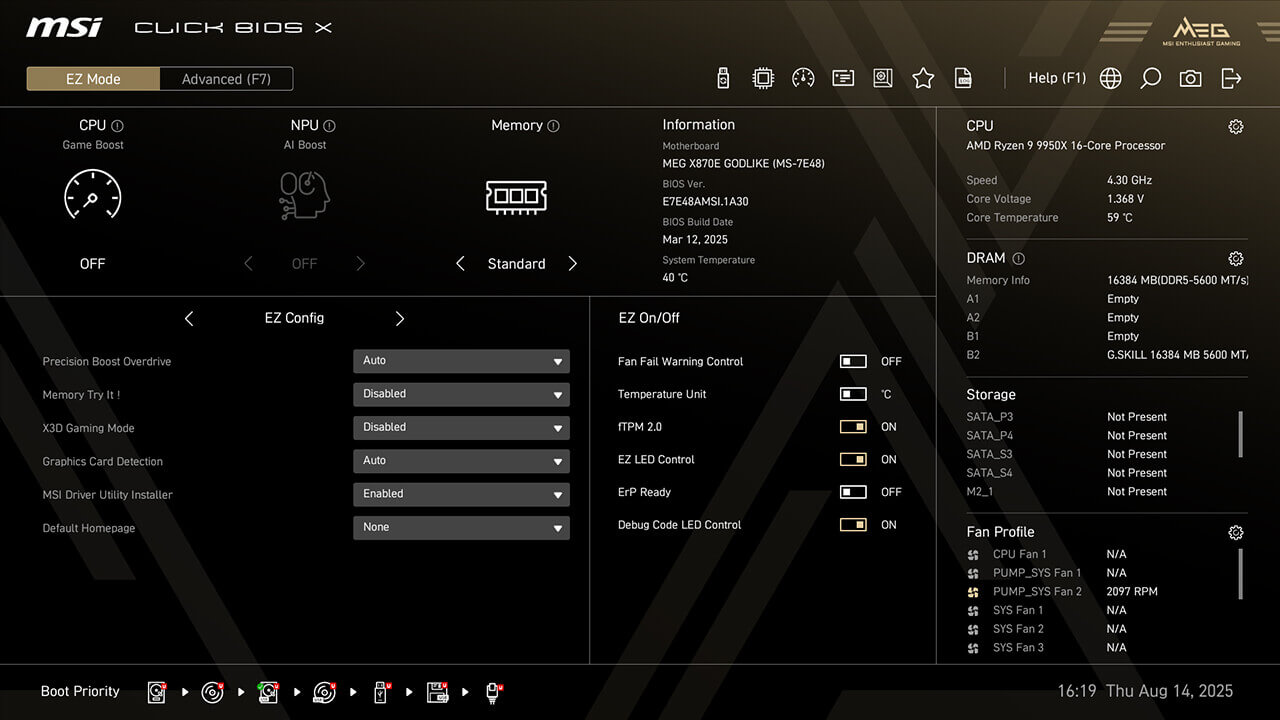
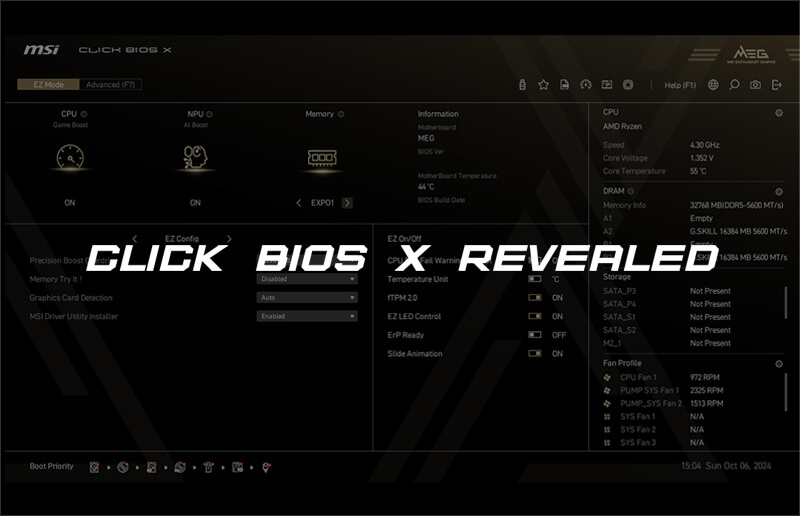
DUAL MODE DESIGN
CLICK BIOS X offers two configuration modes: EZ Mode and Advanced Mode. EZ Mode provides a simplified interface for quick access to essential settings, while Advanced Mode unlocks a wider range of detailed options for experts. Seamlessly switch between modes with a simple F7 key press to tailor the BIOS experience.
Easy Mode
Advanced Mode
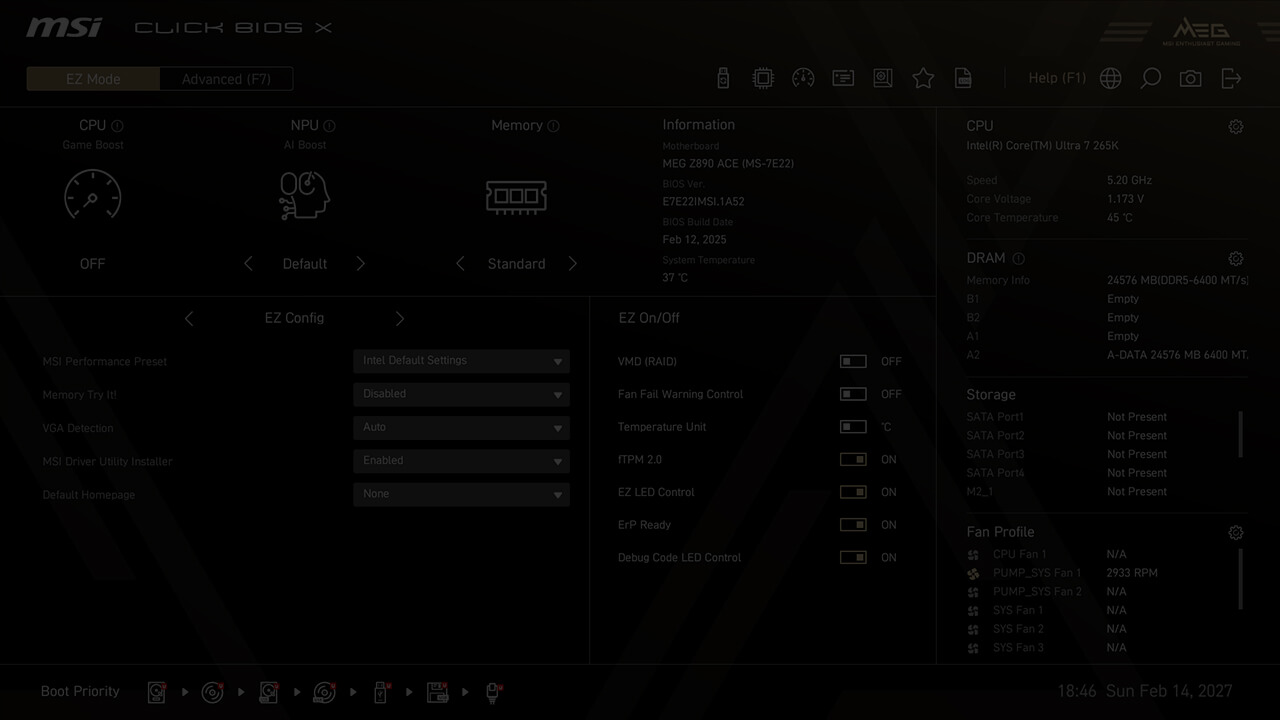


- One Click Overclocking
- BIOS Information
- EZ Config & Favorite
- EZ Setup Switches
- Boot Priority
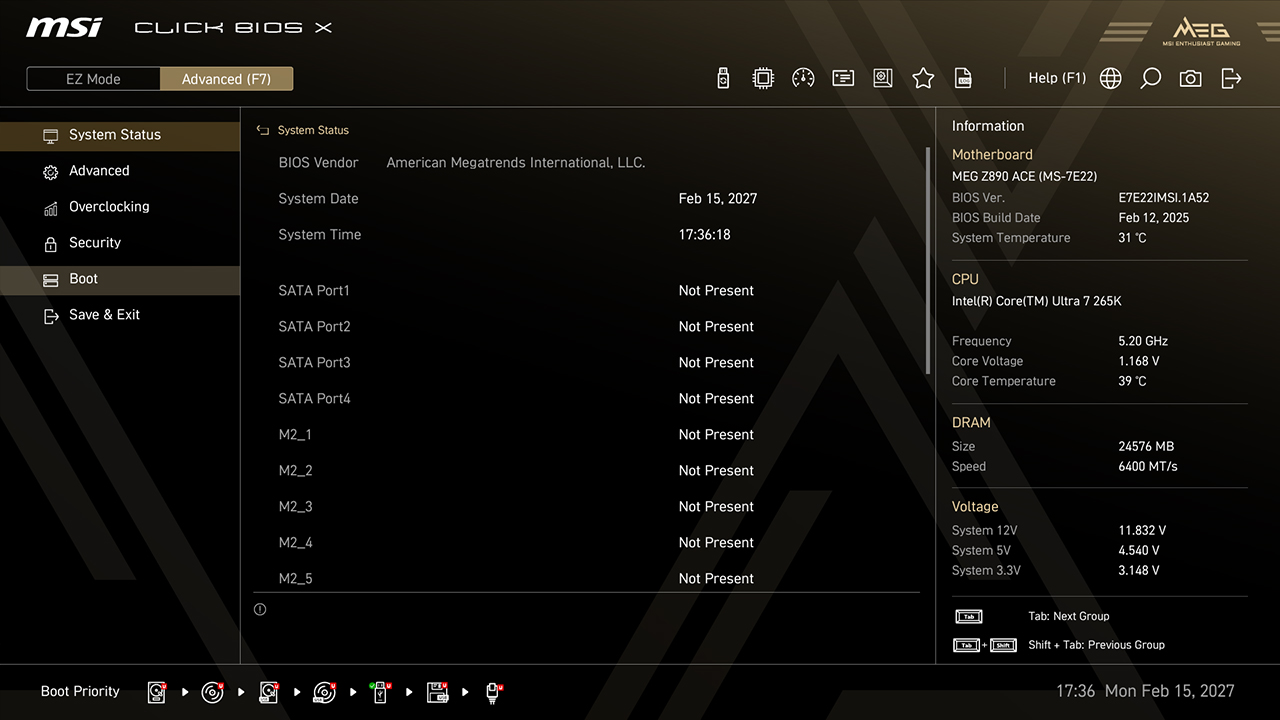
- System Information
- Shortcut Key
- BIOS Mode Switch
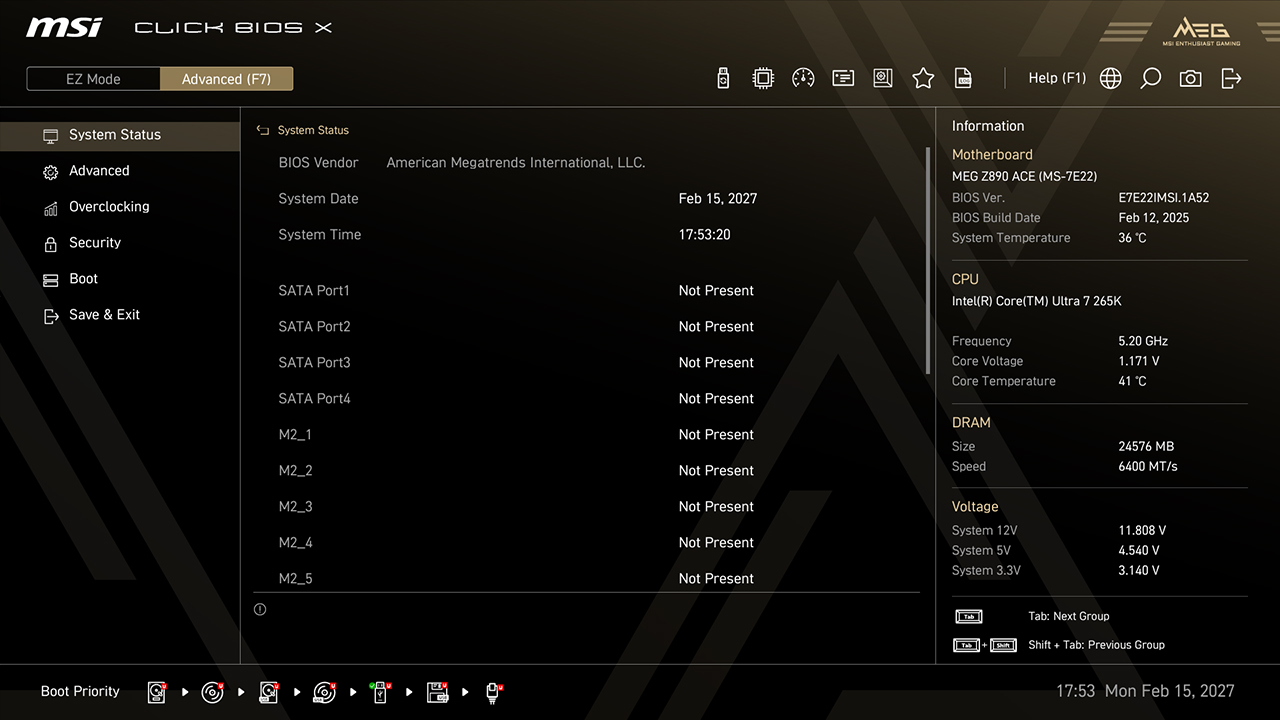
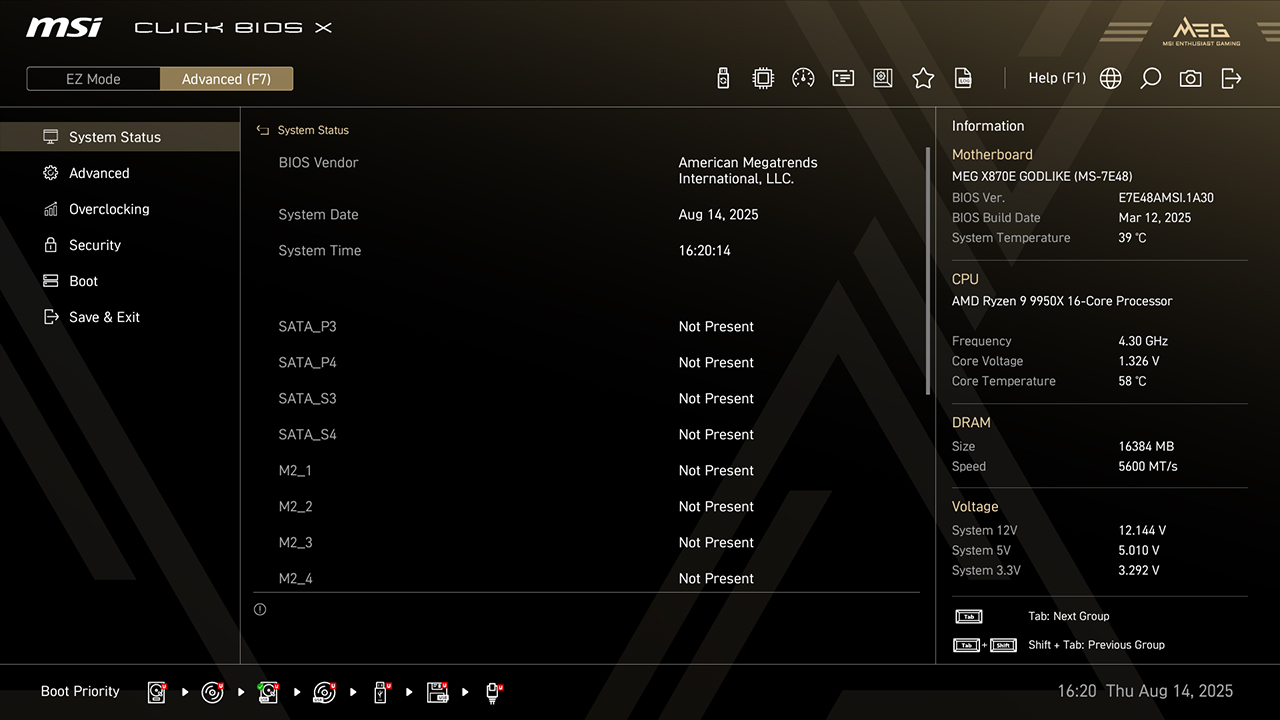
In Advanced Mode, users can access the BIOS to configure hardware settings and other system parameters in detail. For example, you might use the BIOS to enable or disable certain features or peripherals, or tweak system performance settings even to reach the world records!
- Tools

- One Click OC
- Tuning
- Search
- Favorite
- M-Flash
- Hardware Monitor
- Boot Priority
- Profile
- Smart Button
- VMD (RAID)
- CPU Force 3
- Memory Force
-

- Game Boost
- AI Boost
- XMP & EXPO
- Intel 200S Boost
- Memory Try It!
- Dragon Alliance Mode
-
- MSI Performance Preset
- Memory Extension Mode
- BCLK Control
- CPU Lite Load Control
- Precision Boost Overdrive
- Performance Switch
- X3D Gaming Mode
- Latency Killer
- High-Efficiency Mode
- Config TDP
- PCIe Configuration
- Intel Virtualization
- Re-size Bar
-
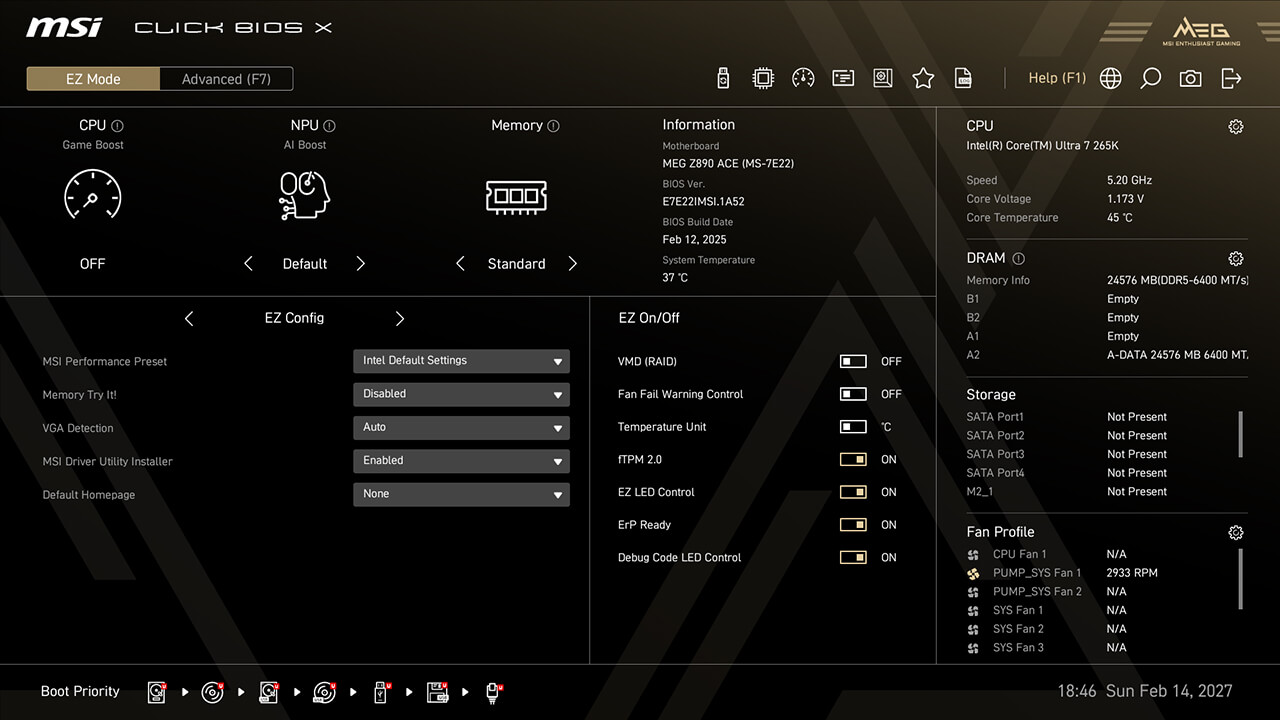
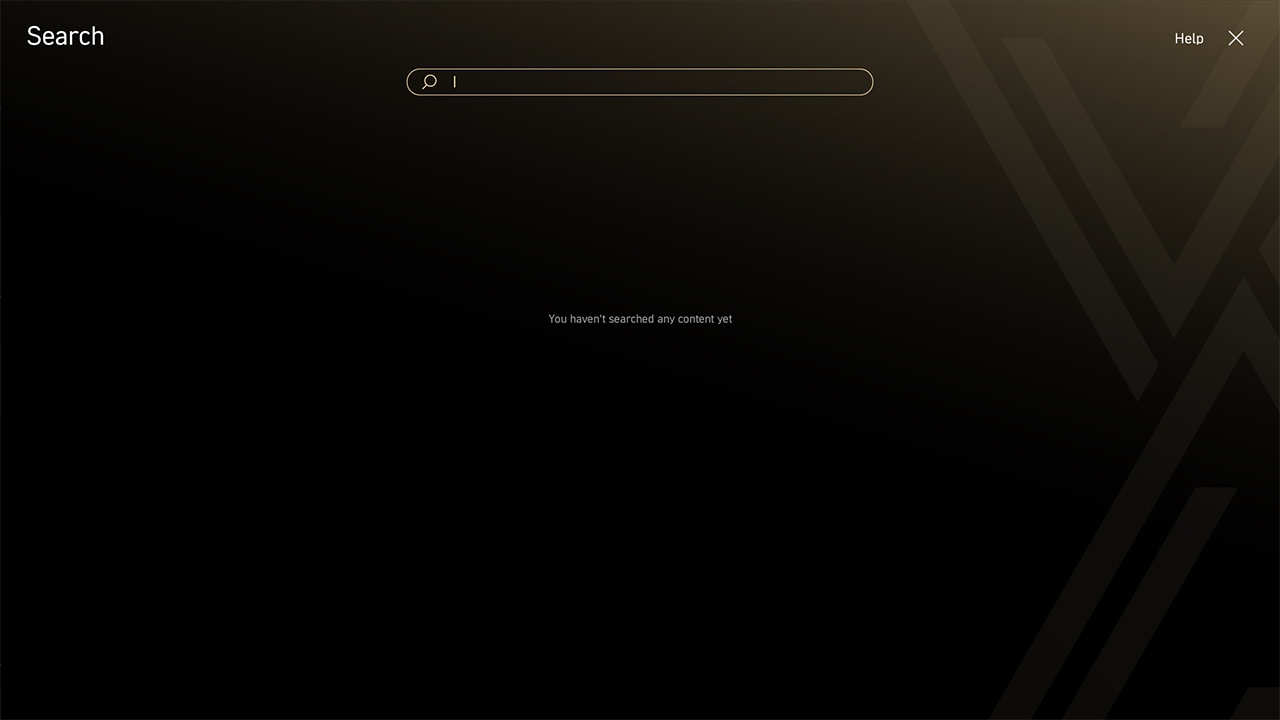
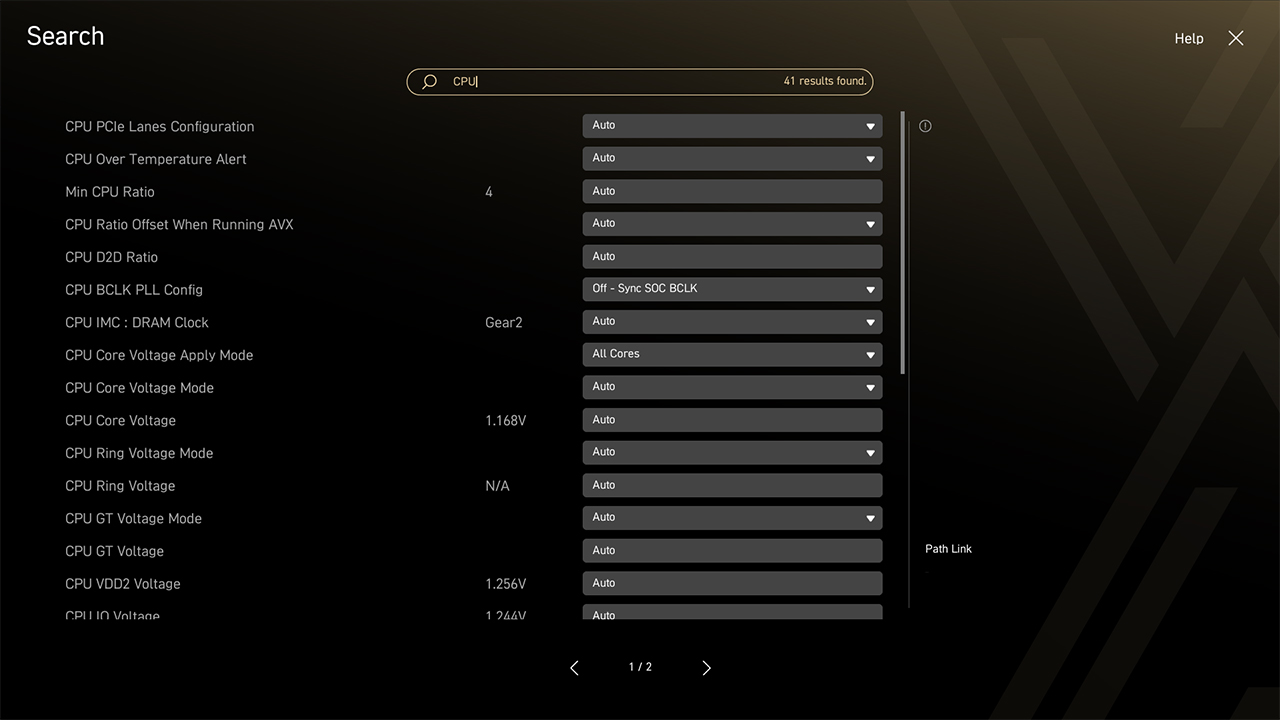
Search
Search function allows you to search for related BIOS items by entering a keyword.
-
1. Click the Search icon in easy mode
-
2. Type the keyword to find the function on the search page
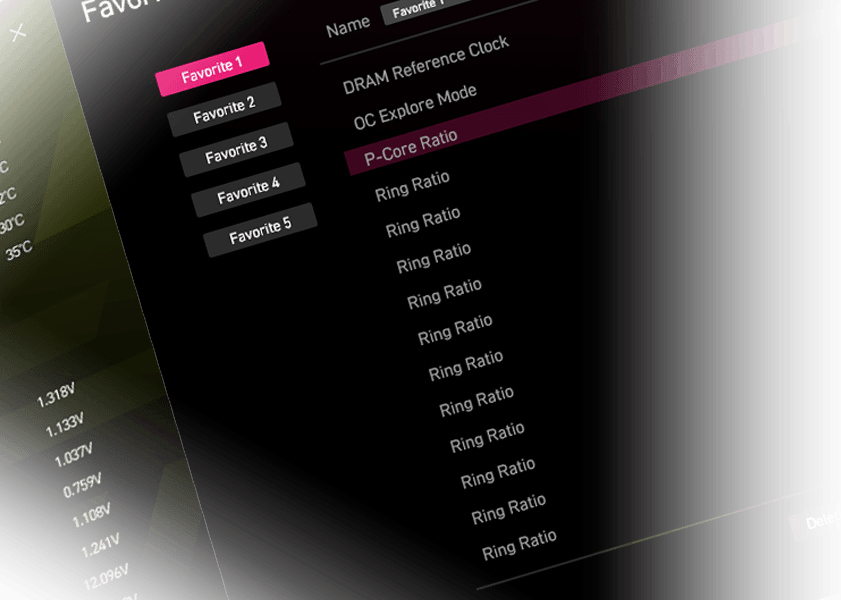
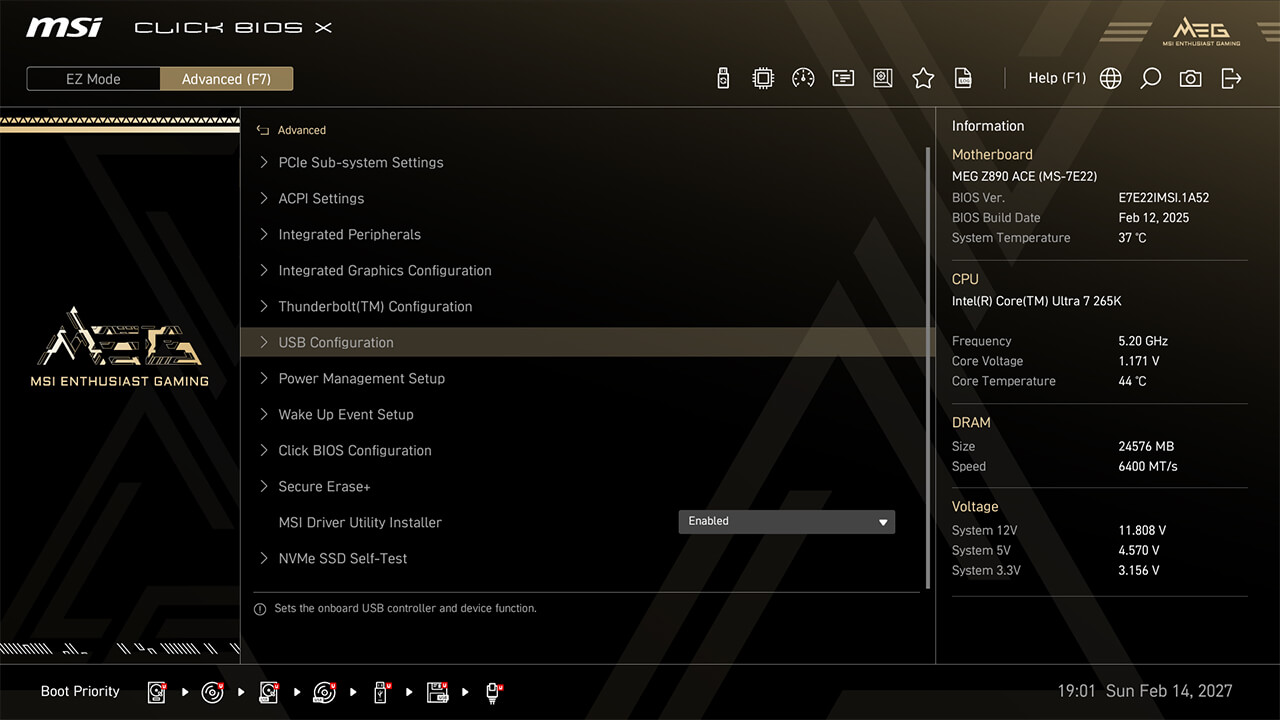
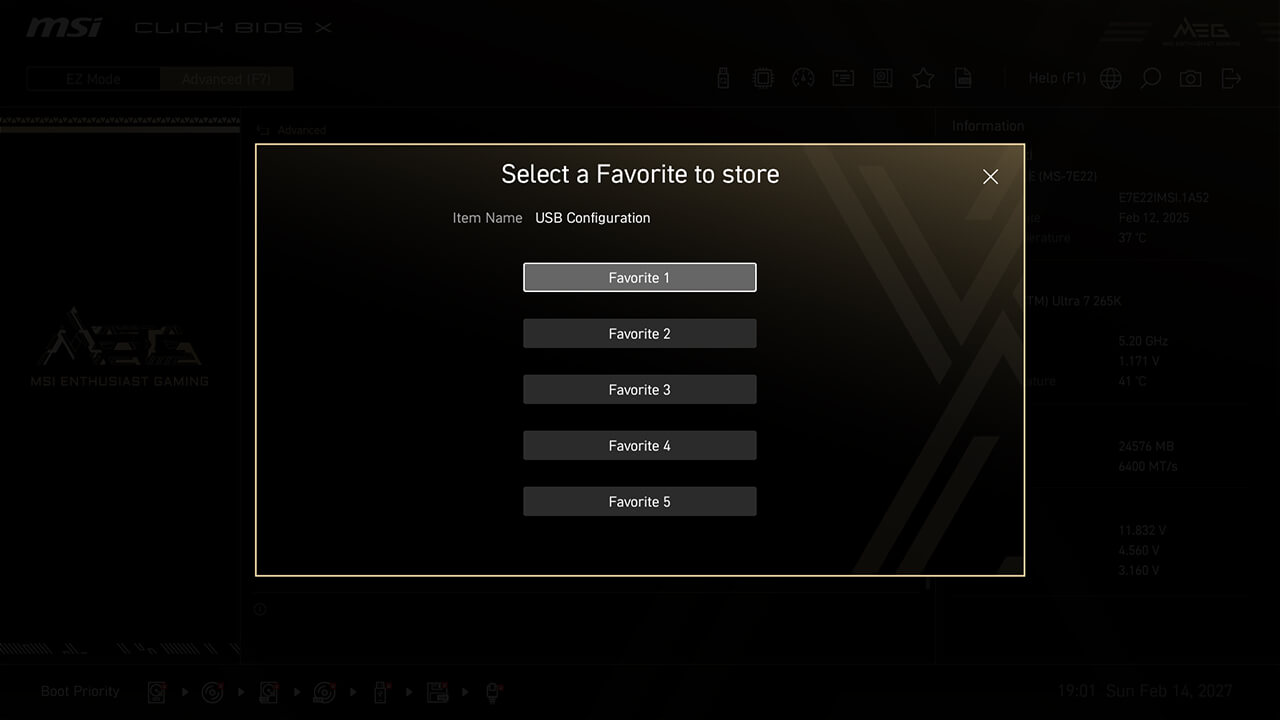
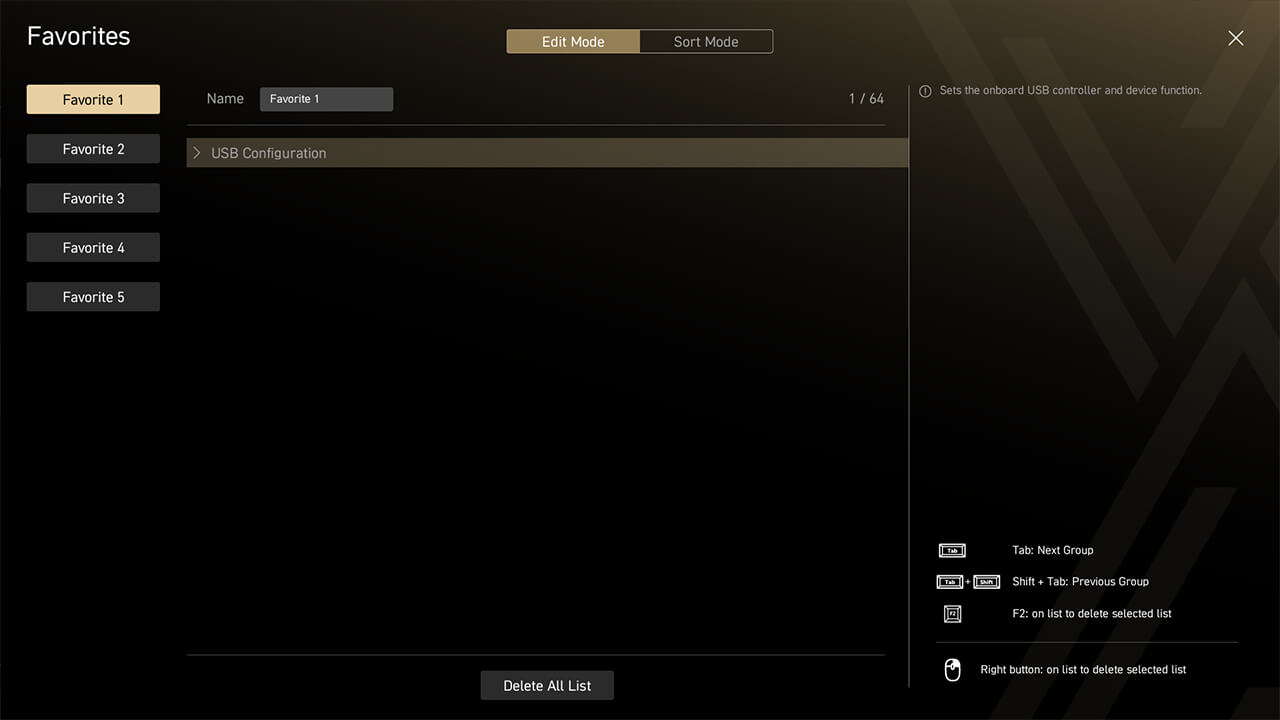
Favorite
Favorite menu allows you to quickly and easily access your most commonly used BIOS functions.


-
1. Right-click or press F2 on a BIOS item in the BIOS sub-menu, and choose one favorite menu to add this BIOS item
-
2. Click Favorite icon in easy mode to the favorite list
-
3. To delete a BIOS item, right-click or press F2 in the favorite menu if needed
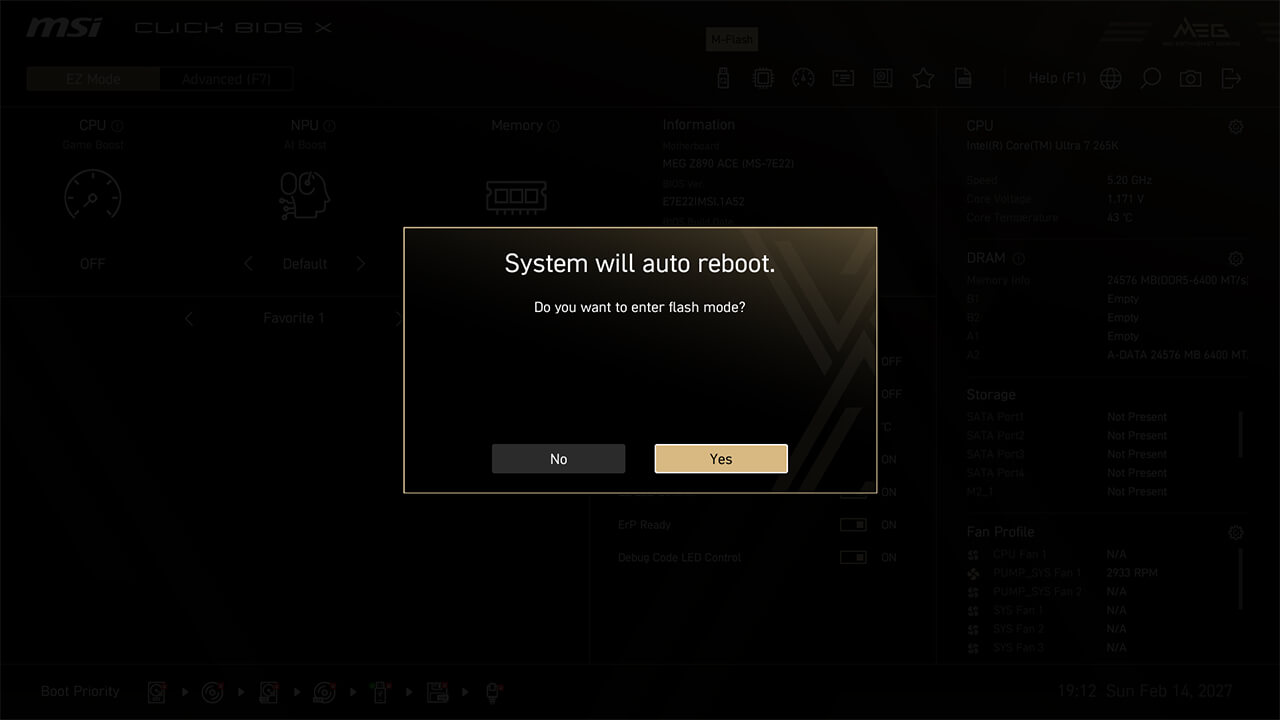
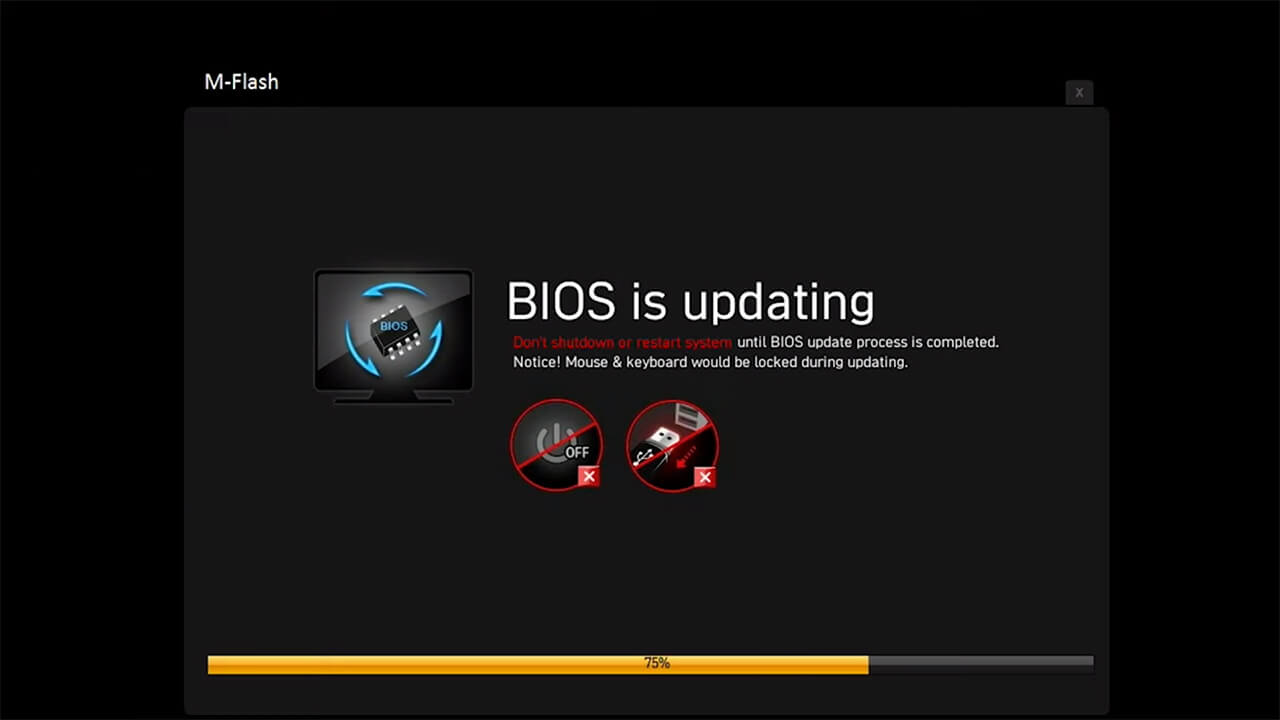
M-Flash
M-Flash function allows you to easily flash or upgrade the BIOS in just a few minutes directly from the CMOS Setup Utility.


-
1. Insert the USB flash drive with the downloaded BIOS inside and click the M-Flash icon in easy mode
-
2. Choose the dedicated BIOS and click yes to update the BIOS
-
3. Wait for the BIOS update (Do not power off, restart or remove the USB flash drive during BIOS updates process)
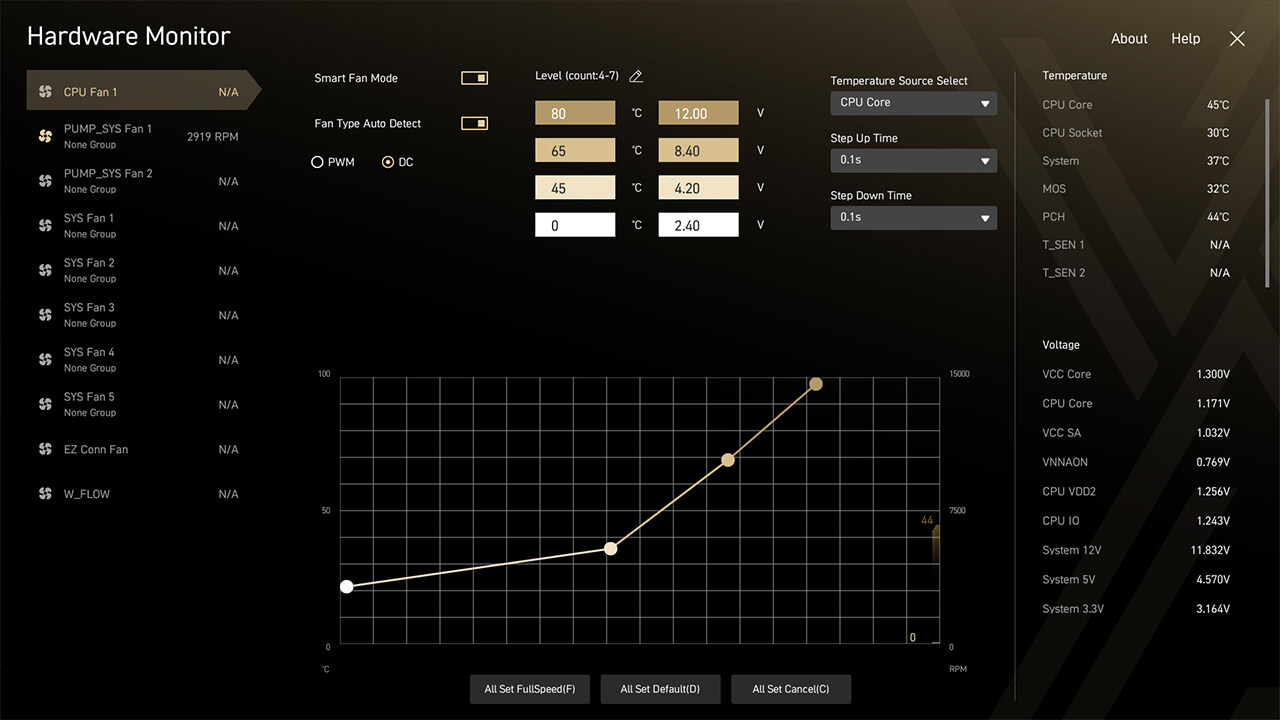
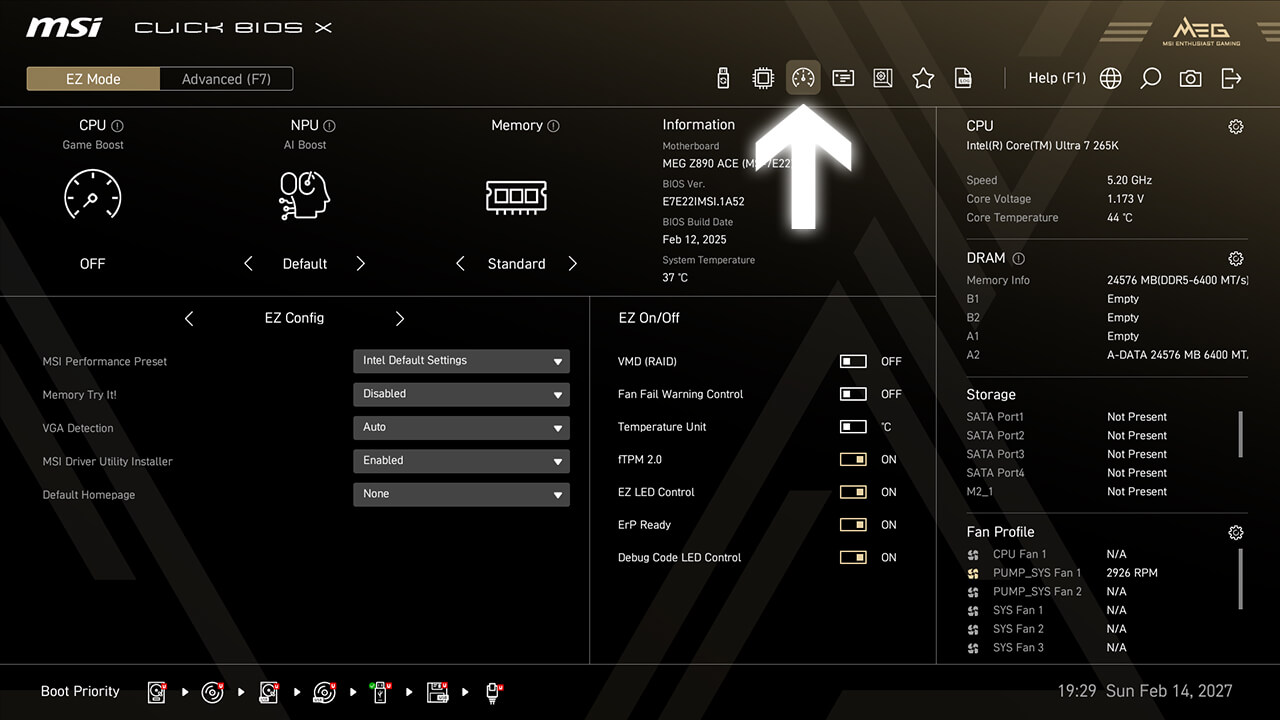
Hardware Monitor
Hardware Monitor enables real-time monitoring of temperature, voltage, and fan speed. In Smart Fan Mode, you can customize four points of the fan curve to optimize system performance.

-
1. Click the Hardware Monitor icon in easy mode
-
2. Check real-time hardware information. If you customize a fan curve, press F10 to save changes and exit BIOS
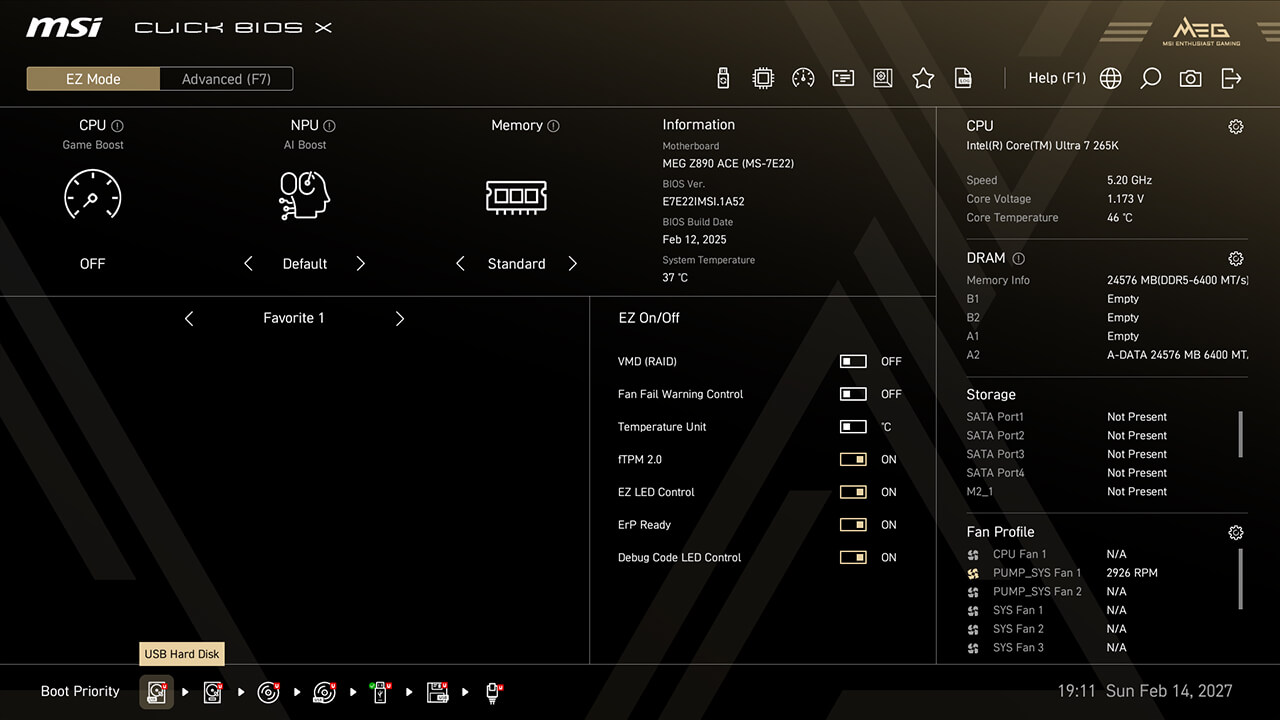
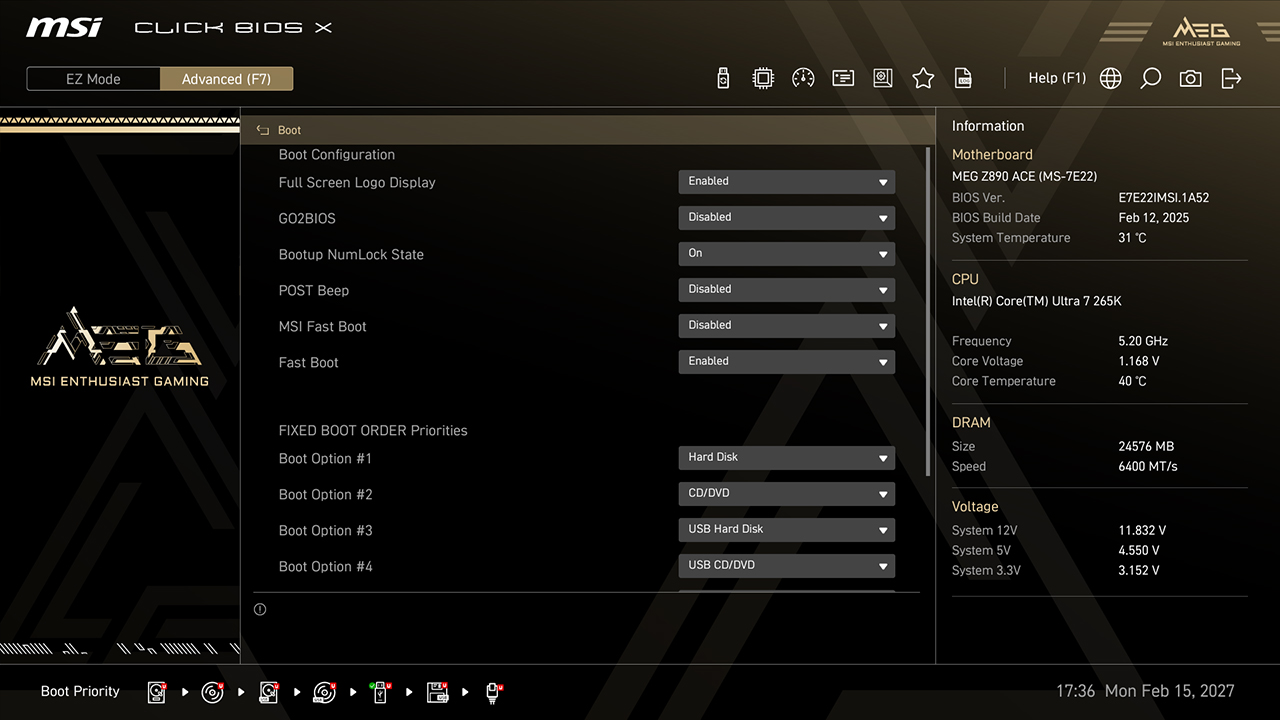
Boot Priority
Boot Priority setting allows you to choose which device the BIOS boot from first. For example, if you need to install a new operating system from a USB drive, you can easily change the order to prioritize the desired device.

-
A. Click and drag the storage icon to adjust the boot priority in easy mode
-
B. In Advanced Mode, click Boot, adjust the boot order, then press F10 to save changes and exit BIOS
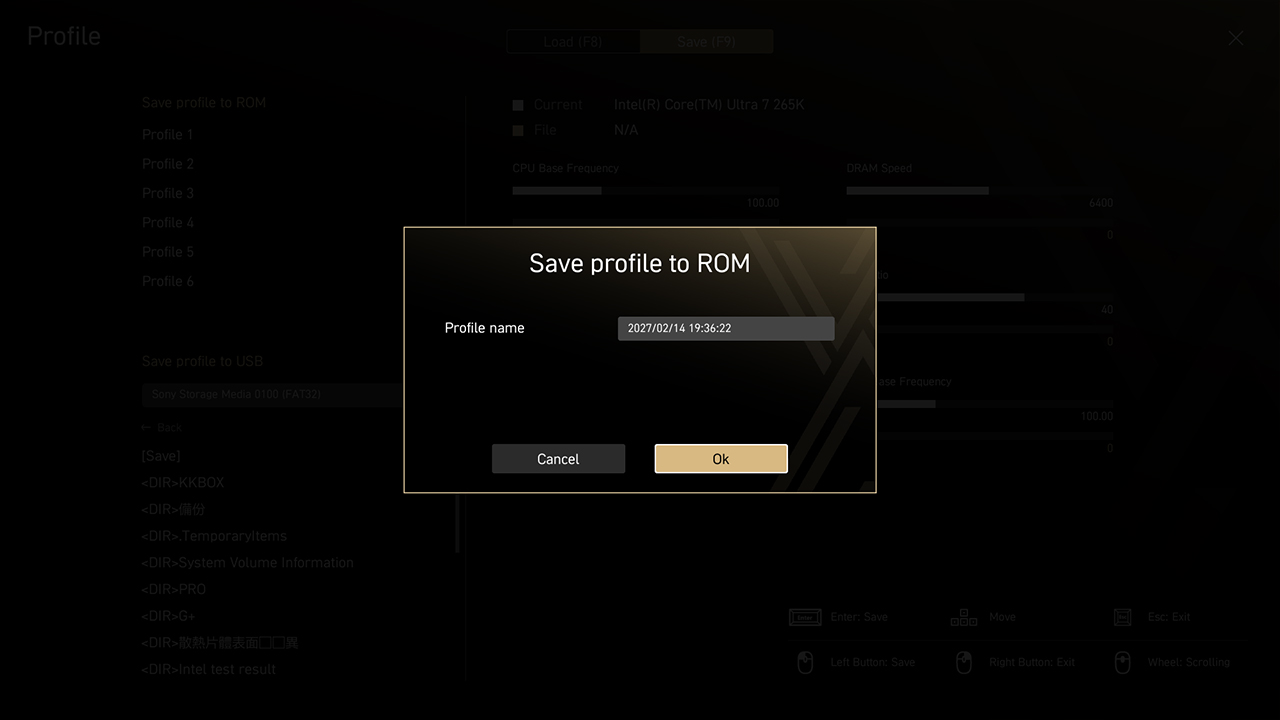
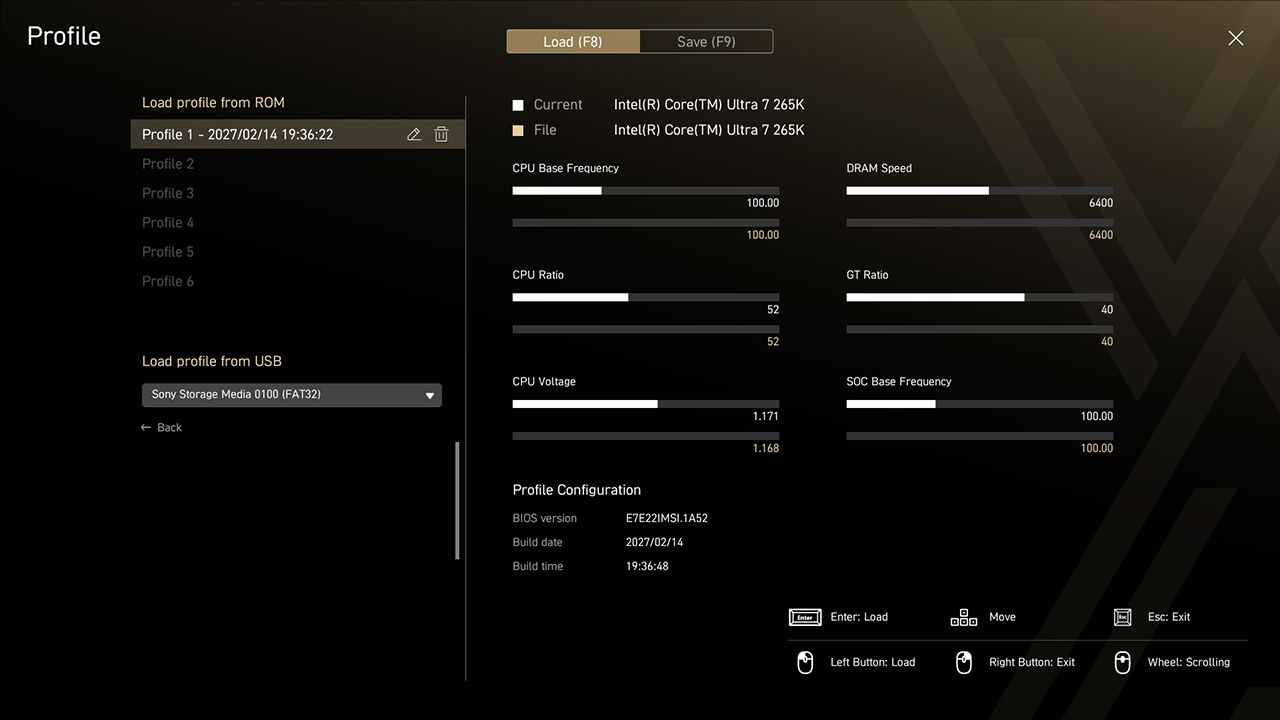
Profile
Profile function allows you to save or load the specific BIOS settings as a profile from the BIOS ROM or USB flash drive. This feature is ideal for those who frequently change BIOS settings for different configurations.


-
1. Click the Profile icon in easy mode
-
2. Save, load or clear BIOS profiles with a single click if needed
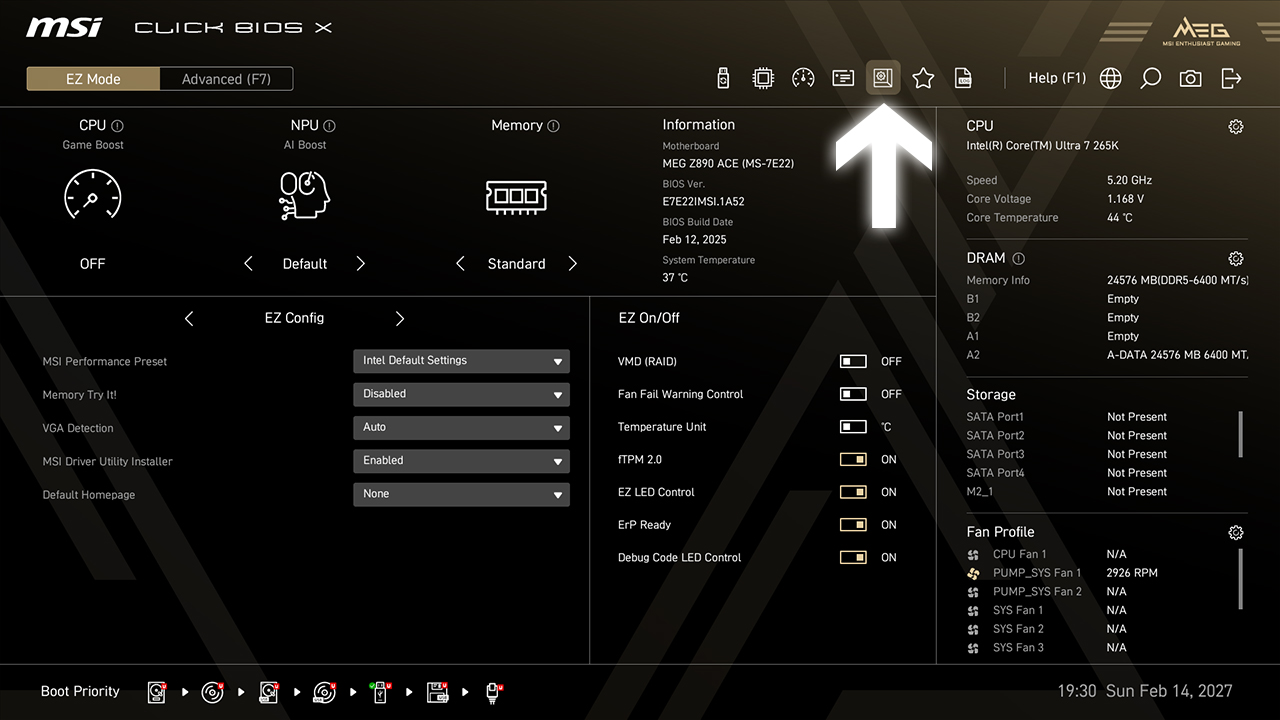
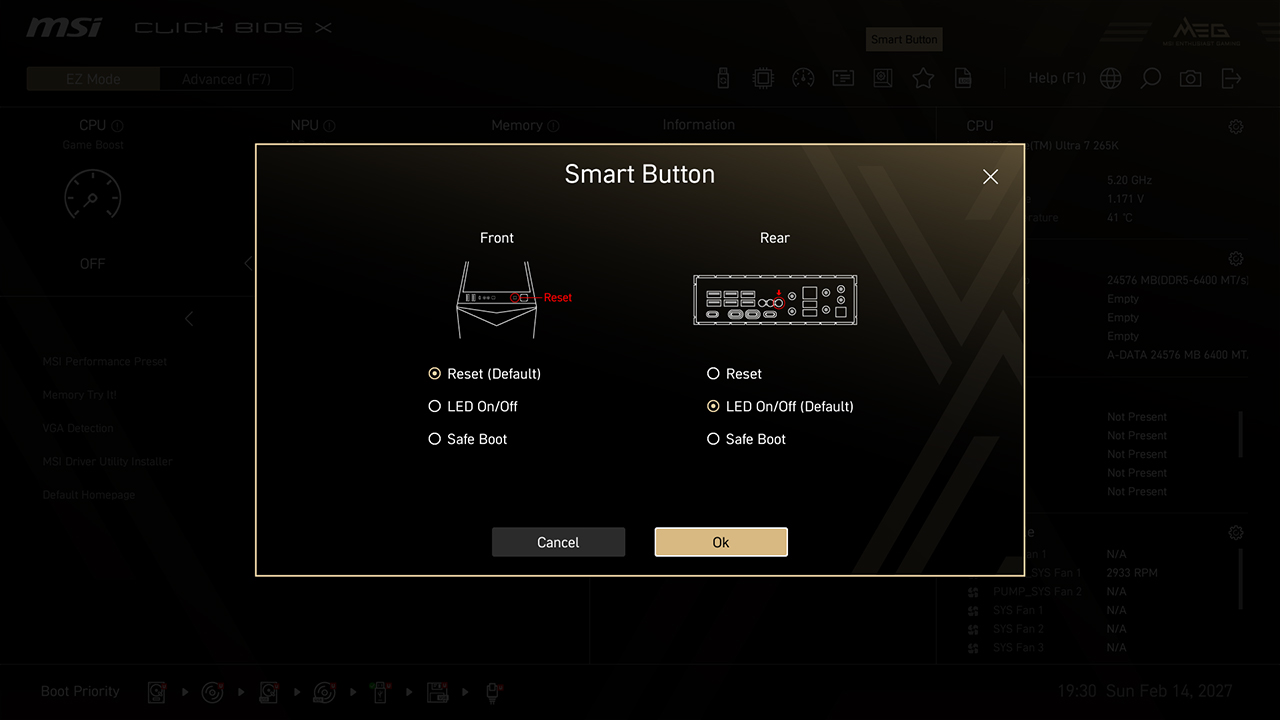
Smart Button
Smart Button allows you to set up the different functions to the rear I/O smart button or case reset button, including Reset Computer, Safe Boot, Turbo Fan, and EZ LED Control, all with a single click.

-
1. Click the Smart Button icon in easy mode
-
2. Choose the preferred option, then press F10 to save changes and exit BIOS
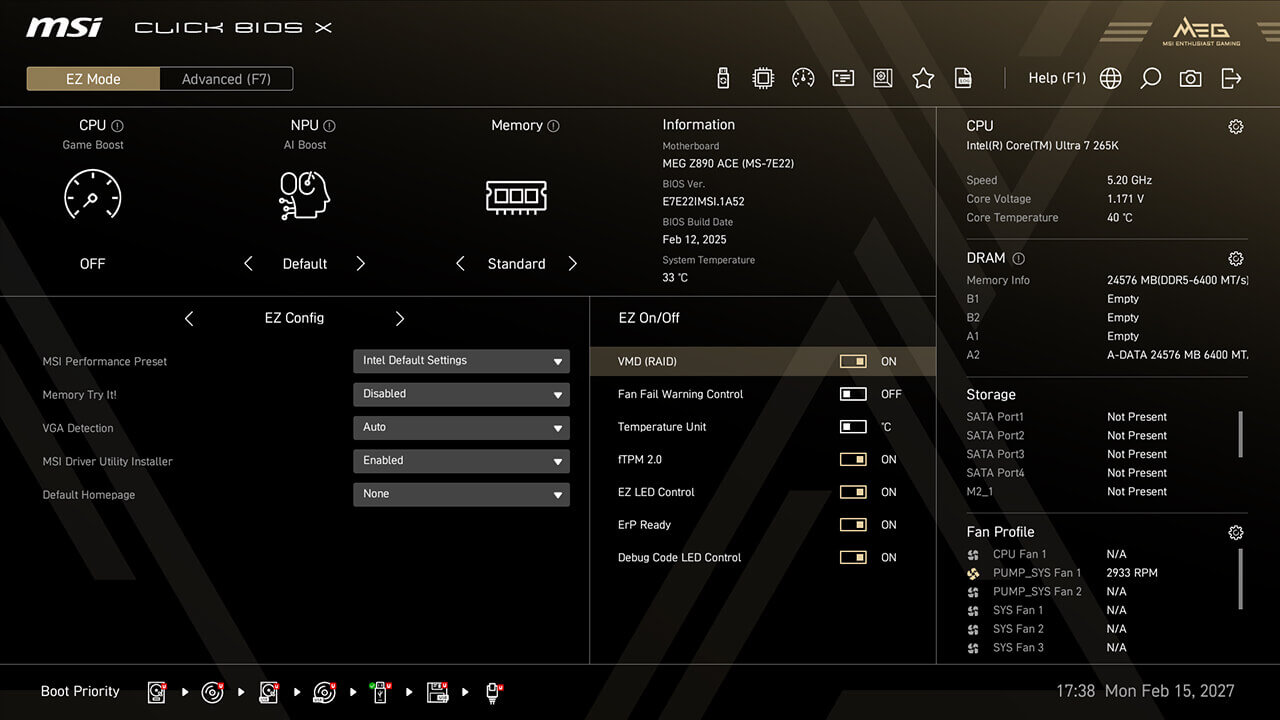
VMD (RAID)
VMD (Volume Management Device) allows you to configure and manage NVMe-based storage devices. The main benefit is improved storage performance by enabling multiple NVMe devices to be used in parallel through RAID configurations.


-
1. Click the VMD (RAID) icon in EZ Setup Switches under easy mode
-
2. Enable VMD (RAID) function, then press F10 to save changes and exit BIOS
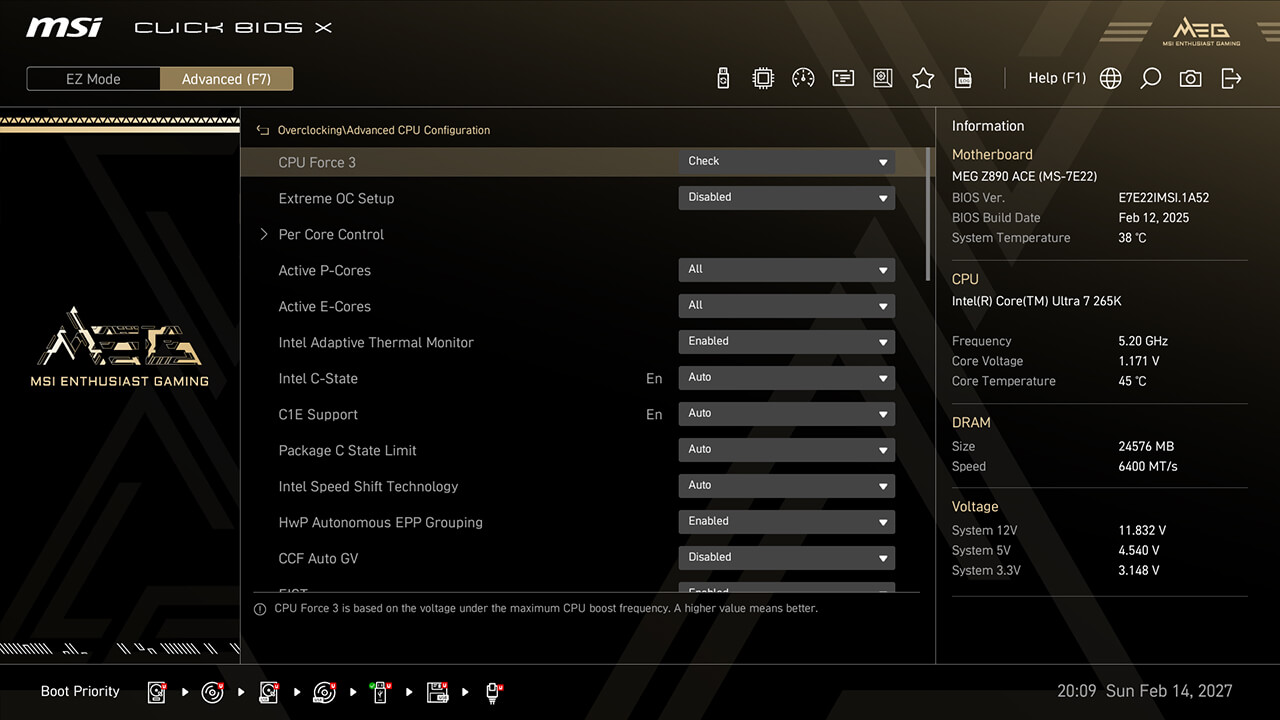
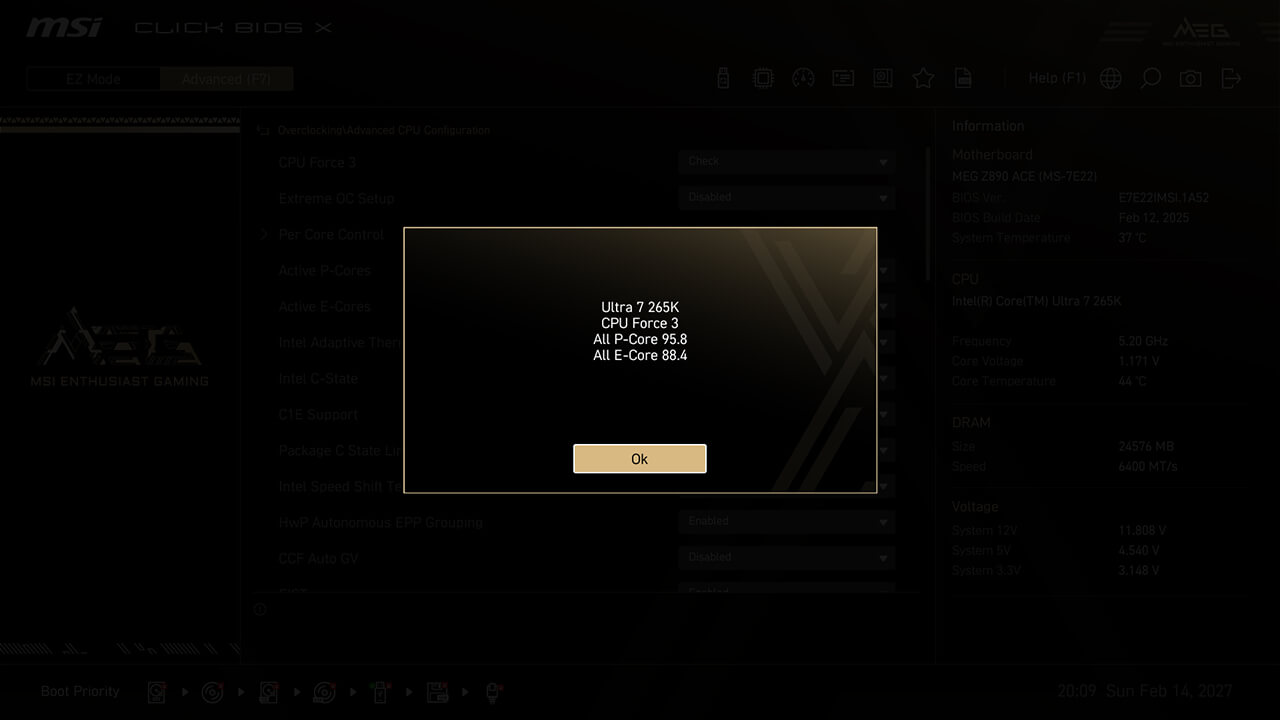
CPU Force 3
CPU Force 3 allows you to assess the processor's quality by providing a detailed performance score, helping evaluate overclocking potential and system stability.


-
1. In Advanced Mode
-
2. Click Overclocking\Advanced CPU Configuration\CPU Force 3
-
3. The CPU Force 3 score represents the processor's quality, with a higher score generally indicating better overclocking capabilities
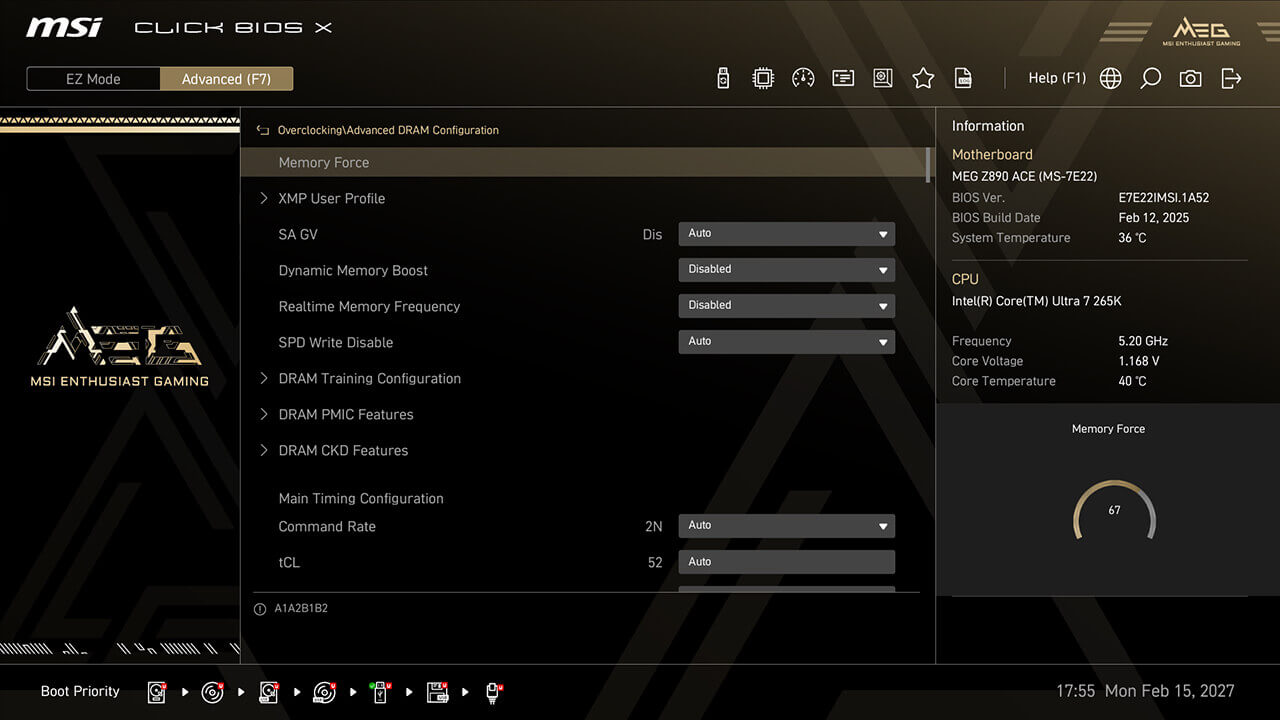
Memory Force
Memory Force chart shows your memory's current overclocking capability, helping guide memory overclocking without redundant reboots or testing.

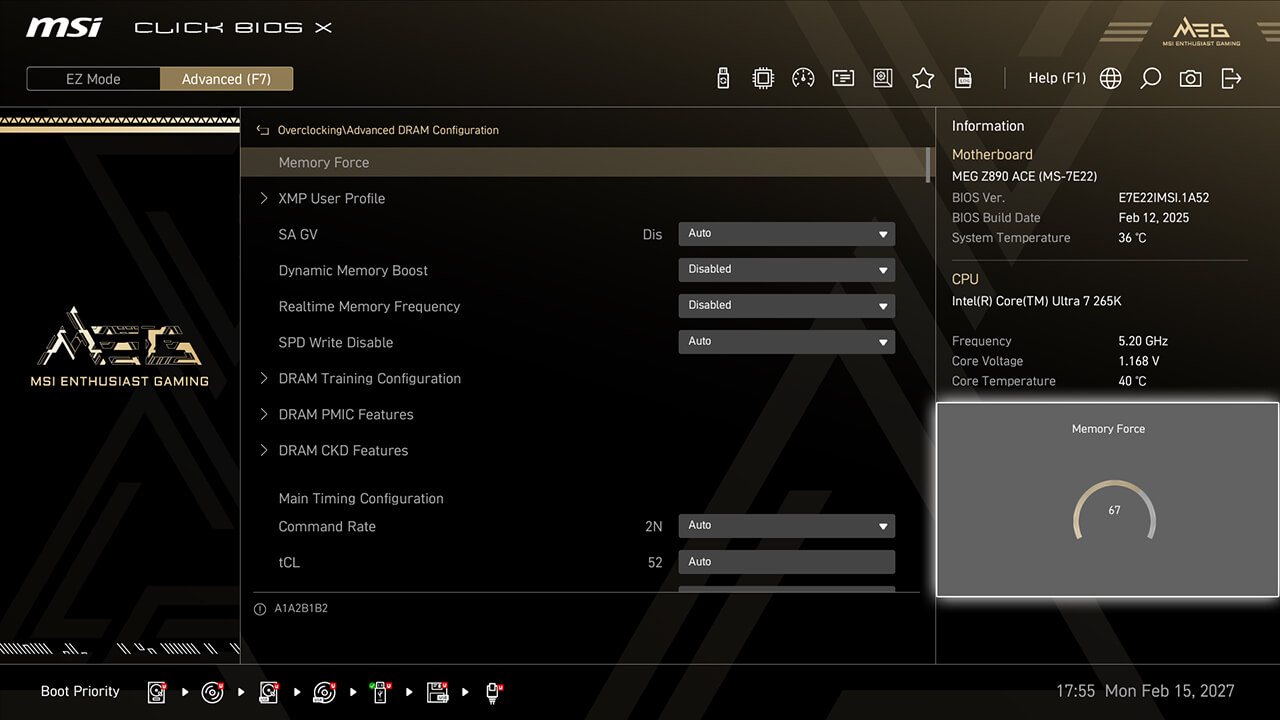
-
1. In Advanced Mode
-
2. Click Overclocking\Advanced DRAM Configuration\Memory Force
-
3. The Memory Force score indicates the memory's current overclocking status. A higher score generally indicates more overclocking potential, while the score drops as performance improves
Game Boost
Game Boost function allows you to quickly configure the CPU for optimal overclocking, enabling higher performance and more FPS with a single button.
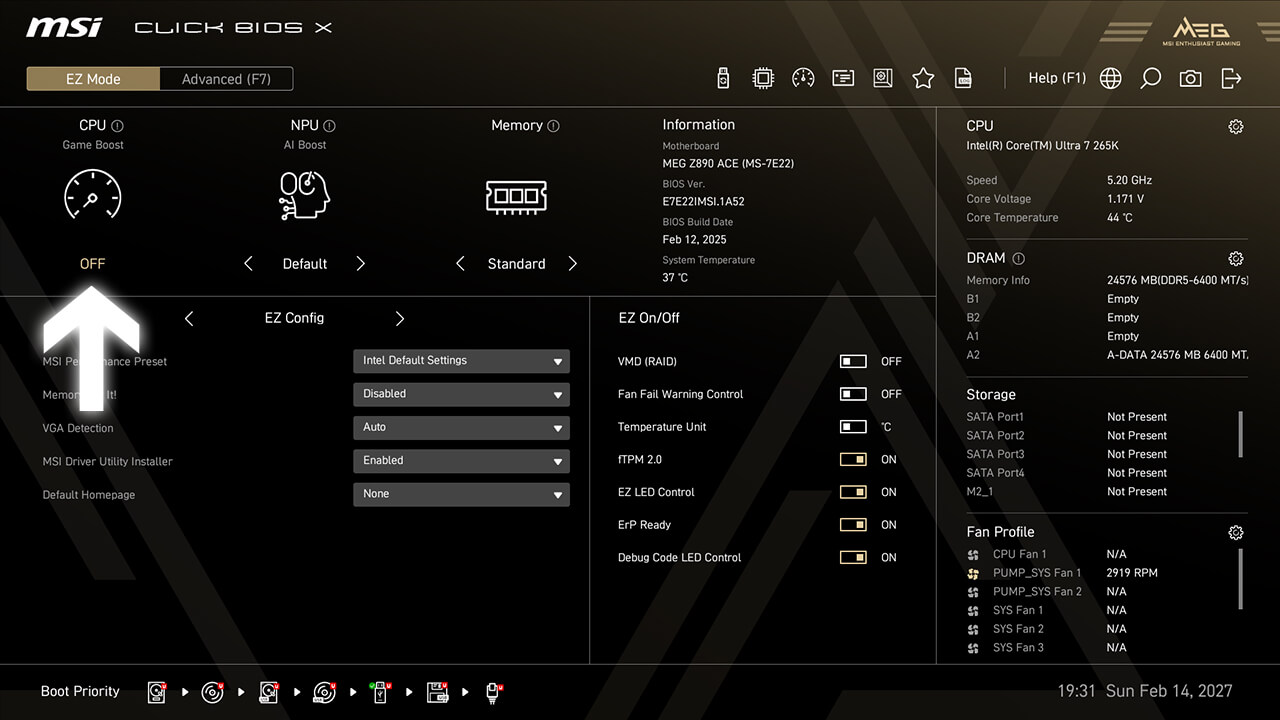
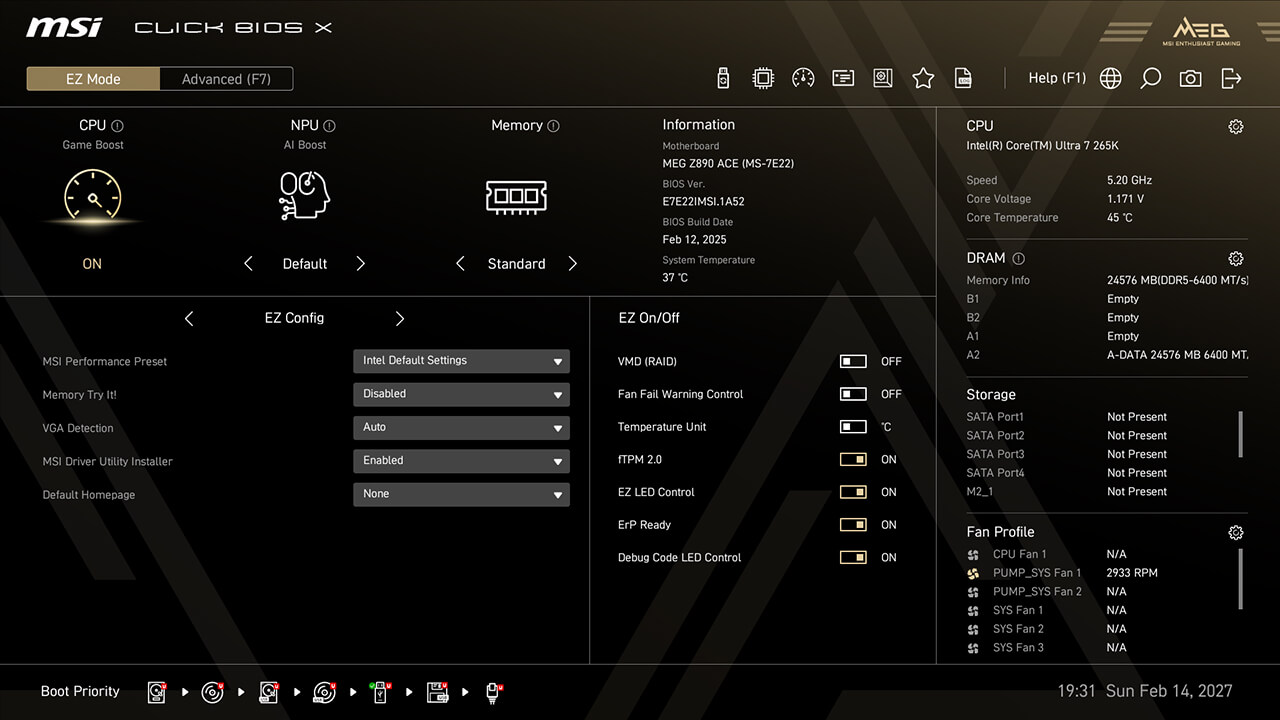
-
1. Click the Game Boost icon in easy mode, then press F10 to save changes and exit BIOS
AI Boost
AI Boost function allows you to enhance NPU performance, delivering maximum AI processing power when additional performance is needed.
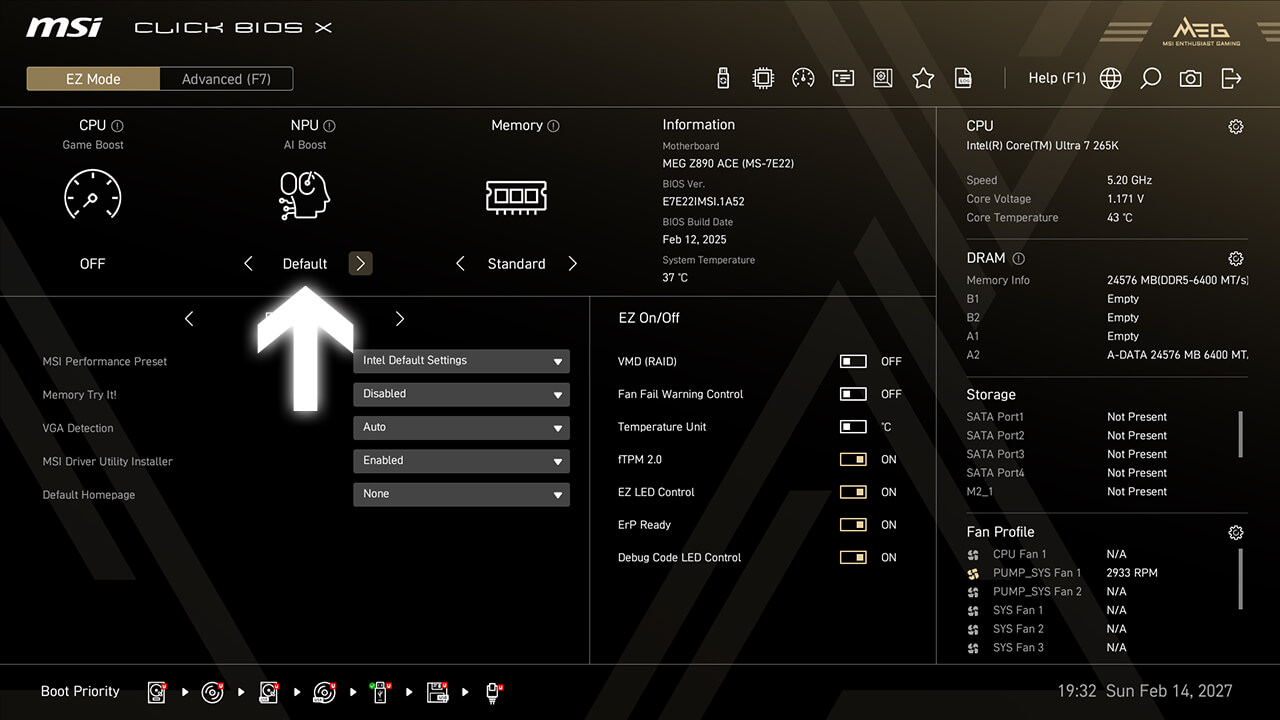
-
1. Click the AI Boost icon in easy mode, then press F10 to save changes and exit BIOS
XMP & EXPO
XMP (Extreme Memory Profiles) allows you to easily enable automatic power settings for optimal memory speed and stability. Additionally, A-XMP, EXPO, and iEXPO profiles are available for different platforms and memory types.


-
1. Click the XMP / EXPO icon in easy mode, then press F10 to save changes and exit BIOS
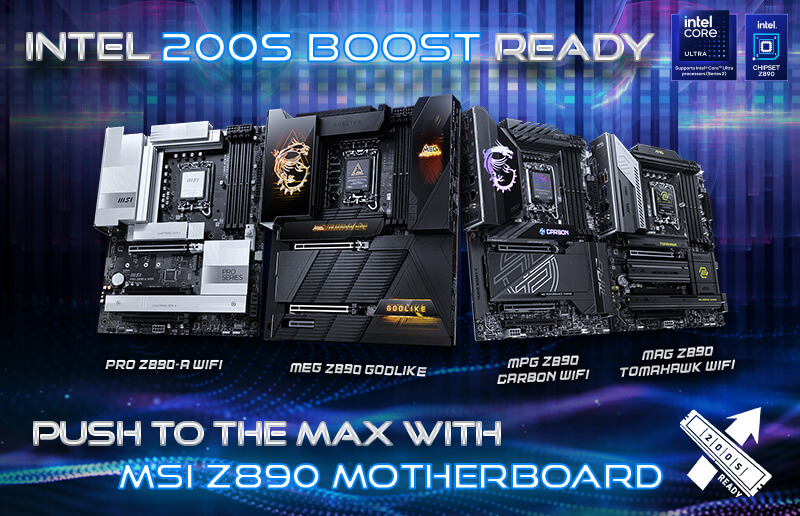
Intel 200S Boost
Intel 200S Boost allows you to enhance both memory performance (XMP) and CPU performance (NGU and D2D) simultaneously.
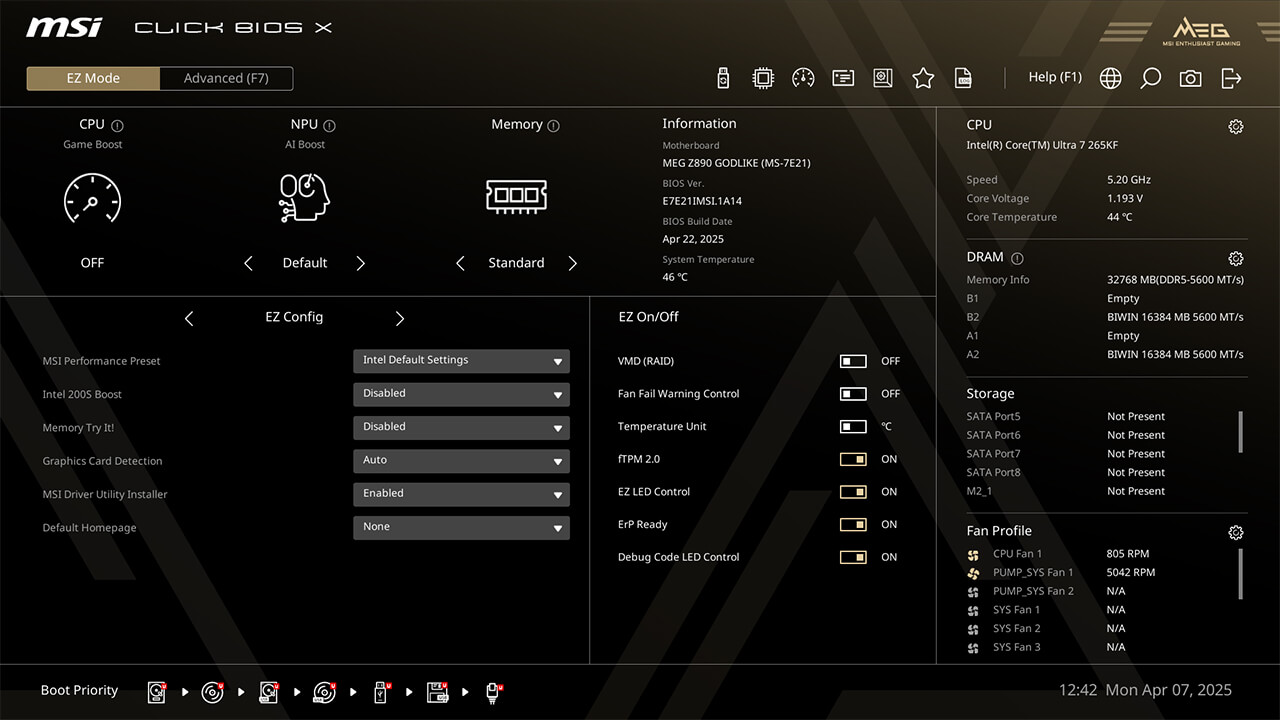
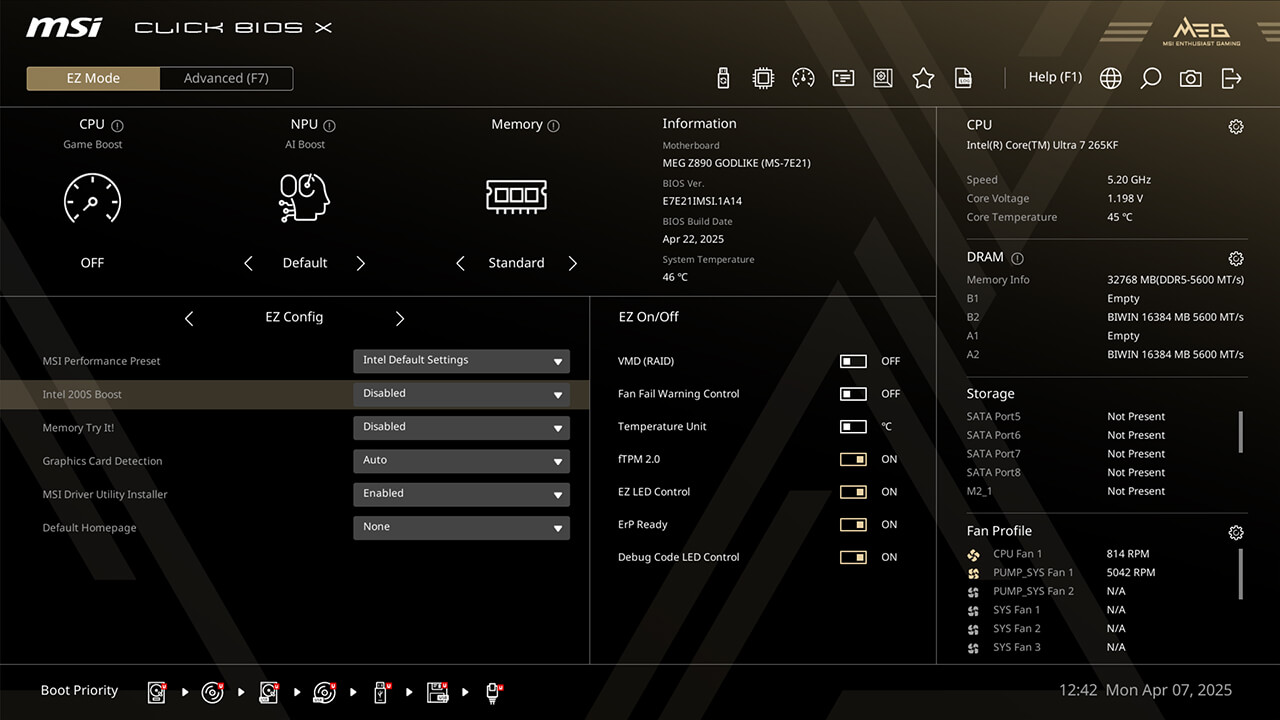
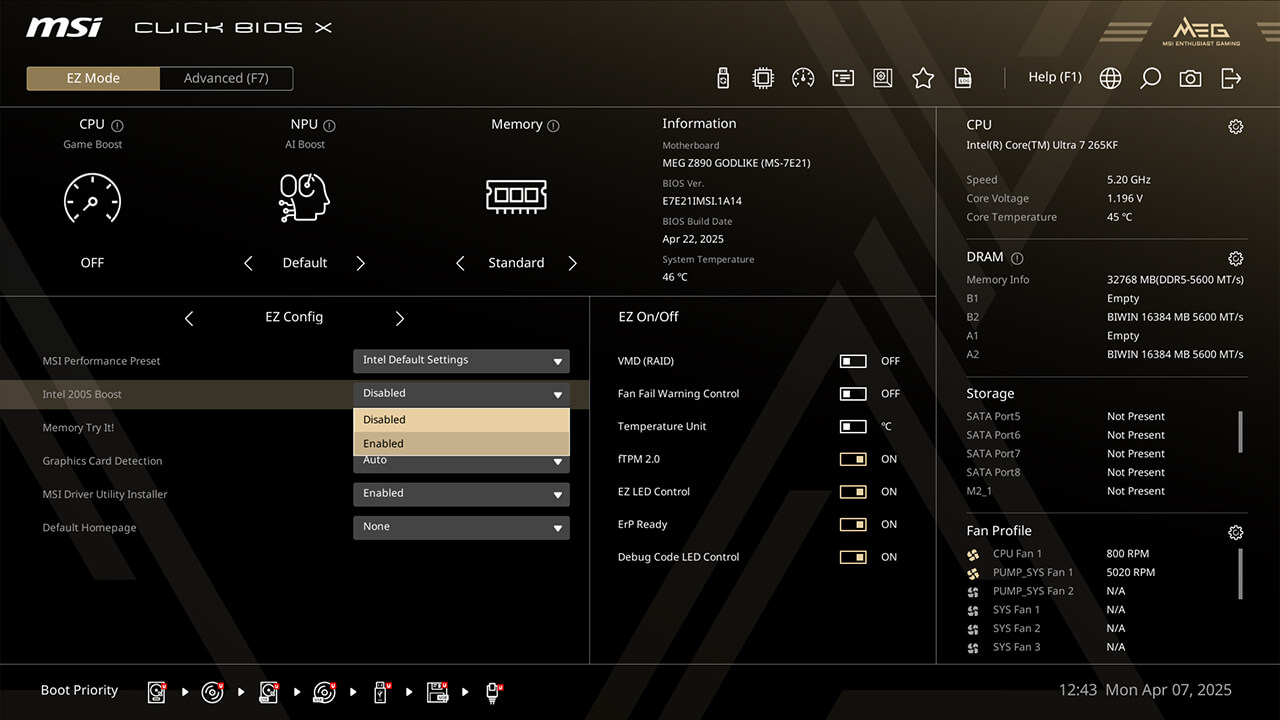
-
1. Click the Intel 200S Boost in EZ Config under easy mode
-
2. Enable Intel 200S Boost function, then press F10 to save changes and exit BIOS
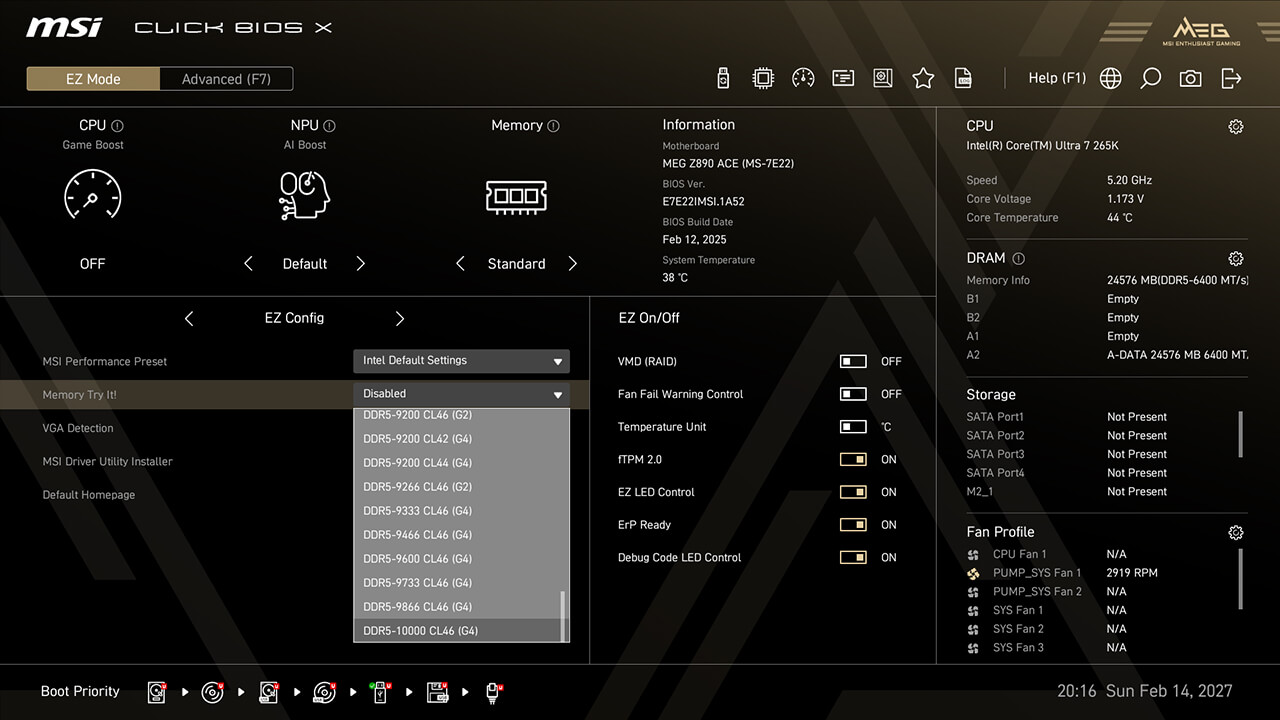
Memory Try It!
Memory Try It! provides more memory overclocking profiles than XMP and EXPO. Simply select a profile from the dropdown menu and test its stability.

-
1. Click the Memory Try It! in EZ Config under easy mode
-
2. Choose the preferred profile, then press F10 to save changes and exit BIOS
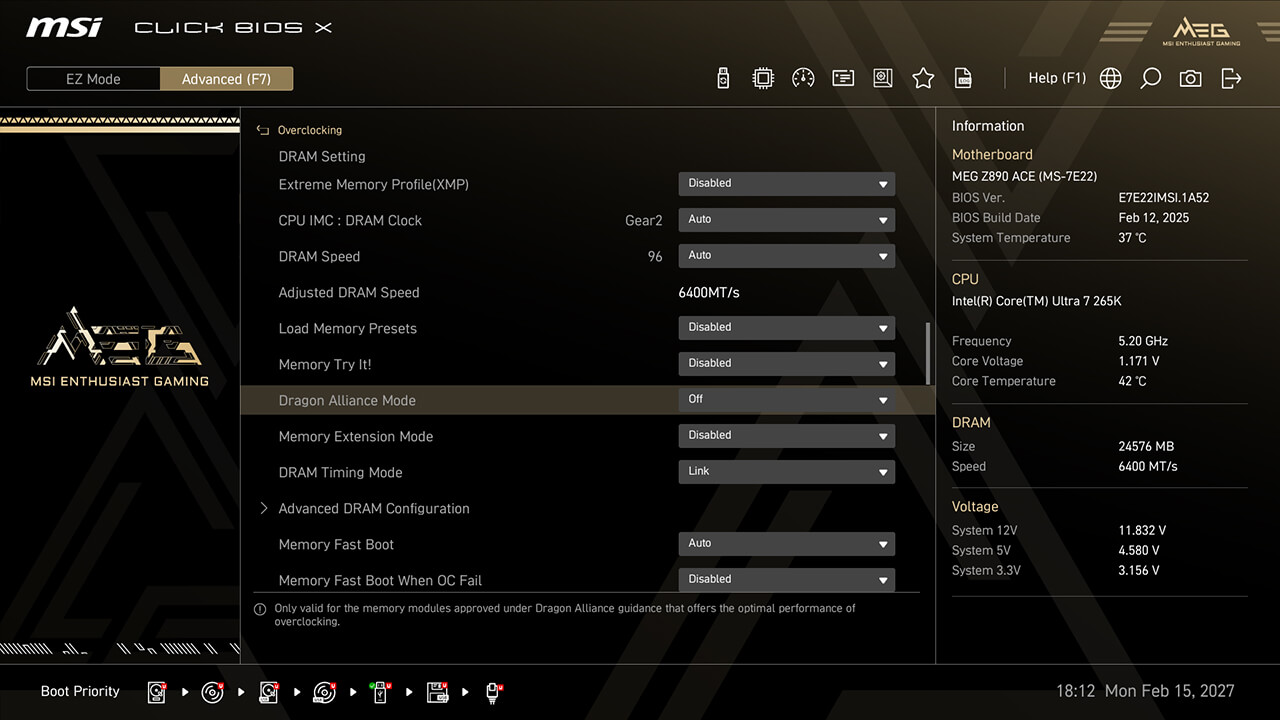
Dragon Alliance Mode
Dragon Alliance Mode offers one-click extreme memory overclocking for compatible memory modules with dedicated BIOS parameters, making high memory frequencies more accessible to enthusiasts.


-
1. In Advanced Mode
-
2. lick Overclocking\Dragon Alliance Mode
-
3. Enable Dragon Alliance Mode function, then press F10 to save changes and exit BIOS
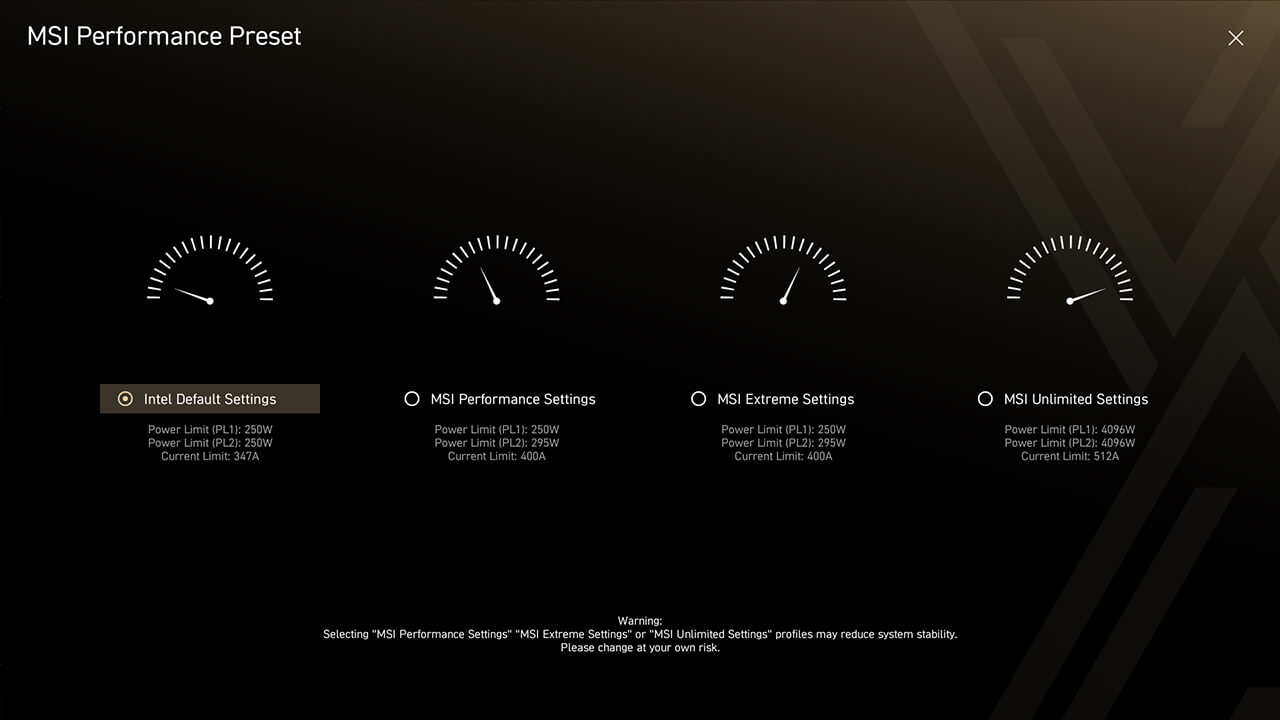
MSI Performance Preset
MSI Performance Preset is an intuitive way to boost CPU performance by setting the power limitation as your preference. There are multiple level settings for different significant scenarios.

-
1. Click the MSI Performance Preset icon in easy mode
-
2. Choose the preferred option, then press F10 to save changes and exit BIOS
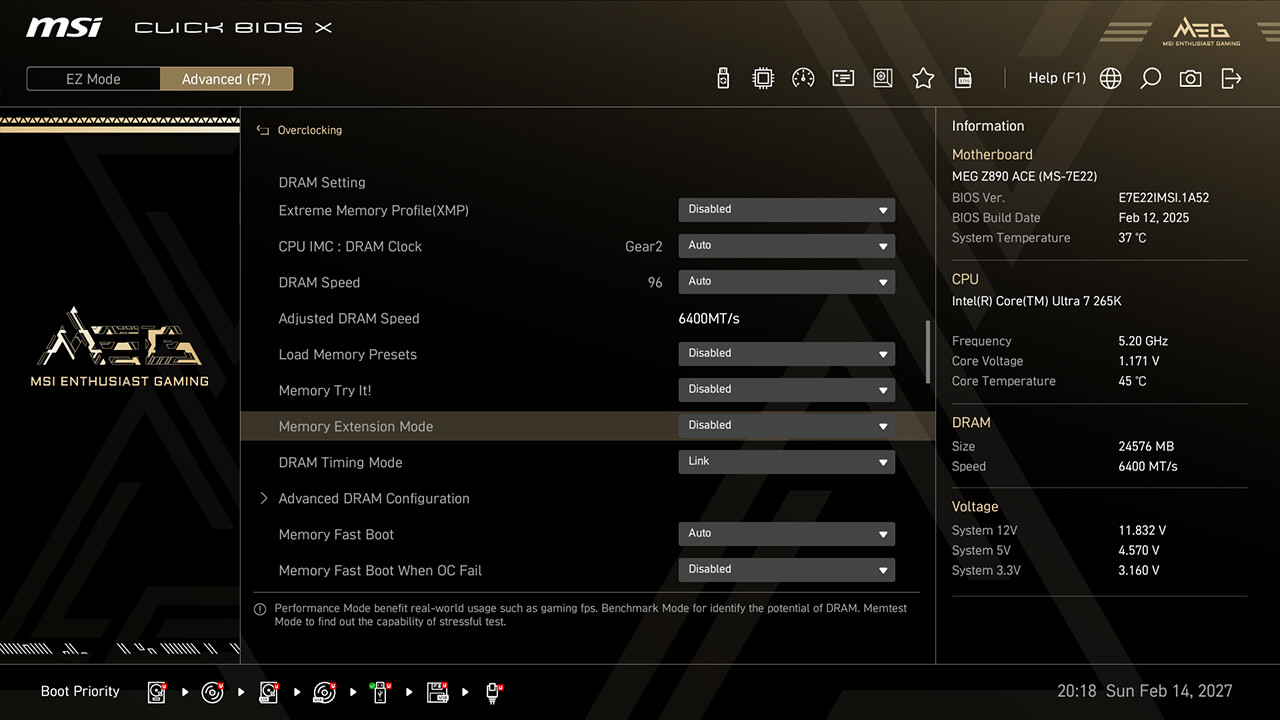
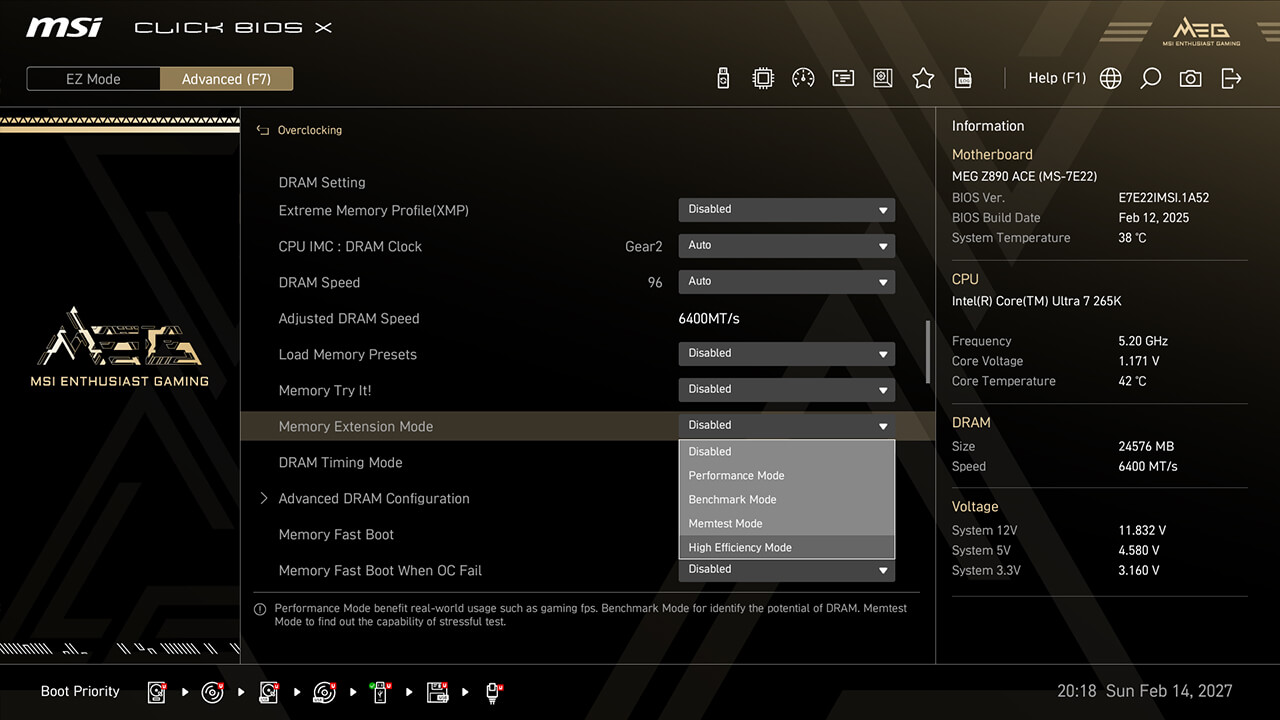
Memory Extension Mode
Memory Extension Mode reduces memory latency and enhances performance at the same frequency. It also allows combining XMP profiles to find the best configuration.


-
1. In Advanced Mode
-
2. Click Overclocking\Memory Extension Mode
-
3. Choose the preferred option, then press F10 to save changes and exit BIOS
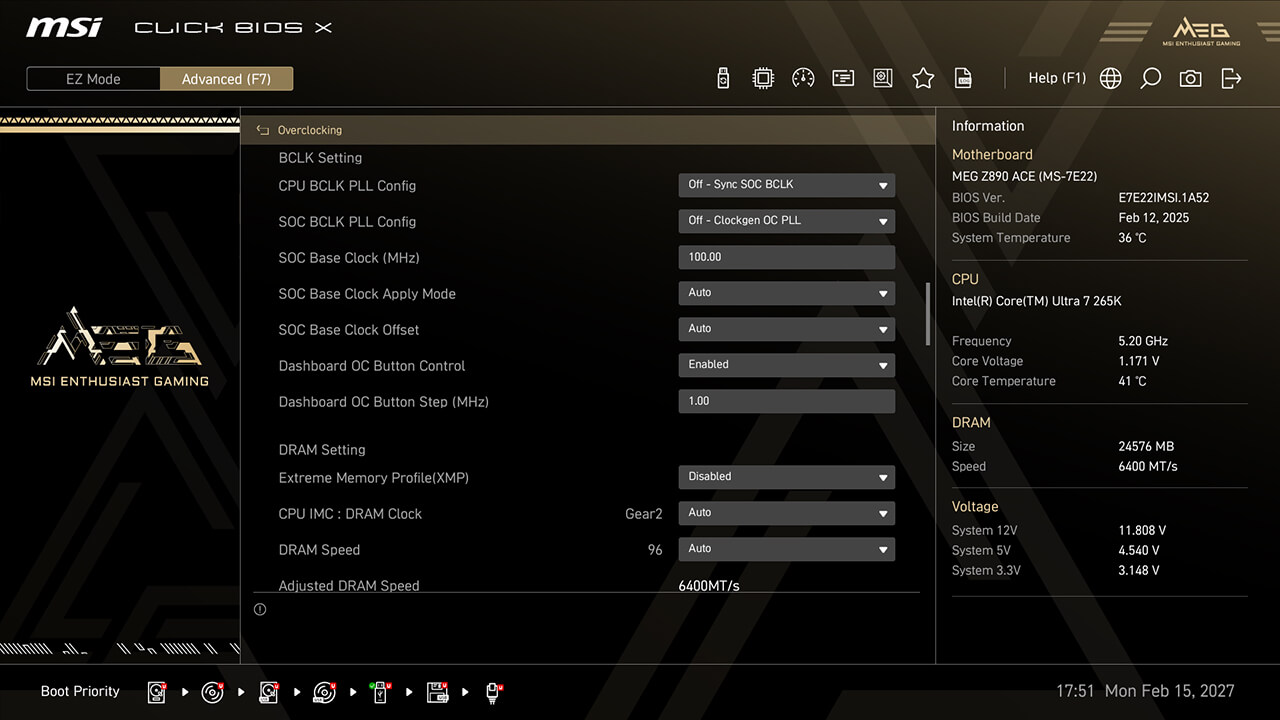
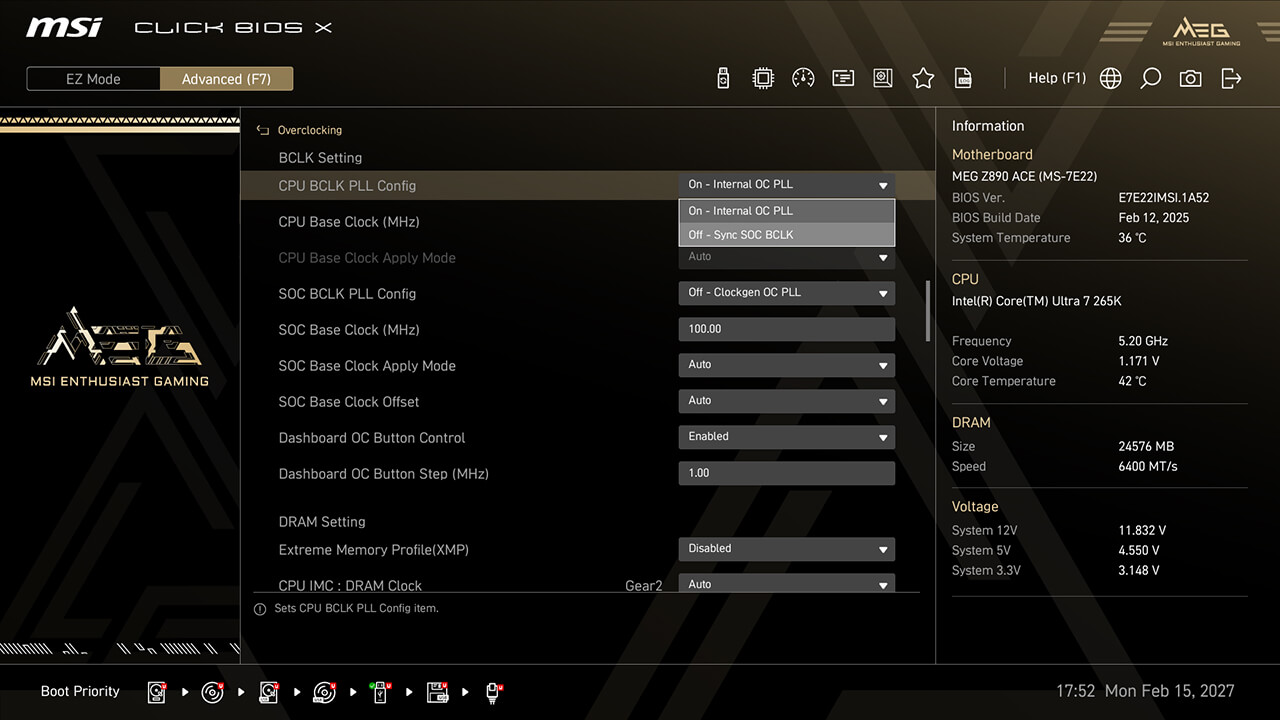
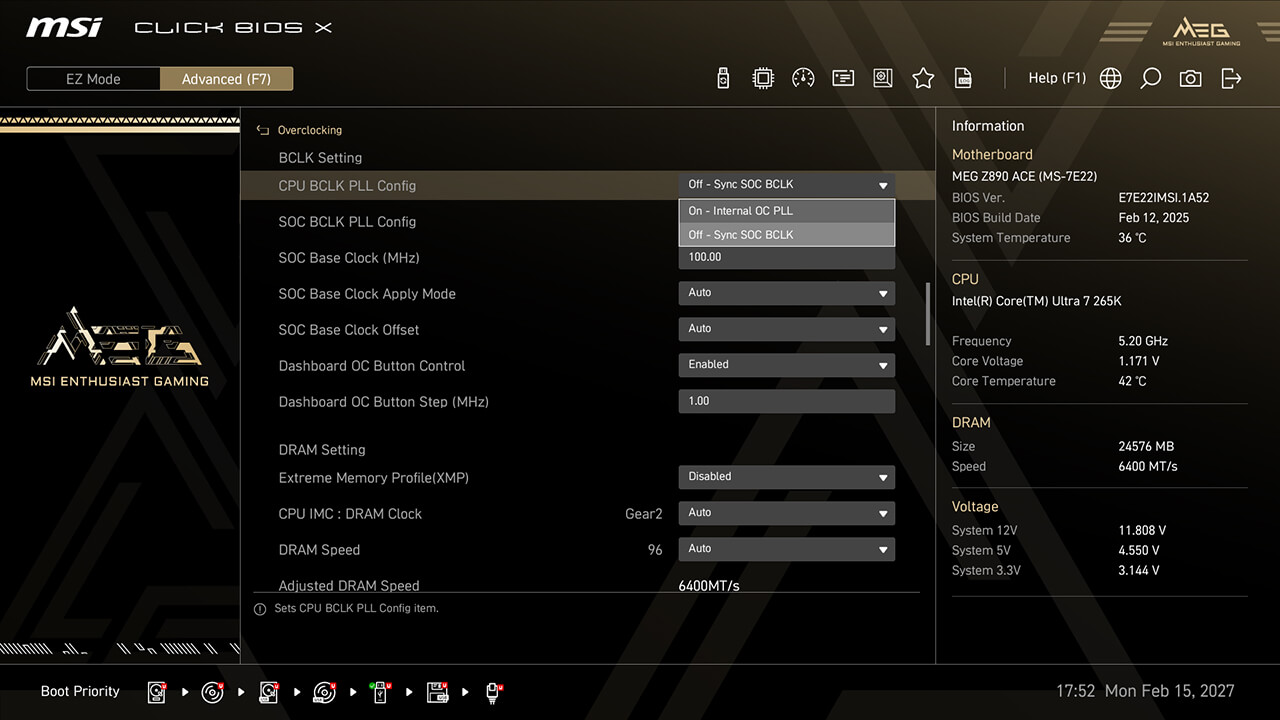
BCLK Control
MSI OC Engine(clock generator) motherboards allow flexible BCLK overclocking. You can sync CPU and SOC BCLK or adjust them separately for optimal performance.

-
1. In Advanced Mode
-
2. Click Overclocking\BCLK Setting
-
3. Set the preferred option and parameters, then press F10 to save changes and exit BIOS
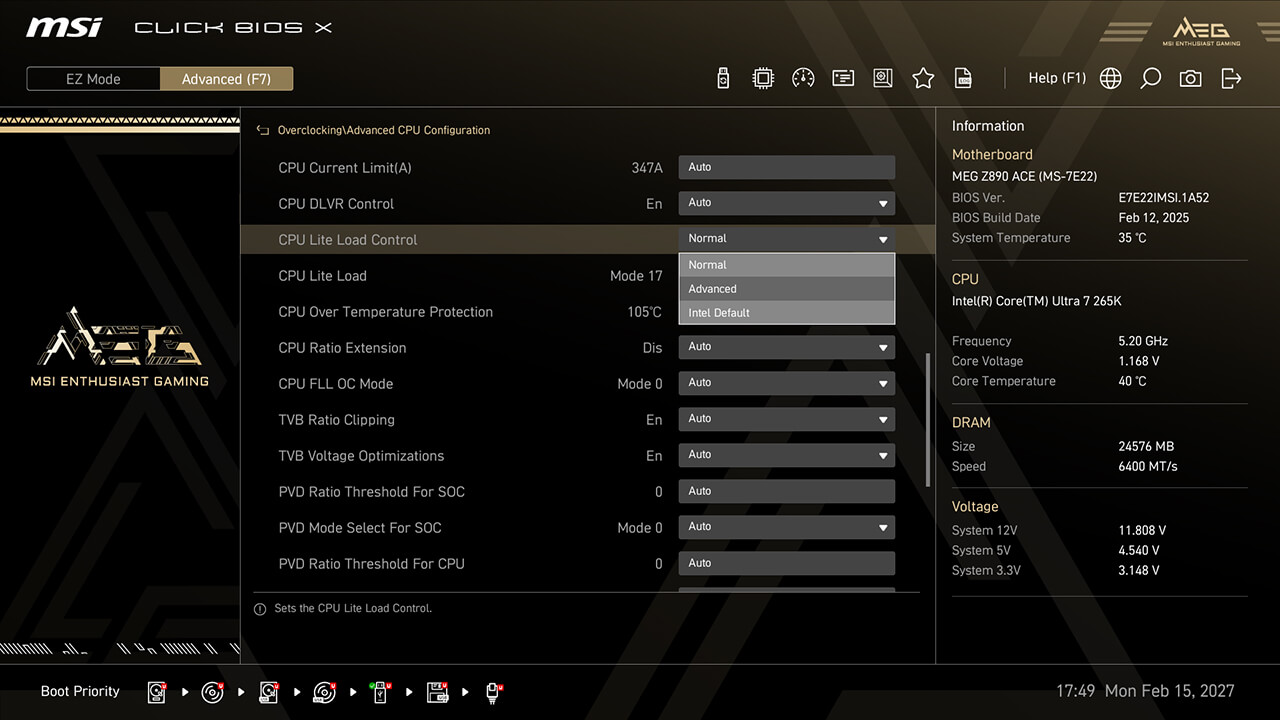
CPU Lite Load Control
CPU Lite Load Control allows easy AC/DC loadline adjustment, optimizing power consumption and thermal performance for stability and energy efficiency.


-
1. In Advanced Mode
-
2. Click Overclocking\Advanced CPU Configuration\CPU Lite Load Control
-
3. Choose the preferred option, then press F10 to save changes and exit BIOS
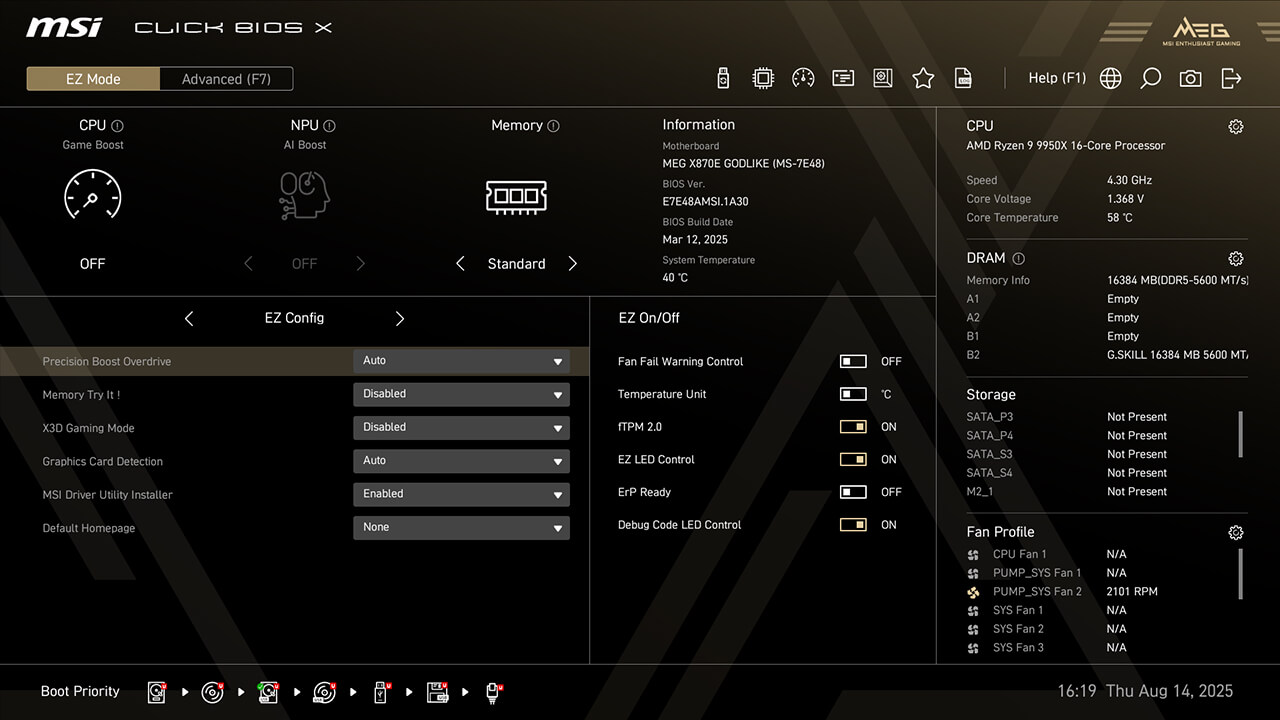
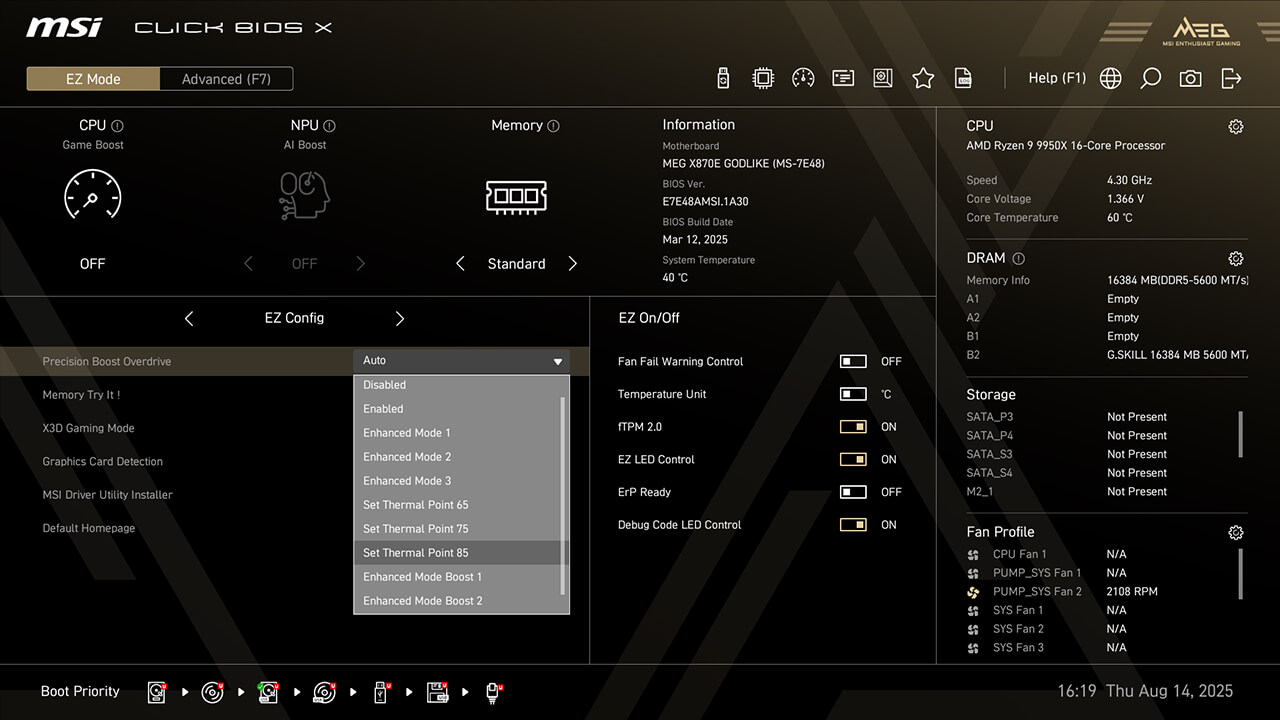
Precision Boost Overdrive
Precision Boost Overdrive (PBO) allows your Ryzen CPU to dynamically boost clock speeds beyond the base frequency. MSI offers additional options like Thermal Point settings or Enhanced Mode to maximize performance for different scenarios.
-
1. Click the Precision Boost Overdrive in EZ Config under easy mode
-
2.Choose the preferred profile, then press F10 to save changes and exit BIOS
Performance Switch
Performance Switch combines AMD’s Precision Boost Overdrive (PBO) and MSI’s custom OC settings, delivering higher CPU performance in both status of single-core and multi-core workloads.
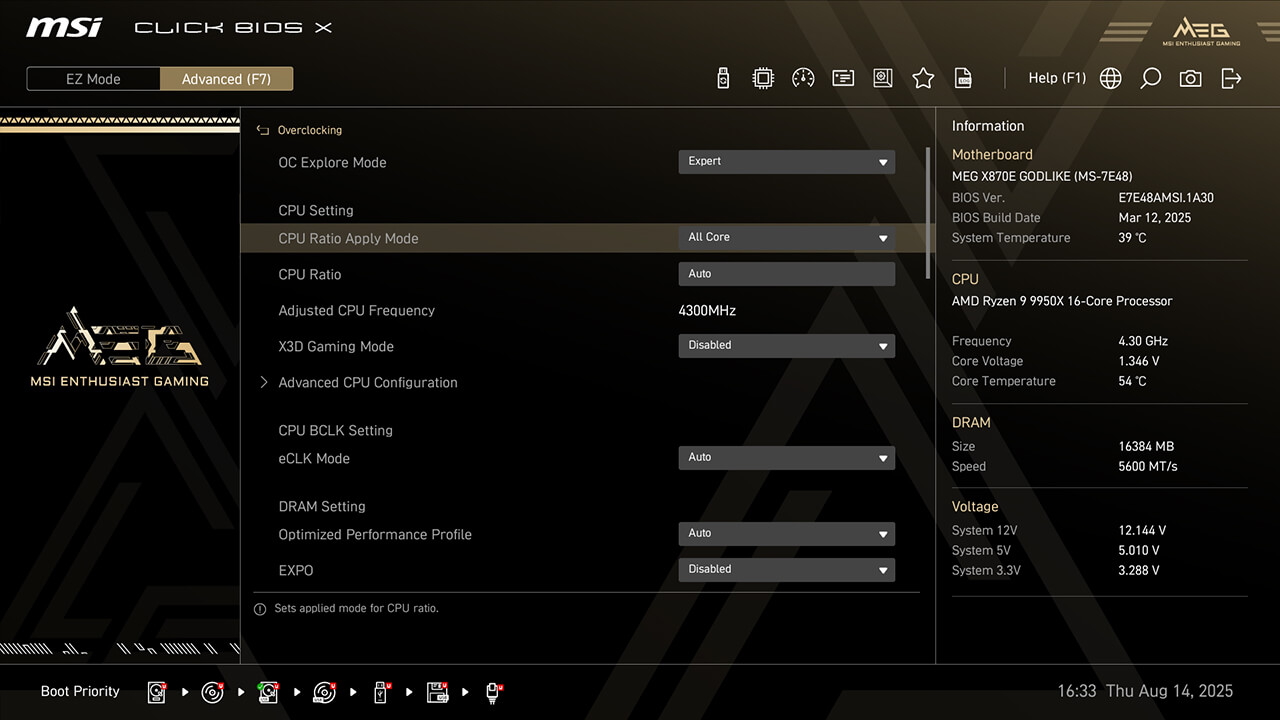

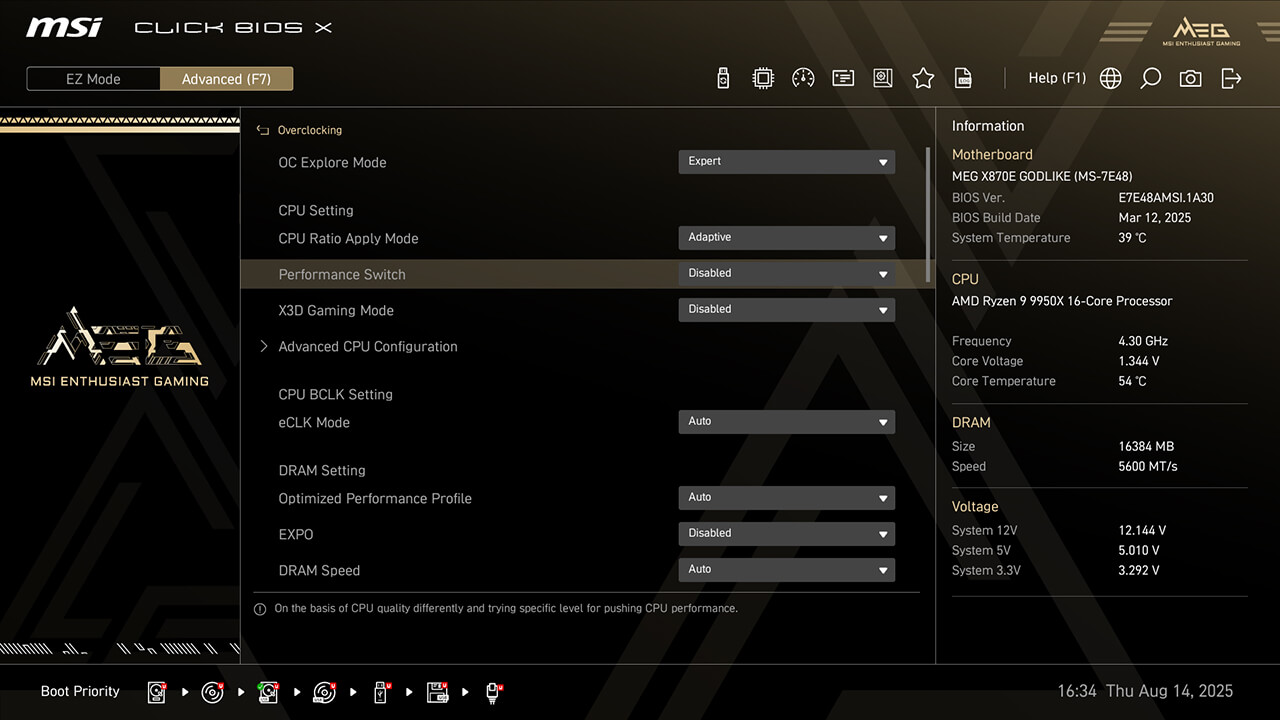
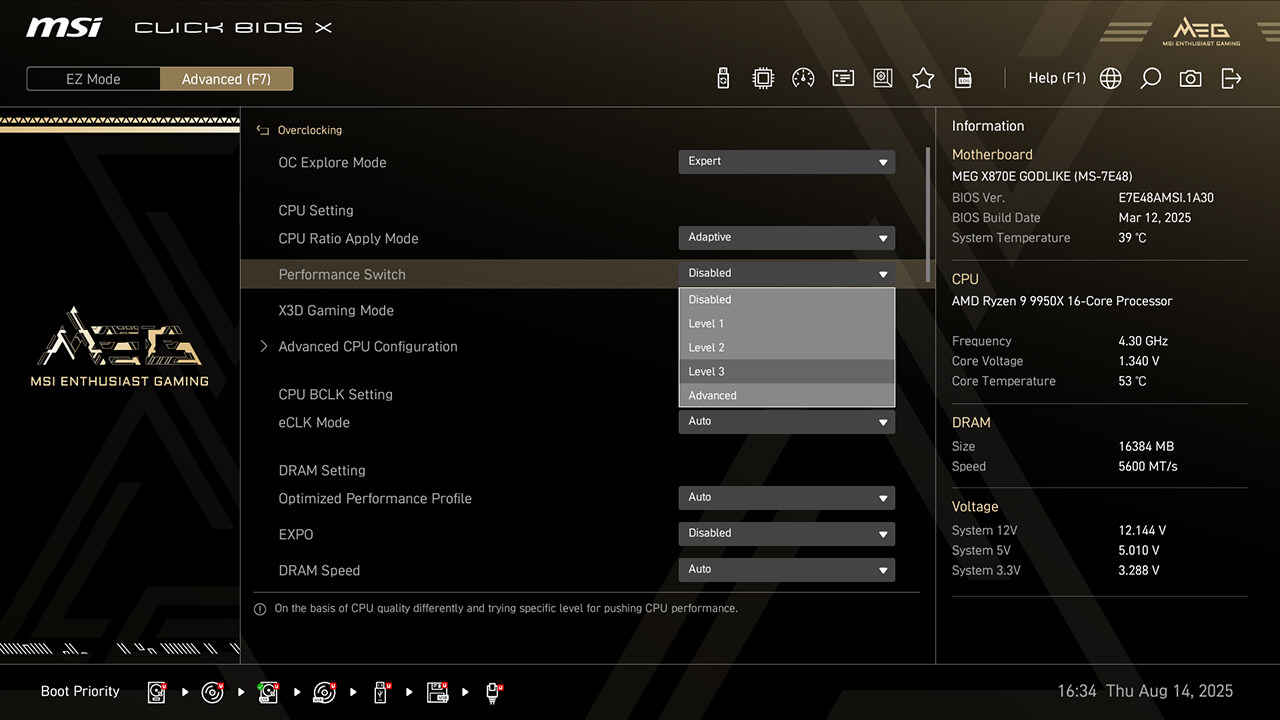
-
1. In Advanced Mode
-
2. Click Overclocking\CPU Ratio Apply Mode
-
3. Select Adaptive in CPU Ratio Apply Mode, choose the preferred profile in Performance Switch, then press F10 to save changes and exit BIOS
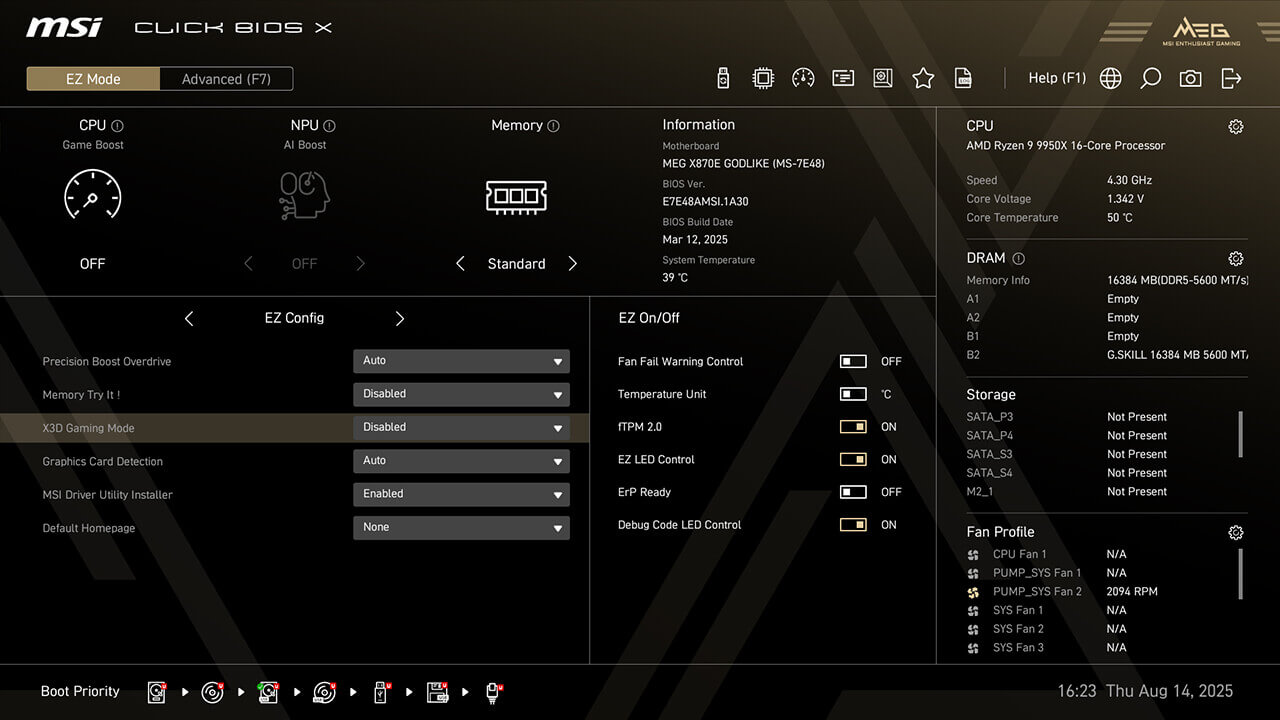
X3D Gaming Mode
X3D Gaming Mode optimizes Ryzen CPU’s core and Simultaneous Multithreading (SMT) settings, enhancing multi-core performance in CPU-intensive applications to boost gaming performance.

-
1. Click the X3D Gaming Mode in EZ Config under easy mode
-
2. Enable X3D Gaming Mode function, then press F10 to save changes and exit BIOS
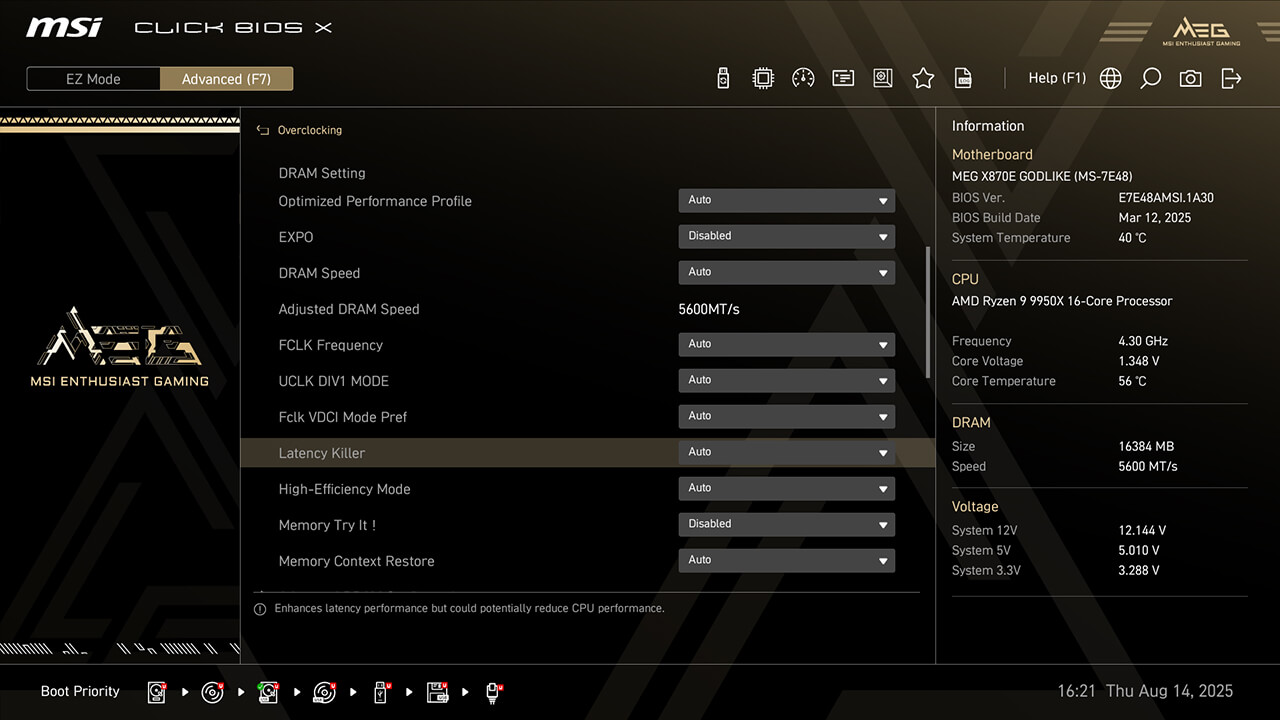
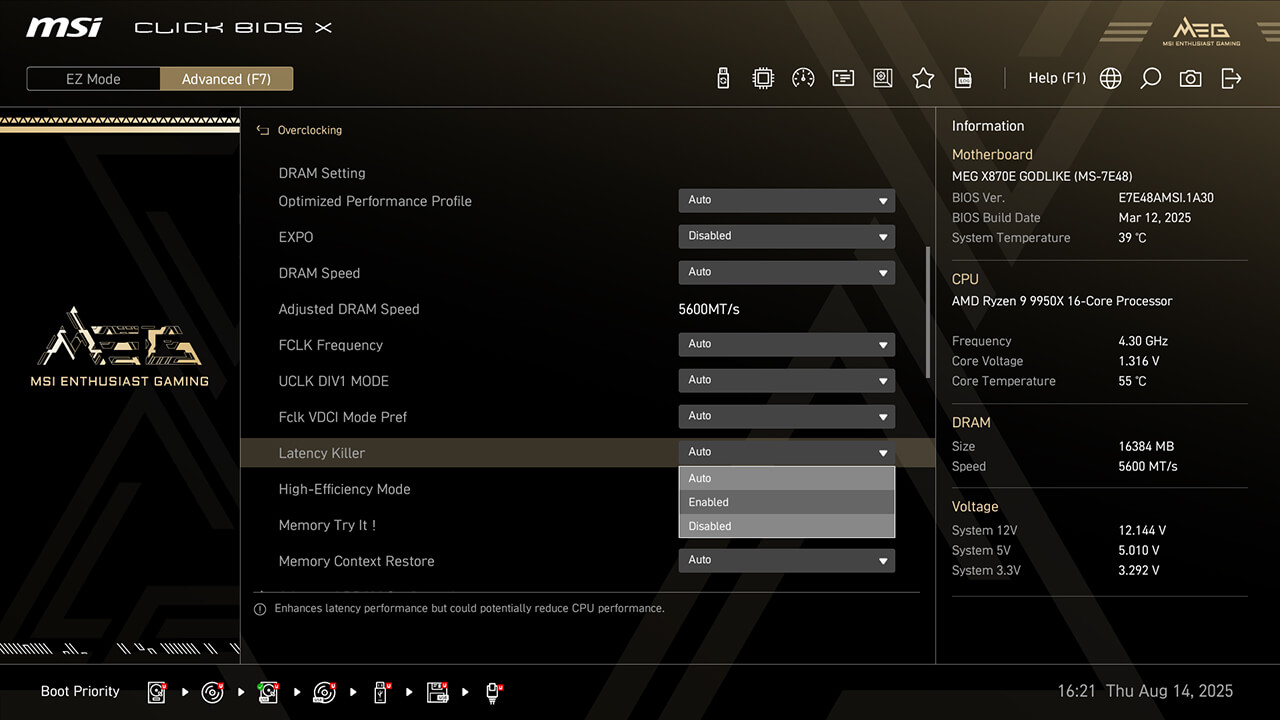
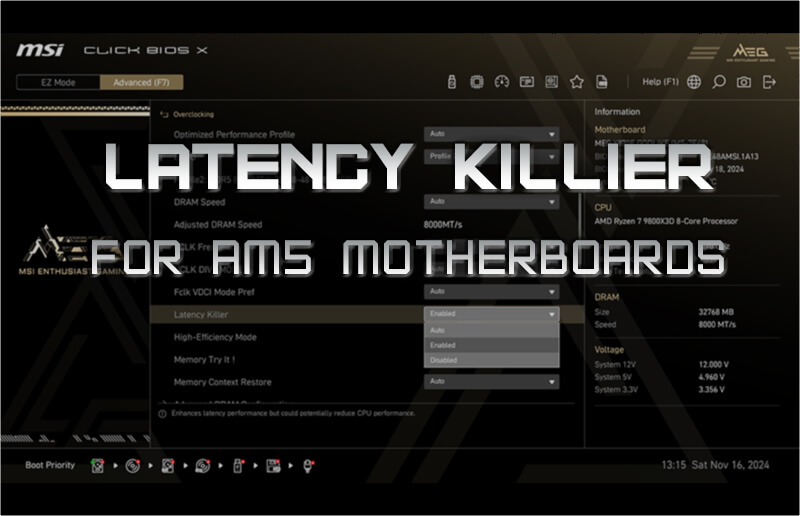
Latency Killer
Latency Killer reduces memory latency and boosts performance. It also allows combining exclusive BIOS functions like EXPO, A-XMP profiles, Memory Try It, High-Efficiency Mode, or manual overclocking settings.


-
1. In Advanced Mode
-
2. Click Overclocking\Latency Killer
-
3. Enable Latency Killer function, then press F10 to save changes and exit BIOS
High-Efficiency Mode
High-Efficiency Mode enhances memory performance by increasing bandwidth and reducing latency. MSI provides four RAM timing presets to help you find the optimal configuration based on memory module quality.

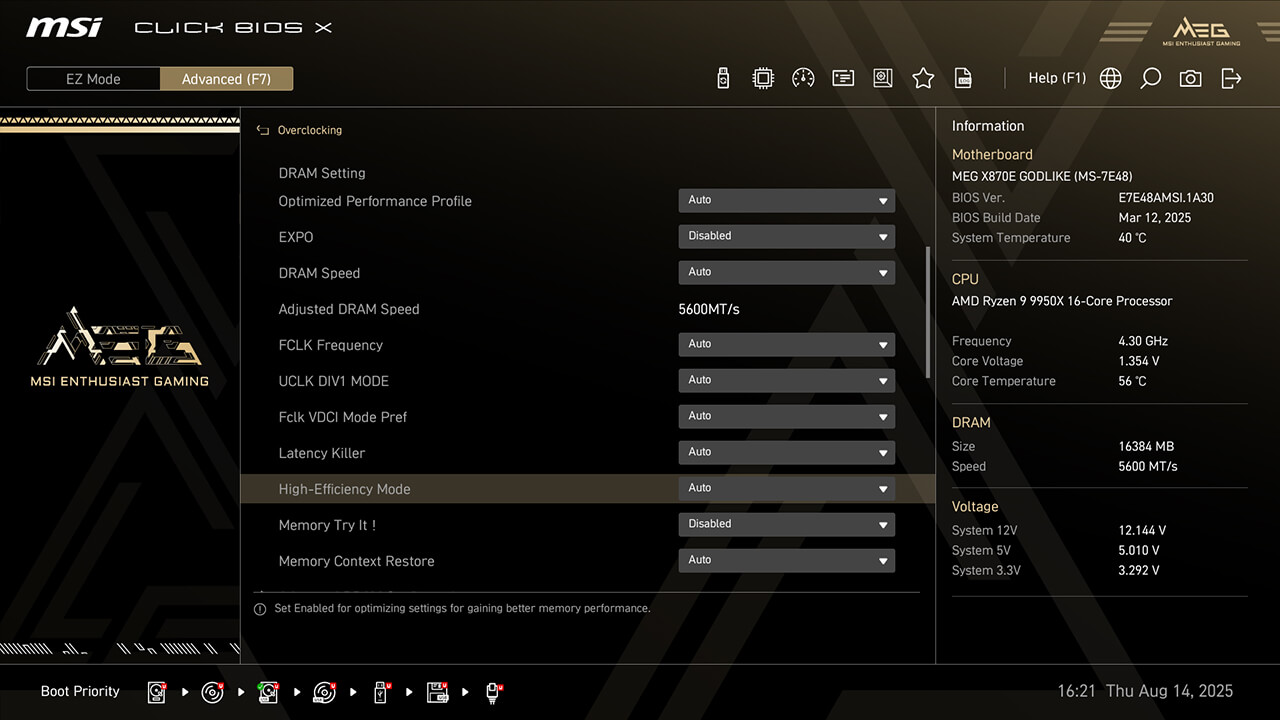

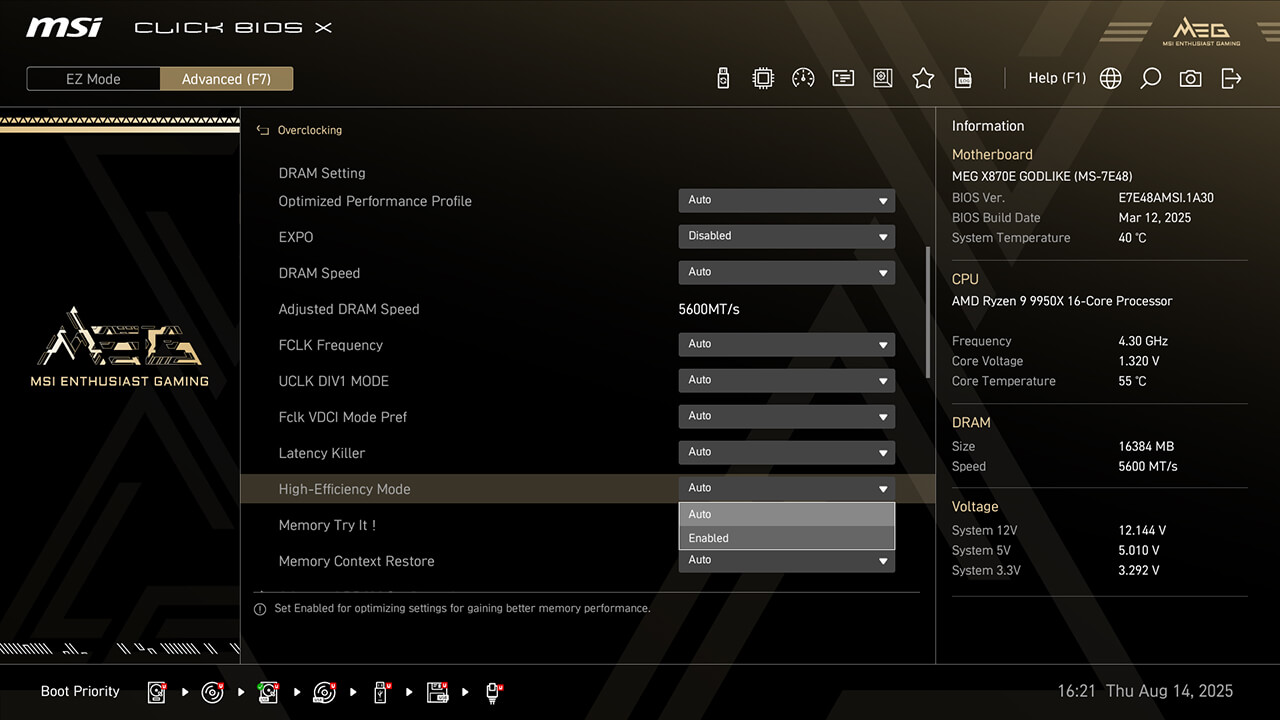
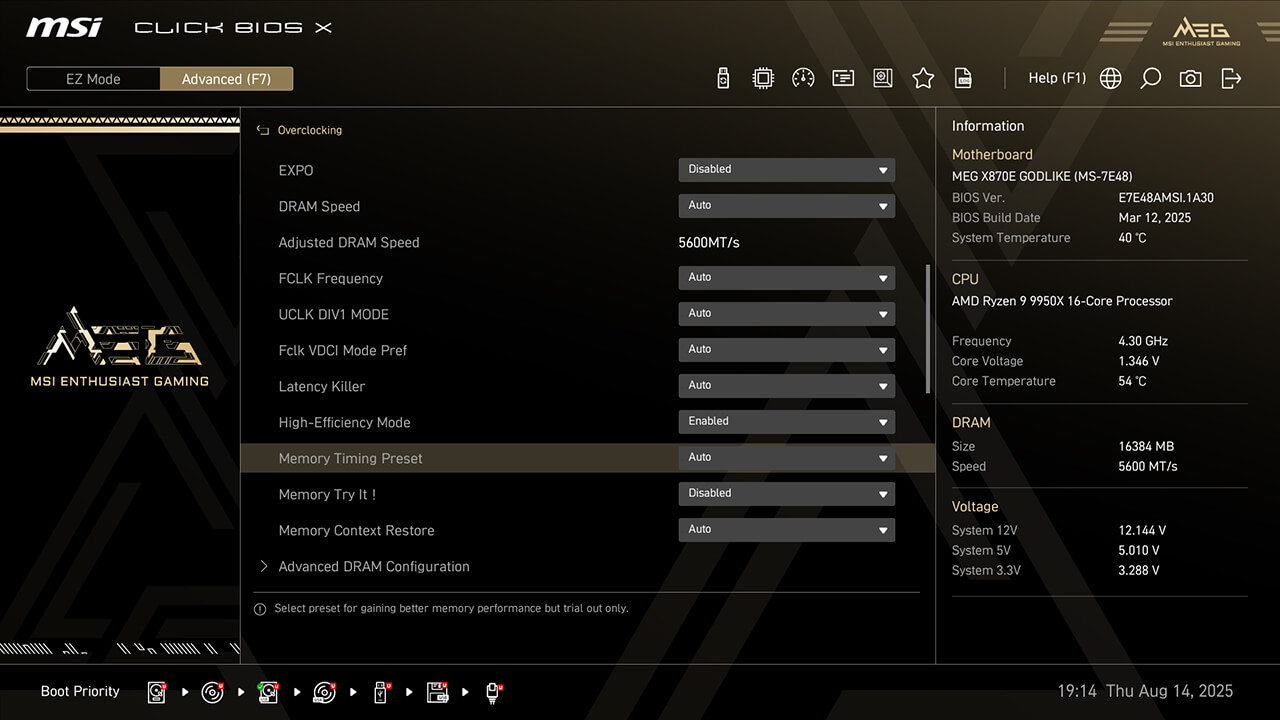
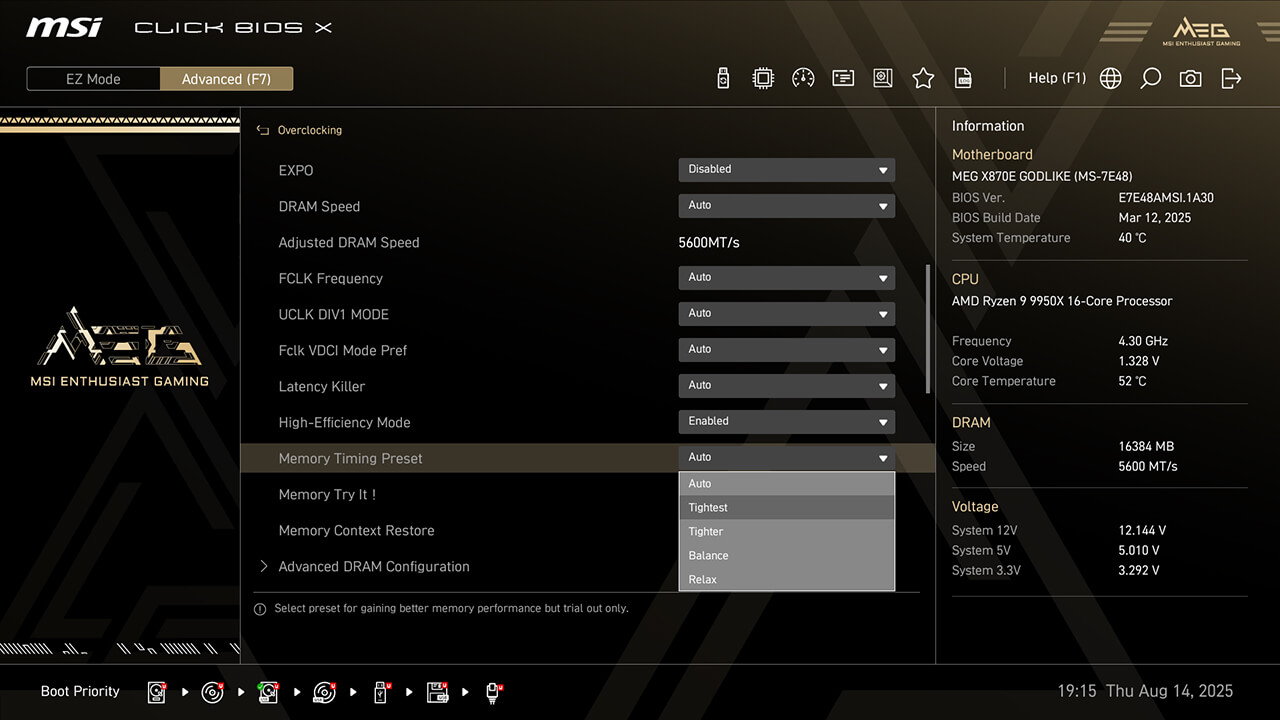
-
1. In Advanced Mode
-
2. Click Overclocking\High-Efficiency Mode
-
3. Enable High-Efficiency Mode, choose the preferred profile in Memory Timing Preset function, then press F10 to save changes and exit BIOS
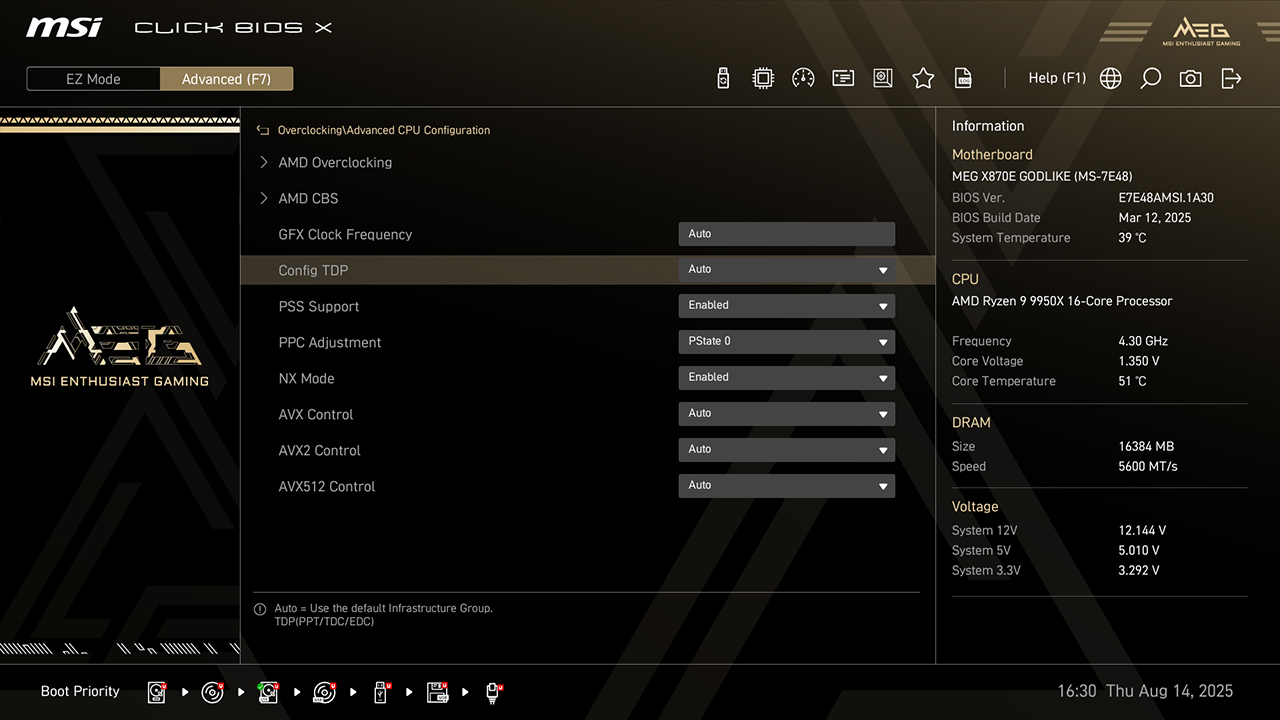
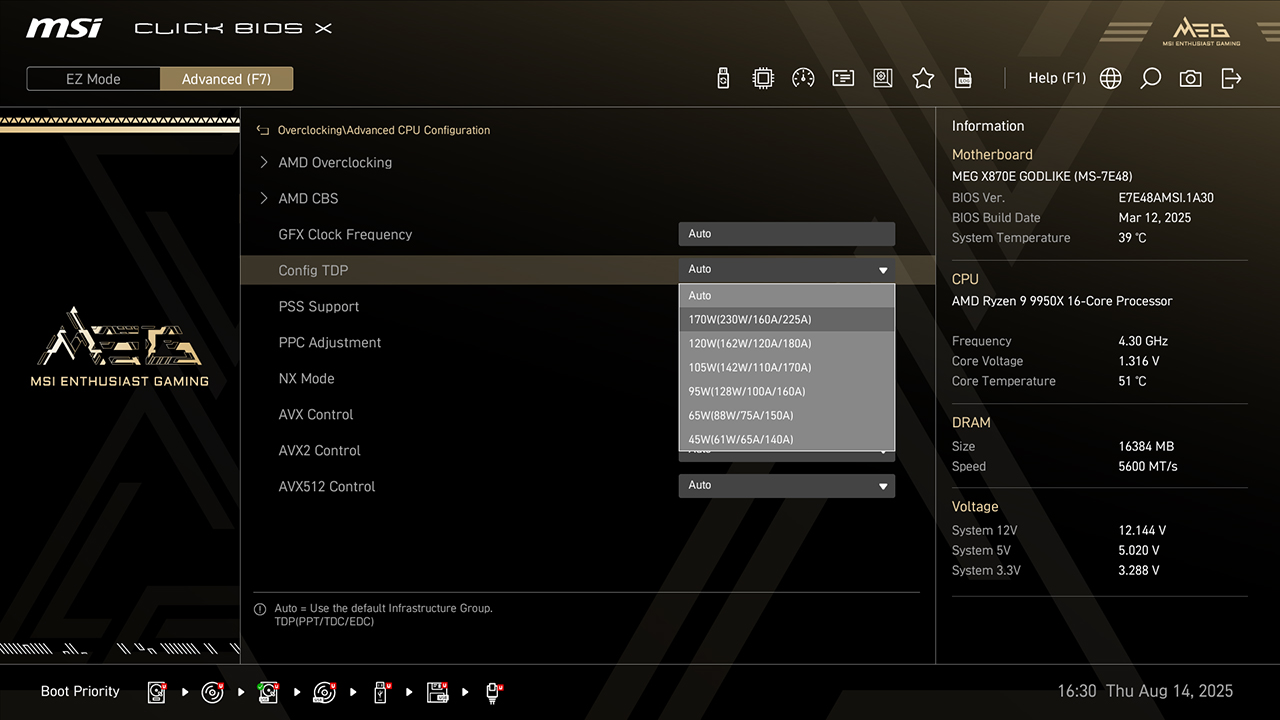
Config TDP
Config TDP offers several profiles for different TDP settings, makes setting process easier and don’t need to modify settings manually for each TDP.

-
1. In Advanced Mode
-
2. Click Overclocking\Config TDP
-
3. Choose preferred option, then press F10 to save changes and exit BIOS
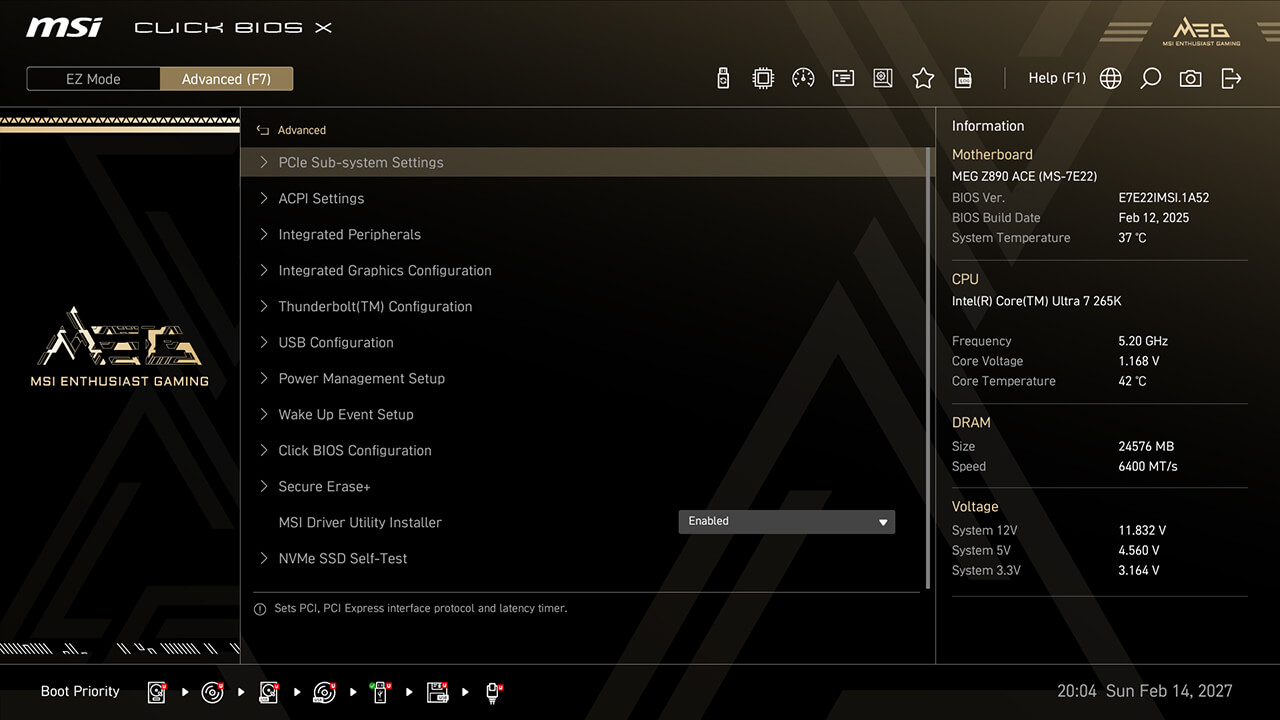
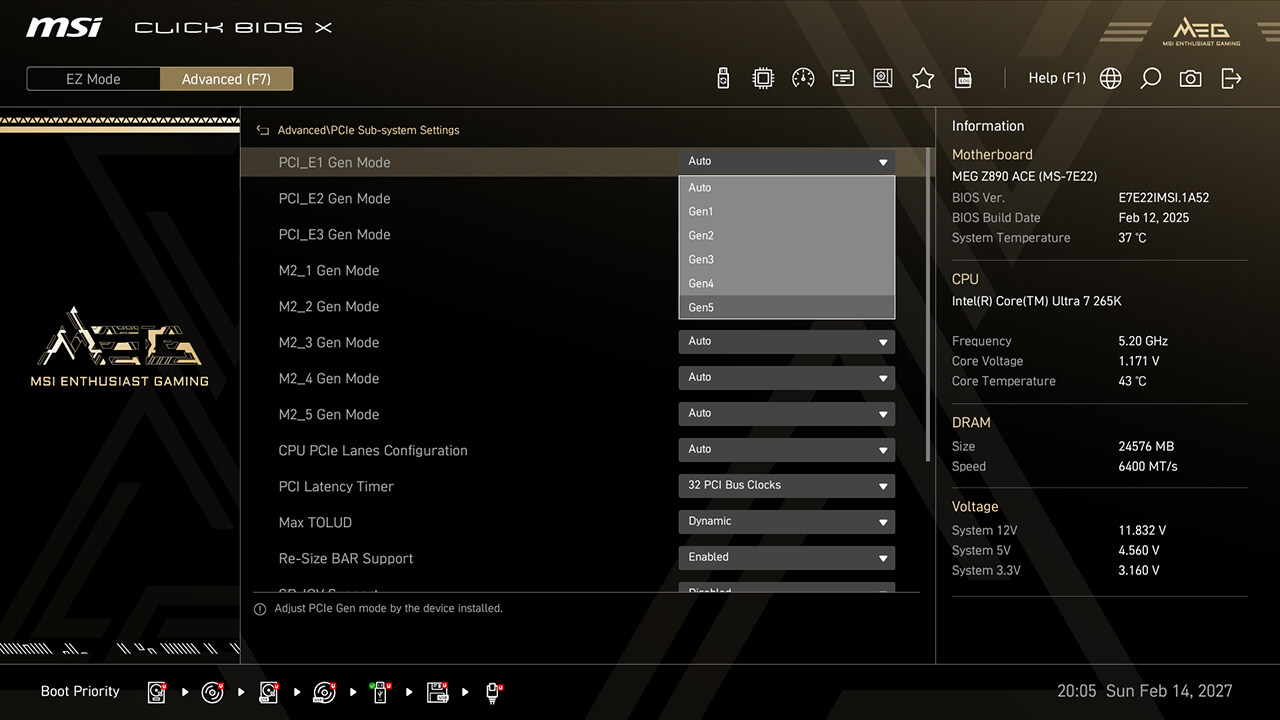
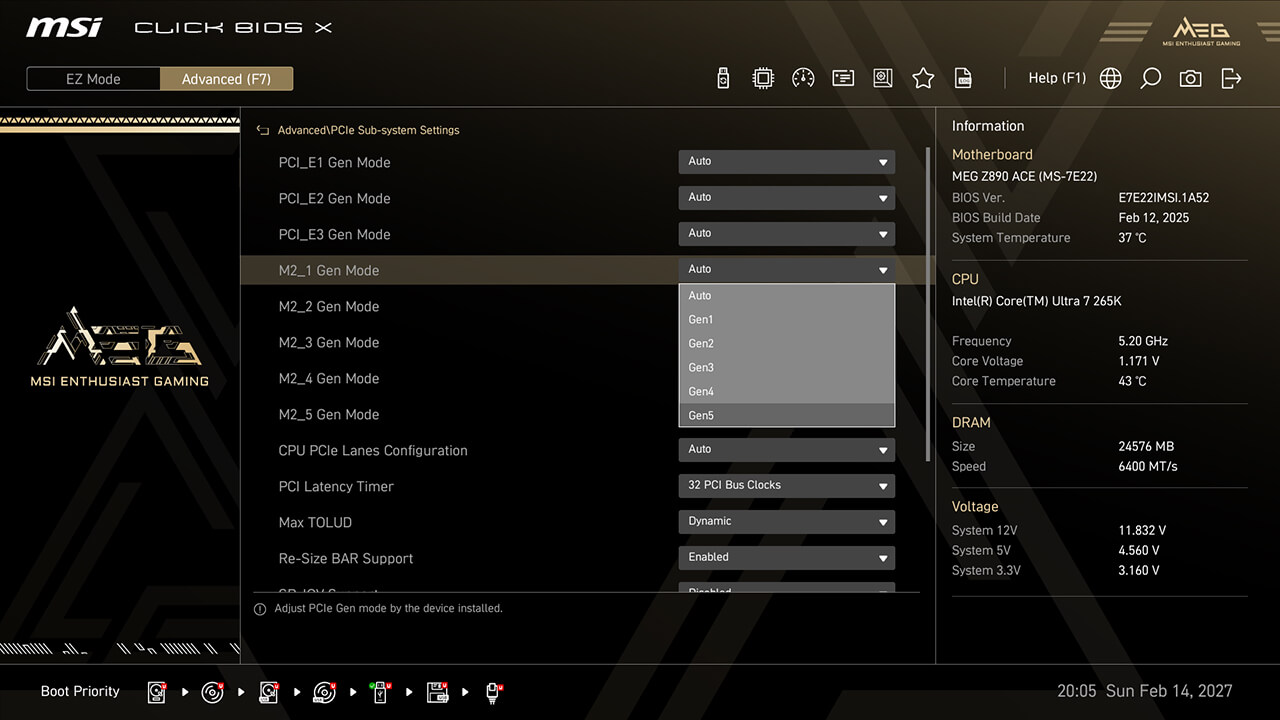
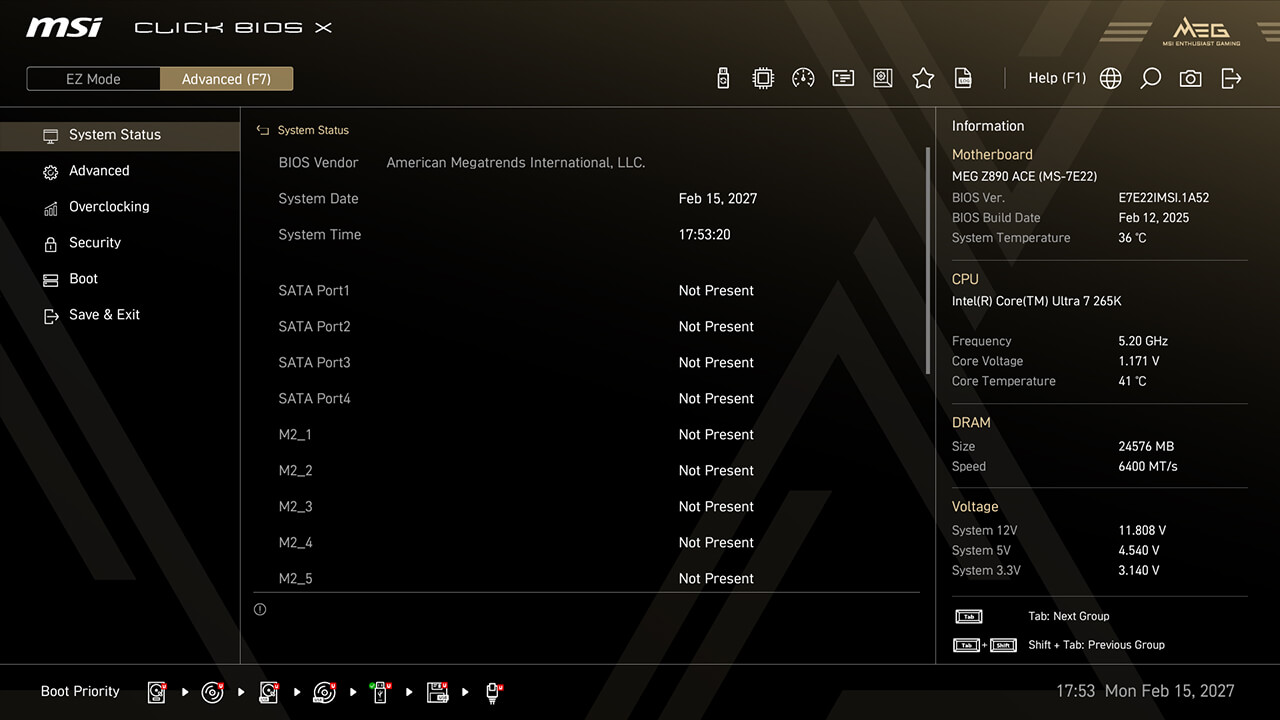
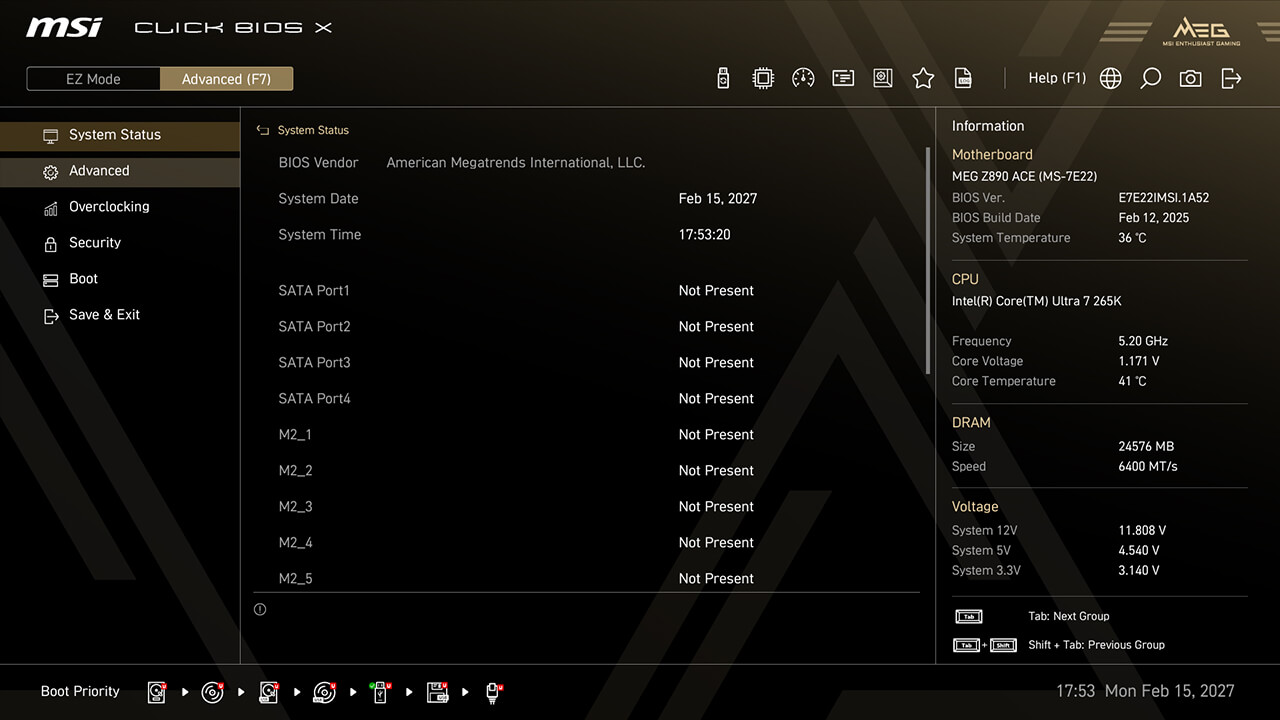
PCIe Configuration
PCIe Configuration allows you to adjust settings related to the PCIe interface, optimizing performance and compatibility for connected devices such as graphics cards, and storage devices.


-
1. In Advanced Mode
-
2. Click Advanced\PCIe Sub-system Settings
-
3. Set preferred PCIe Speed and Lane Configuration for different PCIe or storage devices, then press F10 to save changes and exit BIOS
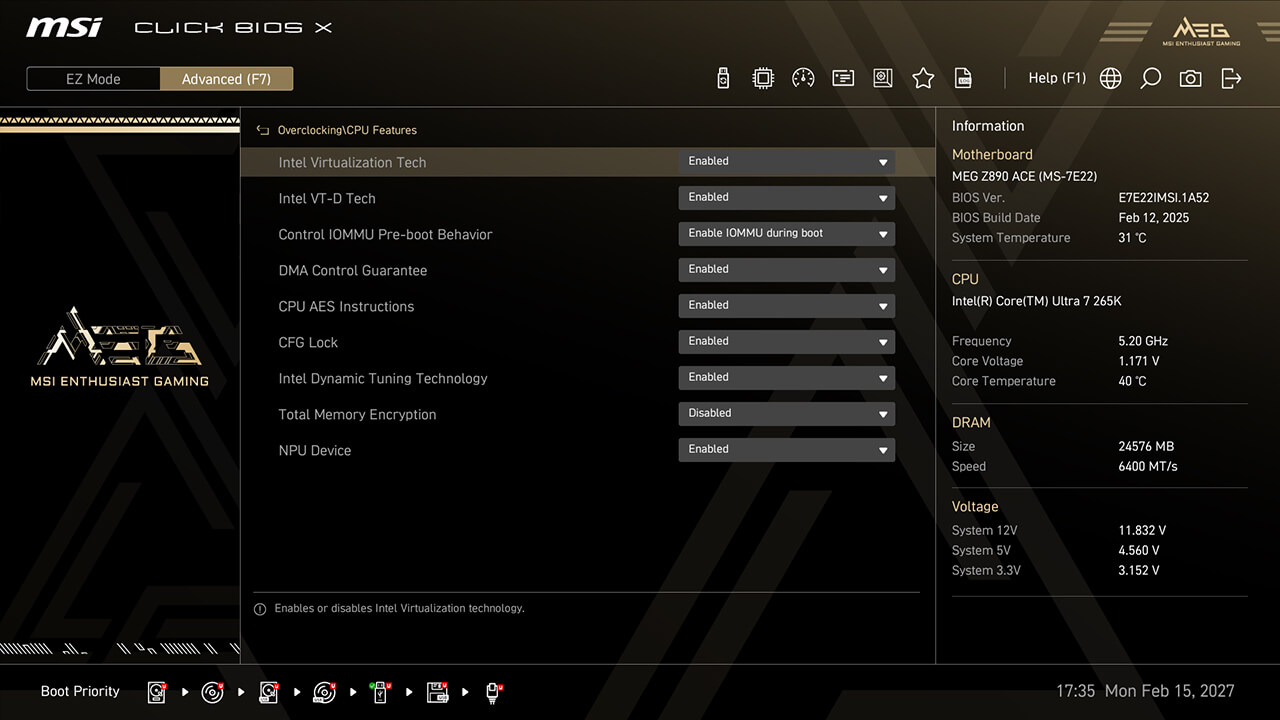
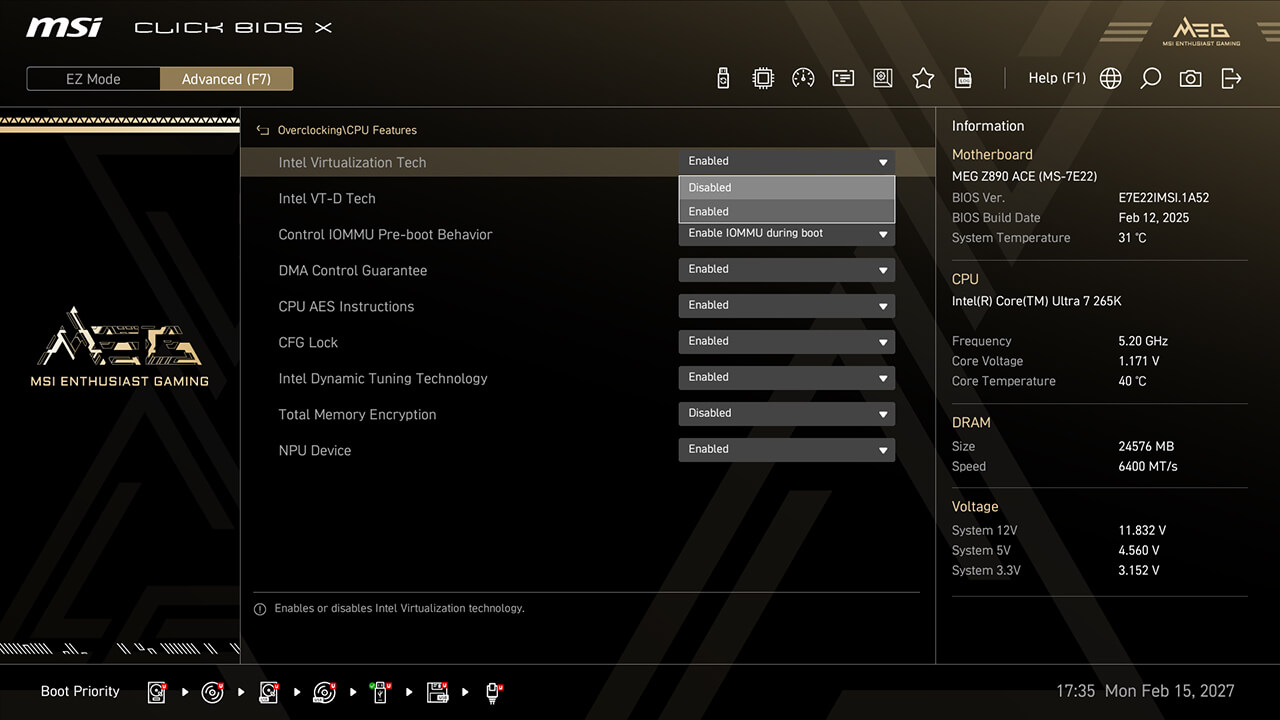
Intel Virtualization
Intel Virtualization enables a platform to run multiple operating systems in independent partitions, allowing the CPU to efficiently manage multiple VMs while enhancing security through isolation.


-
1. In Advanced Mode
-
2. Click Overclocking\CPU Features\Intel Virtualization Tech
-
3. Enable Intel Virtualization Tech and Intel VT-D Tech, then press F10 to save changes and exit BIOS
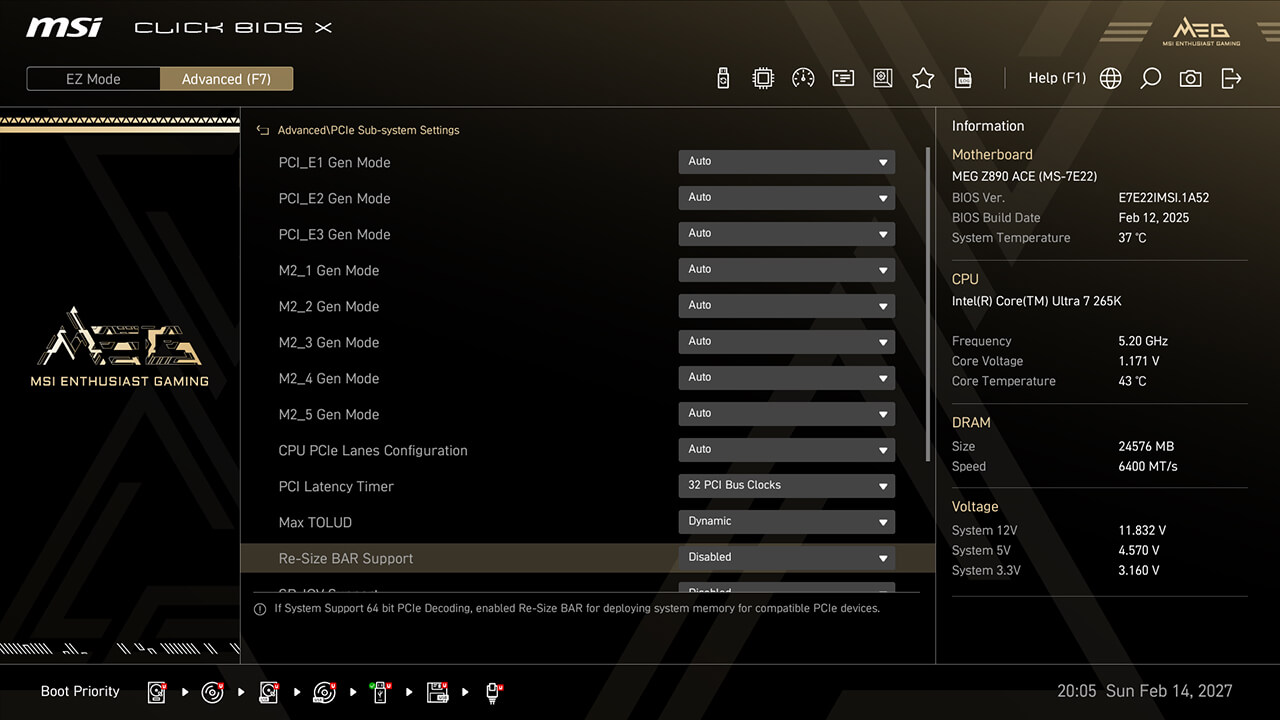
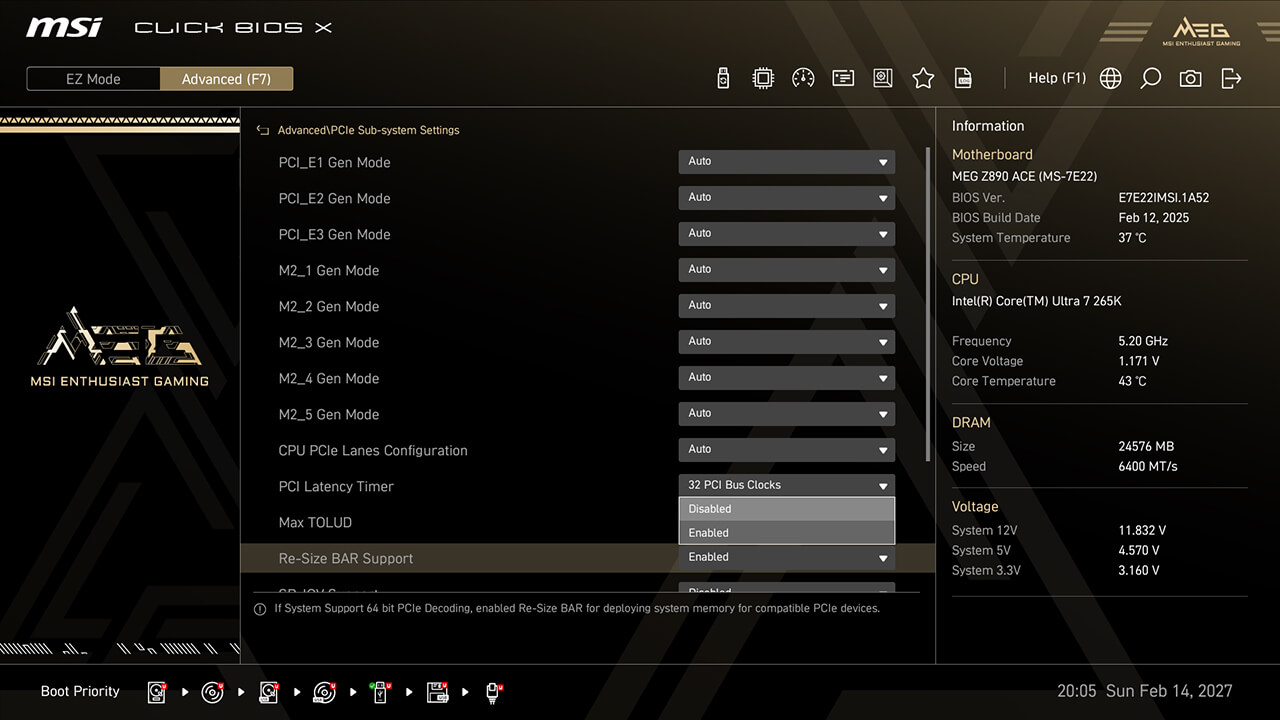
Re-size Bar
Re-Size BAR (Resizable BAR) allows the CPU to access the entire GPU frame buffer at once, enhancing performance.
-
1. In Advanced Mode
-
2. Click Advanced\PCIe Sub-system Settings\Re-size Bar Support
-
3. Enable Re-size Bar Support, then press F10 to save changes and exit BIOS
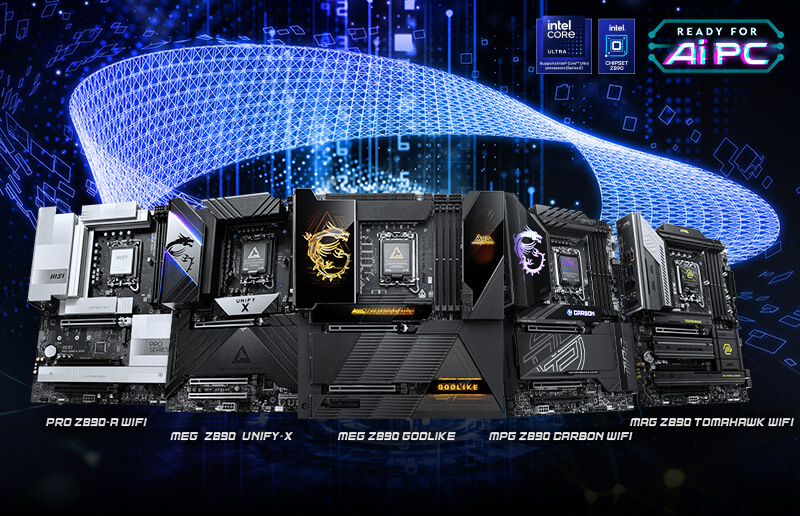
Support Product
INTEL 800 SERIES


AMD 800 SERIES


RELATED ARTICLES
MSI Click BIOS X Revealed: Simplified Overclocking, New Looks, and Unmatched Control

How to Boost AMD Ryzen 9 9950X3D Gaming Performance
The Latency Killer – Killing DDR5 Latency for your AM5 platforms

MSI X3D Gaming Mode Enhances Gaming Performance on AMD Ryzen Processors

MSI Releases New X870 BIOS: Supports 192GB (48GB x4) Memory at 6400MT/s
How to Enable Intel 200S Boost on MSI Z890 Motherboards and Maximize Performance with Memory Partners
MSI AI Boost Enhances Intel Core Ultra 9 285K AI Performance by 17%

Boost Intel Core Ultra 9 285K Gaming Performance with MSI Memory Extension Mode
MSI Memory Extension Mode Boosts Intel Core Ultra 9 285 Gaming Performance